
Your car’s brake lights are crucial for safety, signaling to drivers behind you that you’re slowing down or stopping. When one goes out, it can lead to dangerous situations and even a ticket.
Imagine cruising down the road, confident and carefree, only to discover a brake light is out. You don’t want to be caught off guard or risk an accident, right? Changing a brake light bulb might sound intimidating, but it’s a simple task you can handle yourself.
You don’t need to be a car expert or spend money at the mechanic. Just a few tools, a new bulb, and this straightforward guide will get you back on the road safely. Dive in to learn how to change your car brake light bulb with ease, and keep your vehicle safe and sound.
Tools And Materials Needed
Changing a car brake light bulb requires a few essential tools and materials. Gather a screwdriver, replacement bulb, and gloves for safety. Ensure you have the correct bulb type to match your vehicle specifications.
Changing a car brake light bulb might seem like a daunting task, but with the right tools and materials, you can tackle it with ease. This section will guide you through the essential items you’ll need to ensure the process is smooth and successful. Picture yourself armed with the right gear, ready to transform a tedious chore into a quick fix. What tools will you need to avoid making multiple trips to the store?
Essential Tools
- Screwdriver Set:Most brake light covers are secured with screws. Having a set of screwdrivers with different sizes and types will help you tackle any screw head you encounter.
- Pliers:Sometimes, you might need pliers to loosen stubborn screws or bolts. A good pair can save you a lot of frustration.
- Gloves:Protect your hands from sharp edges or hot surfaces. It’s always better to be safe than sorry.
Materials Needed
- Replacement Bulb:Ensure you have the correct bulb type for your car model. Double-check the car manual or consult a store expert.
- Cleaning Cloth:Use a microfiber cloth to clean the bulb area, ensuring no dirt or debris affects the new bulb’s performance.
- Electrical Contact Cleaner:A spray cleaner can ensure the contact points are free from corrosion, helping the bulb function effectively.
Optional Extras
- Multimeter:If you’re into troubleshooting, a multimeter can help test the electrical connections to ensure they’re working properly.
- Headlamp or Flashlight:Working in a dimly lit area? A headlamp or flashlight can make the job much easier.
Equipped with these tools and materials, you’re ready to make quick work of changing your brake light bulb. Imagine the satisfaction of seeing your car light up perfectly as you test the new bulb. Have you ever been caught without a necessary tool, delaying the simplest task? Planning ahead can save you time and frustration.
Identifying The Brake Light Bulb
Start by locating the brake light assembly at the rear of your vehicle. Check for screws or clips securing it.
Changing a car brake light bulb might seem daunting, but it’s manageable. The first step is identifying the brake light bulb correctly. This ensures you replace the right bulb and maintain safety on the road. Knowing the bulb type and location can save time and effort.
Understanding Your Car’s Brake Light Configuration
Different cars have different brake light setups. Some use a single bulb for multiple functions. Others have separate bulbs for brake lights. It’s crucial to check your car’s manual. This will guide you on the bulb type and position.
Locating The Brake Light Bulb
Brake light bulbs are usually found in the rear tail lights. These may be accessible through the trunk or rear panel. Open the trunk and inspect the rear light assembly. Look for screws or clips that secure the light cover.
Identifying The Bulb Type
Brake light bulbs come in various sizes and types. Common types include halogen and LED bulbs. Refer to your car’s manual or existing bulb markings. This ensures you purchase the correct replacement bulb.
Checking For Burnt-out Bulbs
A burnt-out bulb is easy to spot. It may appear dark or have a broken filament. Turn on your lights and check the rear assembly. Observe both lights to ensure only the brake light is affected.
Preparing For Replacement
Ensure the car is off and parked securely. Gather necessary tools like screwdrivers and gloves. This prevents injury and facilitates a smooth replacement process.
Accessing The Brake Light Assembly
Accessing the brake light assembly involves opening the trunk or removing the light cover. This step provides access to the brake light bulb for easy replacement.
Accessing the brake light assembly can feel like a puzzle at first, but it’s simpler than you might think. Whether you’re at home or in a dimly lit parking lot, knowing how to access the brake light is crucial for a quick bulb change. Imagine being stuck with a broken brake light, unsure where to start. This guide is here to help you tackle this common car maintenance task with ease and confidence.
Opening The Trunk Or Tailgate
Begin by popping open the trunk or tailgate of your vehicle. This is your gateway to accessing the brake light assembly. Once open, you’ll likely see a carpeted or plastic panel that covers the inner workings of your car’s tail lights. Have you ever noticed how every car seems to hide its secrets behind a panel? This is the moment where you channel your inner detective. Check for any screws, clips, or fasteners that might be securing the panel in place. Keep a screwdriver handy; it’s often your best ally in this task.
Removing Interior Panels
With the trunk or tailgate open, your next step is to remove any interior panels obstructing the brake light assembly. These panels are typically designed to be user-friendly, but they might require a gentle hand and some patience. Look for tabs or clips that hold the panels in place, and give them a careful tug. Have you ever hesitated, fearing you might break something? Take it slow, but remember that these parts are usually built to withstand a bit of pressure. Once the panels are out of the way, you’ll have a clear view of the brake light assembly. Now, the real work begins—changing that pesky bulb. Isn’t it satisfying when you can finally see what you’re working with?

Credit: www.youtube.com
Removing The Old Bulb
Removing the old brake light bulb is an essential step in car maintenance. A faulty bulb can lead to road safety issues and traffic fines. Follow these steps to safely remove the old bulb from your car.
Disconnecting The Wiring
Start by opening the car’s trunk or rear hatch. Locate the access panel near the brake light. Use a screwdriver if the panel is screwed in place. Gently remove the panel to expose the bulb housing. Identify the wiring harness connected to the bulb. Carefully disconnect the wiring by pressing the release tab. This action ensures the bulb is no longer powered.
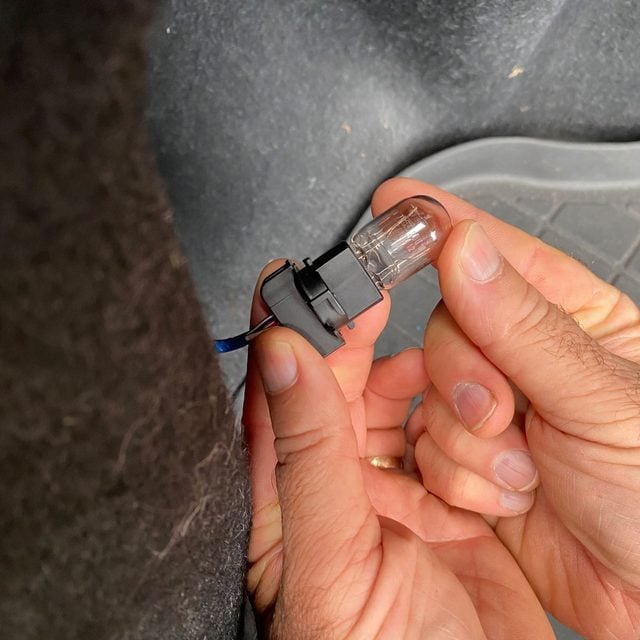
Extracting The Bulb
After disconnecting the wiring, locate the bulb socket. Turn the socket counterclockwise to loosen it. Pull the socket out gently. The bulb will be visible and ready for extraction. Hold the bulb firmly and pull it straight out of the socket. Avoid using excessive force to prevent damage. Dispose of the old bulb responsibly.
Installing The New Bulb
Installing the new bulb requires precision. First, gently insert the bulb into the socket, ensuring a snug fit. Secure it by twisting until it locks in place.
Installing a new brake light bulb is a simple task. It ensures your car remains safe and visible on the road. Follow these steps to replace the old bulb with a new one.
Choosing The Right Bulb
First, find the correct bulb type for your car. Check your car’s manual or consult an auto parts store. Using the wrong bulb can cause issues. Make sure the bulb matches the old one.
Securing The New Bulb
Insert the new bulb into the socket carefully. Avoid touching the glass part. Oils from your fingers can damage it. Twist or push the bulb until it is secure. Ensure it fits snugly and doesn’t move. Once in place, test the lights to confirm it works. A quick test prevents future problems.
Credit: www.familyhandyman.com
Testing The New Brake Light
Testing a new brake light is essential after bulb replacement. Ensure the light functions properly by pressing the brake pedal. Check both sides for consistent brightness to guarantee safety on the road.
Testing the New Brake Light After you’ve successfully replaced the brake light bulb, it’s crucial to ensure everything is working perfectly before hitting the road. Testing the new brake light not only guarantees your safety but also prevents potential hassles with traffic regulations. Let’s dive into the practical steps to verify your new brake light bulb is functioning correctly.
Check Visibility From Different Angles
Position yourself behind the car and observe the brake light while someone else presses the brake pedal. Check if the light is bright and visible from various angles. This ensures that other drivers can easily see your signal in various driving conditions.
Observe In Daylight And Nighttime
Test the brake light during the day and night. In daylight, make sure the bulb shines brightly enough to be noticeable. At night, ensure it doesn’t glare excessively or cause visibility issues. This dual-time check confirms your brake light’s effectiveness in diverse lighting conditions.
Monitor For Consistent Illumination
Look for consistent lighting without flickers or dimming. A steady light indicates the bulb is properly installed and functioning. Flickering can signal an improper connection or a faulty bulb, requiring further inspection.
Ask A Friend For Feedback
Sometimes, a second opinion helps. Ask a friend or family member to check the brake light while you engage it. Their feedback can reveal issues you might have missed. This collaborative approach enhances accuracy and ensures comprehensive testing.
Use A Reflective Surface
If you’re alone, use a reflective surface like a window or garage door to view the brake light’s reflection. This method allows you to verify its brightness and functionality without assistance. It’s a handy trick for solo testers ensuring safety and compliance. Engaging with these tests not only confirms your brake light’s reliability but also empowers you with the confidence that your vehicle is safe and road-ready. Can you think of other innovative ways to test your car brake light? Share your thoughts and experiences below!
Reassembling The Light Assembly
Reassembling the light assembly involves positioning the new bulb carefully in its socket. Ensure it fits snugly to avoid any loose connections. Secure the light cover back into place, confirming all screws are tightly fastened to prevent moisture from entering.
Reassembling the light assembly after changing a car brake light bulb is a crucial step that ensures everything is securely in place and functioning correctly. You don’t want to drive off only to find out your brake light isn’t working because something was improperly reassembled. This part of the process is often overlooked, but it’s vital for your safety and the safety of others on the road.
Double-check The Bulb Placement
Before you start putting everything back together, make sure the new bulb is seated correctly. A slight misalignment can lead to a malfunction. Gently wiggle the bulb to ensure it’s firmly in place.
Align The Light Assembly
Carefully align the light assembly with its original position. This can sometimes be a bit tricky. Make sure all the holes line up with their corresponding screws or clips. This alignment will make the next steps much easier.
Secure The Screws And Clips
Once aligned, start securing the screws or clips one by one. Use the same tools you used for disassembly. Tighten them evenly to avoid any undue stress on one side of the assembly. Remember, over-tightening can crack the plastic, so apply just enough pressure.
Test The Brake Light
Before you close everything up, test the brake light. Have someone step on the brake pedal while you observe the light. This step ensures that all your efforts are successful. If the light doesn’t illuminate, revisit the previous steps to troubleshoot the issue.
Reattach Any Additional Covers Or Panels
If your car has additional covers or panels over the light assembly, reattach them securely. These covers often have tabs or clips that snap into place. Ensure they’re all aligned and snapped in to avoid any rattling noises while driving.
Check For Gaps Or Misalignments
After everything is reassembled, do a final check for any gaps or misalignments. Even a small gap can let moisture in, leading to potential electrical issues. Address any discrepancies immediately to maintain the integrity of the assembly. Reassembling the light assembly may seem like a straightforward task, but meticulous attention to detail can save you from future headaches. How confident are you in your DIY skills to tackle this task?
Safety Tips And Best Practices
Ensure your car is turned off and parked safely. Gather necessary tools like gloves and a screwdriver. Carefully remove the bulb cover and replace the old bulb with a new one. Test the brake light to confirm proper installation. Regularly check brake lights for optimal safety.
Changing a car brake light bulb might seem like a simple task, but ensuring you do it safely is crucial. Following the right safety tips and best practices not only protects you from injury but also guarantees that your vehicle remains in optimal condition. Let’s explore some essential guidelines to keep in mind before you start this straightforward yet important task.
Wear Protective Gear
Always wear gloves to protect your hands from sharp edges and dirt. Safety glasses can shield your eyes from dust or debris. Remember, safety first!
Use The Right Tools
Ensure you have the correct tools for the job. Typically, you’ll need a screwdriver and possibly a pair of pliers. Having the right tools makes the process smoother and prevents damage.
Disconnect The Car Battery
Before you begin, disconnect the car battery to prevent any electrical shock. This is a critical step that many people overlook. It’s better to be safe than sorry.
Check The Owner’s Manual
Refer to your car’s owner manual for specific instructions. Not all vehicles are the same, and the manual provides guidance tailored to your model. It can save you time and prevent mistakes.
Inspect The New Bulb
Before installation, check the new bulb for any damages. A cracked or broken bulb can be hazardous and won’t function properly. It’s always a good idea to have a spare bulb handy.
Test The Brake Light
After replacing the bulb, test the brake light to ensure it works. Ask a friend to help you by pressing the brake pedal while you check from behind. This ensures you’re good to go on the road.
Dispose Of The Old Bulb Properly
Don’t just toss the old bulb in the trash. Many car bulbs contain hazardous materials and should be disposed of at a recycling center. Doing so is better for the environment and follows legal guidelines. By following these safety tips and best practices, you ensure not only your safety but also the longevity of your vehicle. Have you ever overlooked a safety measure only to realize its importance later?

Credit: www.youtube.com
Frequently Asked Questions
Can I Replace A Brake Light Bulb Myself?
Yes, you can replace a brake light bulb yourself. Check your car’s manual for guidance. Ensure you have the correct bulb type. Remove the light cover, replace the bulb, and reattach the cover securely. Always test the new bulb to ensure it’s working properly.
Does Autozone Change Brake Light Bulbs?
AutoZone does not offer brake light bulb replacement services. They sell bulbs and provide guidance for DIY installation. Visit your local store for bulb options and advice.
How Much Does It Cost To Replace A Brake Light?
Replacing a brake light typically costs between $10 and $30 for the bulb. Labor fees can add $20 to $50. Prices vary based on vehicle type and location. Always consult a professional for an accurate estimate. Regular maintenance prevents costly repairs and ensures safety on the road.
Will O’reilly Change My Brake Light Bulb?
O’Reilly Auto Parts offers free bulb replacement services for brake lights, if you purchase the bulb from them. Their staff can assist with installation, ensuring your brake light functions correctly. It’s a convenient service to keep your vehicle safe and compliant with traffic regulations.
Conclusion
Changing a car brake light bulb is simple. Follow the steps carefully. Gather your tools first. Ensure the car is off and safe. Access the bulb housing. Remove the old bulb gently. Insert the new bulb securely. Test the light to confirm it’s working.
Regular checks prevent accidents. Save money by doing it yourself. Feel confident in your skills. Share your experience with friends. Encourage them to try it too. Safety is everyone’s priority. Keep learning and stay prepared.