
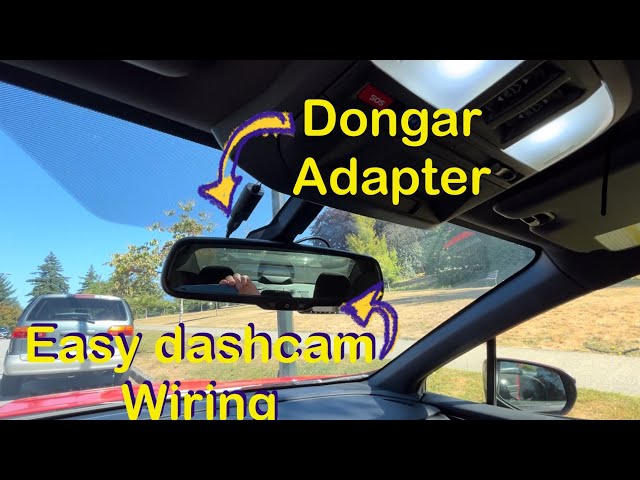
Imagine you’re driving down the road, and suddenly, an unexpected event unfolds. In that crucial moment, having a dash cam can be your saving grace, capturing every detail with precision.
But how do you ensure that this indispensable device is correctly wired into your car? You’ve come to the right place. Wiring a dash cam might seem daunting, but with the right guidance, you can do it efficiently and without stress.
This step-by-step guide is designed with you in mind, offering clear instructions and practical tips that make the process straightforward. By the end of this article, you’ll be equipped with the knowledge to wire your dash cam like a pro, ensuring it functions seamlessly whenever you need it. Dive in to unlock the peace of mind that comes with knowing your dash cam is always ready to record.

Credit: www.youtube.com
Choosing The Right Dash Cam
Choosing the right dash cam is vital for your car’s safety. A good dash cam captures clear video and fits your needs. It should be easy to install and use. Consider the features and compatibility with your vehicle. This ensures you get the most out of your investment.
Features To Consider
Focus on a few key features. Video quality is crucial. Look for at least 1080p resolution. This ensures clear images and details. Night vision is also important. It helps record clear footage in low light. A wide-angle lens is beneficial too. It captures more of the road. Check for a G-sensor. It detects sudden impacts and locks footage. Loop recording is useful. It overwrites old files when storage is full. Look for Wi-Fi capability. It makes transferring files easier.
Compatibility With Your Vehicle
Ensure the dash cam is compatible with your car. Check the power source options. Some dash cams use the cigarette lighter socket. Others connect directly to the car battery. Ensure the dash cam’s size fits your windshield. It shouldn’t obstruct your view. Check if additional accessories are needed. Some models require extra mounts or cables. Consider any special features your car may need. This could include parking mode or rear cameras.

Credit: www.youtube.com
Gathering Necessary Tools And Materials
Gather essential tools like screwdrivers, wire cutters, and electrical tape. Secure materials including a dash cam, wiring kit, and mounting hardware. Ensure all components are within easy reach for a smooth installation process.
Gathering necessary tools and materials is crucial for wiring a dash cam. It ensures a smooth installation process. Properly equipped, you can save time and avoid frustration. Start by preparing everything you need before installation. This helps prevent interruptions. Below, you’ll find a list of essential tools and additional accessories.Essential Tools List
- Screwdriver: For removing panels and securing the dash cam.
- Wire cutters: To trim wires to the right length.
- Electrical tape: For securing and insulating wires.
- Multimeter: To check connections and voltage.
- Plastic pry tool: For removing trim without damage.
- Cable ties: To organize and secure loose wires.
Additional Accessories
- Fuse tap: For connecting the dash cam to the car’s power supply.
- Extra fuses: In case of blown fuses during installation.
- Mounting brackets: To hold the dash cam in place.
- MicroSD card: For storing video footage.
Planning The Installation
Planning the Installation Start by choosing the right spot on your windshield for the dash cam. Ensure it’s in a location that doesn’t obstruct your view. Carefully route the wiring along the car’s interior, hiding it under the roof lining and panels.
Connect the power cable to your car’s fuse box for a neat finish.
Planning the installation of a dash cam is crucial for optimal performance. A well-thought-out plan ensures the device captures clear footage without obstructions. Consider your car’s layout, the dash cam’s features, and your typical driving conditions.Selecting The Ideal Location
Choosing the right spot for your dash cam is important. The cam should have a clear view of the road. Place it near the rearview mirror for the best angle. This spot keeps it from blocking your view while driving. Ensure it doesn’t interfere with the windshield wipers. The location should allow easy access to controls.Routing The Wiring Path
Planning the wiring path prevents tangling and damage. Start from the dash cam towards the power source. Tuck wires along the roof lining for a neat appearance. Avoid placing wires near airbags to prevent interference. Use adhesive clips to secure the wires. This keeps them from dangling and causing distractions.Installing The Dash Cam
Wiring a dash cam in your car requires careful planning. First, select an ideal location for the camera. Connect the power cable to your car’s fuse box using a fuse tap. Secure the wiring along the trim to keep it hidden and tidy, ensuring safety and functionality.
Installing a dash cam in your car enhances safety and security. It’s crucial to install it properly for optimal performance. This guide will walk you through the process, ensuring a seamless setup.Mounting The Camera
Start by choosing the right spot on your windshield. The best location is behind the rearview mirror. This ensures an unobstructed view while driving. Clean the area with a microfiber cloth to remove dust and dirt. Peel the adhesive backing from the camera mount. Press firmly against the glass for a secure hold. Wait a few minutes to ensure it sticks well before proceeding.Adjusting The Camera Angle
Once the dash cam is mounted, adjust the angle. The camera should capture the road clearly. Make sure it doesn’t record too much sky or dashboard. Use the live view feature on your dash cam. This helps in achieving the perfect angle. Most dash cams allow easy adjustments. Tilt and swivel the camera as needed. Double-check the video feed for clarity and coverage.Wiring The Dash Cam
Installing a dash cam involves connecting it to your car’s electrical system. Begin by choosing the right fuse slot for power. Route the wires neatly, securing them with clips to avoid tangling.
Wiring your dash cam involves some simple steps. This process ensures the camera functions properly. Proper wiring improves the dash cam’s performance. It also keeps your car interior neat.Connecting Power Source
Connecting the power source is crucial. Most dash cams use a 12V car socket. Ensure your car’s engine is off before starting. Locate the socket, usually near the dashboard. Insert the dash cam’s power plug into the socket. Check if the camera turns on. If it does, the connection is successful. Some prefer a hardwired kit for a cleaner look. This involves connecting directly to the fuse box. Use a fuse tap for safety. Follow the instructions in the kit carefully.Hiding The Wires
Hiding the wires keeps your car tidy. It also prevents distractions while driving. Tuck the wire under the car’s headliner. This is the area near the windshield. Use a plastic pry tool if needed. Guide the wire down the A-pillar. Secure it with clips or tape to avoid movement. Run the wire along the edge of the dashboard. Ensure it’s hidden from view. Finally, connect it to the power source. Check that no wires obstruct any controls or vents.Testing And Adjusting The Setup
Ensure the dash cam is securely connected and receiving power. Adjust camera angles for optimal recording coverage. Regularly check the setup to maintain clear video quality.
Wiring a dash cam in your car is just the beginning. To ensure your new gadget is ready to capture crucial moments, you need to test and adjust the setup. This stage is vital for confirming that your dash cam is functioning correctly and optimized for your specific needs. Let’s dive into how you can achieve this.Ensuring Proper Functionality
Begin by checking that your dash cam powers on correctly when you start the car. A simple way to test this is to observe the indicator lights or listen for startup sounds. Once powered, inspect the video feed on the screen. Ensure it’s clear and free from obstructions. Adjust the position slightly if necessary to avoid dashboard glare. Consider recording a short drive. Play it back to ensure that the audio and video quality meet your expectations. Do the timestamps reflect the current date and time?Optimizing Camera Settings
Look into the dash cam settings to tailor them to your needs. Adjust the resolution for clarity without draining memory excessively. Higher resolutions capture more detail but fill up storage faster. Set the loop recording feature to manage storage effectively. Choose a recording length that suits your driving habits. How often do you need your footage to refresh? Experiment with exposure settings. These can help in varying light conditions, like driving at dawn or dusk. A well-lit video can be the difference between capturing a vital detail or missing it. Think about the placement of the dash cam. Is it angled to cover the road adequately? A slight tweak could make all the difference in capturing wide-angle shots. Engaging with your dash cam setup not only enhances its functionality but gives you peace of mind on the road. Is your setup optimized to protect you in unexpected situations?Troubleshooting Common Issues
Connecting a dash cam can be straightforward but may encounter common issues. Ensure wires are securely connected to avoid power problems. Check for loose cables or incorrect connections that might affect footage recording.
Installing a dash cam can offer peace of mind while you’re on the road. However, sometimes things don’t go as smoothly as planned. If your dash cam isn’t functioning properly, don’t worry—you’re not alone. Troubleshooting common issues can often resolve the problem, allowing you to enjoy the benefits of your dash cam without hassle.Addressing Power Problems
A dash cam not turning on is a frequent issue. First, ensure that the power cable is securely connected to both the camera and the power source. Check the cigarette lighter socket or the fuse box connection if you are using a hardwire kit. A blown fuse is a common culprit, so inspect and replace it if needed. Sometimes, the issue lies with the power cable itself. Try using an alternative cable to see if this resolves the problem. Is your dash cam still not powering up? Your car’s battery might be low or faulty, affecting the power supply to the camera.Fixing Recording Errors
If your dash cam is on but not recording, check the memory card. An incompatible or corrupted card can halt recordings. Ensure your card meets the dash cam’s specifications and is formatted correctly. Dash cams often stop recording when the memory card is full. Enable loop recording to automatically overwrite old footage, freeing up space. Still facing recording issues? Update the dash cam’s firmware. Manufacturers release updates to fix bugs and improve performance, so it’s worth checking for the latest version. What if the video quality is poor or glitchy? This could be due to a low-quality memory card. Invest in a reputable brand with a high write speed for smoother video capture. By addressing these common issues, you can ensure your dash cam operates seamlessly. Have you ever encountered an unusual problem with your dash cam? What steps did you take to resolve it? Sharing your experiences can help others facing similar challenges.
Credit: www.youtube.com
Maintaining Your Dash Cam
Maintaining your dash cam is crucial for its longevity and performance. Regular upkeep ensures it captures high-quality footage every time you drive. A well-maintained dash cam can be a reliable witness during road incidents. Follow these simple tips to keep your dash cam in top shape.
Regular Cleaning Tips
Dust and dirt can affect your dash cam’s lens clarity. Use a microfiber cloth to gently wipe the lens weekly. Avoid using harsh chemicals that might damage the lens surface. Clean the surrounding area to prevent dust buildup around the cam. Check for fingerprints on the screen and clean them with a damp cloth. Ensure the cam is off before cleaning to avoid accidental data loss.
Updating Firmware
Firmware updates improve your dash cam’s functionality. Check the manufacturer’s website regularly for updates. Connect the dash cam to your computer using a USB cable. Download the latest firmware and follow the instructions. Restart the device after the update for best performance. Keep your dash cam software up-to-date for new features and improved security.
Frequently Asked Questions
How Do You Wire A Dash Cam In A Car?
To wire a dash cam, start by selecting a power source. Use the car’s fuse box or the cigarette lighter. Run the cable discreetly along the car’s interior. Secure it with adhesive clips. Connect the dash cam and ensure it powers on with the ignition.
Can I Install A Dash Cam Myself?
Yes, you can install a dash cam yourself. Follow the manufacturer’s instructions carefully. Most dash cams come with an installation guide. Basic tools like a trim tool and adhesive clips will help. Ensure the camera is securely mounted and connected to a power source.
What Tools Do I Need To Wire A Dash Cam?
You need a trim tool, adhesive clips, and a power cable. A fuse tap adapter is useful for hardwiring. Ensure you have a screwdriver for any necessary adjustments. These tools help you run the wires neatly and securely in your car.
Is Hardwiring A Dash Cam Better?
Yes, hardwiring a dash cam is often better. It provides a cleaner installation and frees up the cigarette lighter. Hardwiring allows the dash cam to operate even when the car is off. This is useful for parking mode features, providing continuous surveillance and security.
Conclusion
Wiring a dash cam in your car is simple and beneficial. It enhances safety by providing constant surveillance. Follow the steps carefully for a smooth installation. Secure the dash cam properly to avoid distractions while driving. Ensure all wires are tucked away neatly.
Regularly check the connections for reliability. A well-installed dash cam offers peace of mind on the road. Whether for daily commutes or long trips, it proves valuable. Take your time during installation for the best results. Now, you can confidently drive with added security.
Enjoy your journeys with this new tech tool.