
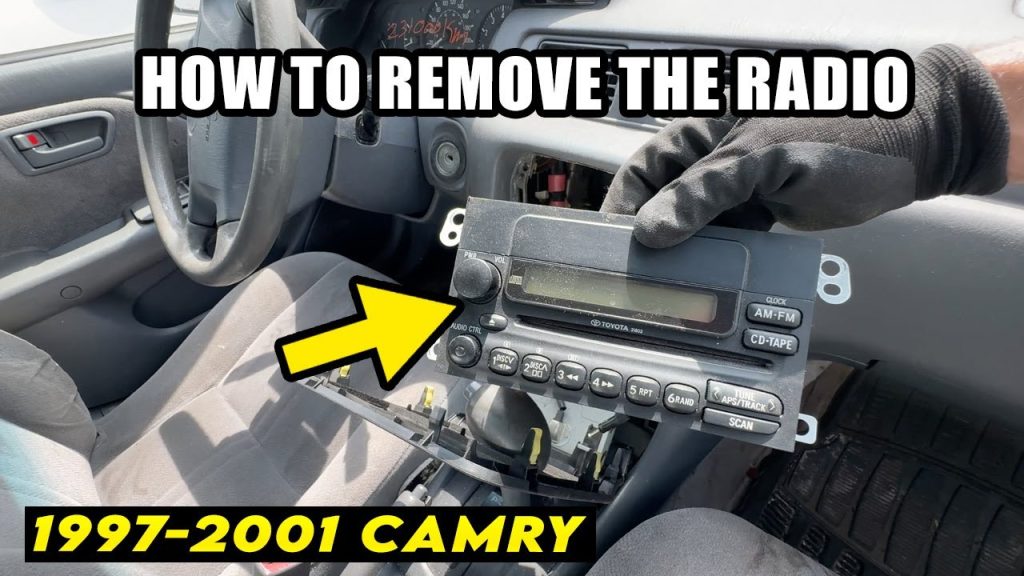
Have you ever found yourself staring at your car stereo, wondering how to remove it without causing damage? You’re not alone.
Many car owners face this challenge, whether they’re upgrading to a new system or simply making repairs. The task might seem daunting at first, but with the right guidance, you can handle it like a pro. Imagine how satisfying it will be to take control of your car’s audio setup, making changes that truly reflect your taste and style.
In this guide, we’ll break down the process step-by-step, ensuring you feel confident and empowered to tackle this project. Get ready to dive into a world where you become the master of your car’s sound experience. Keep reading to unlock the secrets to safely removing your car stereo with ease.
Gathering Necessary Tools
Gather essential tools like screwdrivers, pliers, and a panel remover before taking out a car stereo. A socket wrench set can be helpful for loosening bolts. Having these tools ready ensures a smooth removal process.
Gathering the necessary tools is crucial for removing a car stereo. Having the right tools ensures a smooth process, preventing damage to the stereo or the dashboard. Let’s explore the essential tools needed for this task.Phillips And Flathead Screwdrivers
You’ll need both Phillips and flathead screwdrivers. These help remove screws holding the stereo and panels. Choose the right size to avoid stripping screws.Panel Removal Tools
Panel removal tools protect your car’s interior. They help remove panels without scratching or breaking them. Plastic tools are ideal for this task.Socket Wrench Set
A socket wrench set assists in loosening bolts securing the stereo. Ensure you have the correct size sockets for your vehicle.Wire Cutter And Stripper
Wire cutters and strippers are essential for dealing with electrical connections. They help cut and strip wires safely.Flashlight
A flashlight is useful for seeing inside dark areas. It helps you locate screws and wires easily.Magnetized Tray
A magnetized tray keeps screws and small parts organized. It prevents losing important pieces during the removal process.Electrical Tape
Electrical tape is handy for securing loose wires. It helps prevent short circuits and maintains safety. Having these tools ready simplifies the process. Each tool plays a role in ensuring a safe and efficient removal.
Credit: www.youtube.com
Preparing The Vehicle
Ensure the vehicle is parked on a flat surface and turn off the engine. Disconnect the battery for safety. Gather necessary tools like screwdrivers and pry bars before starting the stereo removal process.
Preparing the Vehicle Before diving into the exciting task of removing your car stereo, it’s crucial to prepare your vehicle properly. This preparation ensures not only a smooth removal process but also keeps your car and yourself safe. A well-prepared workspace sets the stage for success, making the task less daunting and more enjoyable.Disconnecting The Battery
Your first step in preparing your vehicle is disconnecting the battery. This crucial step prevents any electrical mishaps, safeguarding both your stereo and your car’s electrical system. Locate your car’s battery, typically under the hood. Using a wrench, loosen and remove the negative terminal first. It’s always a good idea to wrap the terminal in a cloth or place it away from the battery to prevent accidental reconnection. If you’ve ever had a scare with sparks, you’ll appreciate the peace of mind this brings!Clearing The Workspace
Clearing the workspace is equally essential. A cluttered area can lead to lost screws or misplaced tools, turning a straightforward task into a frustrating ordeal. Start by removing any personal items like CDs, chargers, or air fresheners from around the stereo area. Open your glove compartment and center console to ensure nothing blocks your access. If you’re like me and have a habit of storing everything in your car, tidying up can be a revelation! Consider laying out a soft cloth or towel on your car seats to hold tools and parts as you work. This prevents scratches and keeps everything within easy reach. How many times have you spent more time searching for a screwdriver than actually using it? A clear workspace saves you from such unnecessary hassles.Removing The Trim Panel
Begin by locating the trim panel surrounding the stereo. Carefully pry it off using a trim removal tool. Ensure all clips are released to avoid damage.
Removing the trim panel is a crucial step when taking out a car stereo. This part of the process can seem daunting, but with the right tools and techniques, it becomes straightforward. Whether you’re upgrading your stereo system or troubleshooting an issue, understanding how to remove the trim panel efficiently is key.Locating Screws And Fasteners
Begin by identifying where the screws and fasteners are located. These components hold the trim panel in place and can vary depending on the car model. Typically, screws are hidden beneath small covers or inside storage compartments. Use a flashlight to inspect the area thoroughly. Check around the edges of the trim panel and underneath any removable panels. This ensures you don’t miss any hidden fasteners that could complicate the removal process.Using Trim Removal Tools
To avoid damaging your car’s interior, invest in a set of trim removal tools. These tools are designed to safely pry open panels without causing scratches or dents. Begin by gently inserting the tool between the panel and the dashboard. Apply steady pressure to pop the panel loose. Remember, patience is crucial here. Rushing can lead to broken clips or damaged trim. Have you ever wondered how professionals avoid leaving marks? It’s all about using the right tools and taking your time. By following these steps, you’ll be well on your way to successfully removing the trim panel. This will set the stage for the next phase of your car stereo project, ensuring a smooth and efficient experience.Detaching The Stereo Unit
Removing a car stereo involves several steps. First, disconnect the battery to prevent electrical issues. Next, gently pry off the dashboard panel using a flat tool. Carefully unscrew the stereo unit and slide it out, keeping wires intact for reconnection.
Detaching the stereo unit from your car can feel like a daunting task, especially if it’s your first time handling such a project. You might be worried about damaging your dashboard or losing track of screws. However, with patience and the right guidance, you can smoothly navigate this process and save yourself a trip to the auto shop. Taking out a car stereo can also be a rewarding experience, giving you the confidence to tackle other DIY tasks in your vehicle.Unscrewing The Stereo
Begin by locating the screws that secure your stereo. These are often hidden under a plastic trim or faceplate, which you can gently pry off using a trim removal tool. Keep a small container nearby to store the screws safely, preventing them from rolling away or getting lost. This small step can save you a lot of frustration later on. Be cautious not to strip the screws, as this can complicate the removal process. Use a screwdriver that fits snugly to avoid slipping.Pulling Out The Unit
With the screws removed, it’s time to carefully pull out the stereo unit. Gently tug on it, ensuring you don’t yank any connected wires. Once the stereo starts to come loose, you’ll see a series of wires attached at the back. Disconnect these wires one by one, taking note of their positions for easier reinstallation. Have you ever felt the rush of accomplishment from completing a task on your own? Successfully detaching your car stereo can offer that same sense of achievement. Remember, patience is key, and taking your time can lead to better outcomes.Disconnecting Wiring And Cables
Disconnecting wiring and cables is a crucial step when taking out a car stereo. This can seem daunting, especially if you’ve never tackled it before. But with a little patience and the right approach, you can easily get the job done without damaging your car’s electrical system.
Unplugging Harness Connectors
To begin, locate the harness connectors attached to the back of your stereo. These connectors are designed to snap into place, providing a secure connection. Carefully press the release tab or lever on each connector, and gently pull them apart. Avoid yanking on the wires themselves, as this can cause damage.
Take a moment to note their arrangement. A quick photo can be invaluable later when you’re reinstalling or replacing the stereo. Have you ever had to retrace your steps because you missed this simple trick?
Handling Antenna And Auxiliary Cables
Next, focus on the antenna cable, typically a thicker wire with a distinctive plug. It usually pulls straight out without needing to press any tabs, but handle it with care to avoid bending the plug. The auxiliary cables, often thinner, may require a gentle twist or pull depending on their design.
Ensure you’re clear on which cable connects to what device. Misplacing or mishandling these can affect your stereo’s performance when you set it back up. Have you ever considered how much these cables impact sound quality?

Credit: www.tiktok.com
Handling Special Stereo Locks
Handling special stereo locks requires patience and precision. Begin by disconnecting the battery to ensure safety. Use the right tools to unlock the stereo, carefully following the manufacturer’s instructions.
Taking out a car stereo might seem like a daunting task, especially when faced with special stereo locks. These locks are designed to prevent theft, but they can also confuse car owners trying to replace or repair their sound system. Fear not, though—handling these locks is simpler than it seems. Whether you’re upgrading your stereo or repairing it, understanding how to manage these locks will make the process much smoother. Let’s dive into some actionable tips.Using Release Keys
Most car stereos with special locks require release keys for removal. These keys are typically U-shaped metal tools that slide into slots on either side of the stereo. Once inserted, they release the locking mechanism holding the stereo in place. You can purchase these keys at auto parts stores or online. If you’re in a pinch, some people have successfully used coat hangers or thin screwdrivers as makeshift release tools. It’s essential to gently push the keys into the slots, listening for a click that indicates the locks have released. Pull the stereo out slowly to avoid damaging any wiring.Dealing With Security Codes
Some stereos, particularly in newer cars, have built-in security codes. These codes are a theft deterrent and must be entered to reactivate the stereo once it’s been disconnected. Before removing your stereo, check your car manual or previous service records for this code. If you don’t have the code, contact your car manufacturer or dealership for assistance. Be prepared to provide proof of ownership, as they typically require this information to issue a new code. This step is crucial to ensure you can fully enjoy your stereo after reinstallation. Have you ever been locked out of your stereo because of a missing code? It’s always a good idea to keep this code handy for future needs.Inspecting And Storing Components
Inspecting and storing components is crucial when removing a car stereo. Ensure each part is carefully examined for damage. Store all components in a safe, organized manner to prevent loss or confusion during reinstallation.
After successfully removing your car stereo, the next crucial step is inspecting and storing its components. This part of the process ensures you can easily reinstall or replace parts without any hassle. It’s a bit like putting together a puzzle; you want all the pieces to be in perfect condition and organized. Ensuring everything is in order will save you time and stress down the road. Let’s dive into some practical tips on how to do this effectively.Checking For Damage
Once the stereo is out, carefully examine each component for any visible damage. Look for broken wires, cracks, or any signs of wear and tear. This step helps you identify potential issues that might affect the performance of your new stereo. A small crack or loose wire might seem insignificant now, but it can lead to bigger problems later. Use a flashlight to closely inspect hidden areas and ensure nothing is overlooked. If you find any damage, consider getting it repaired or replaced before proceeding.Organizing Screws And Parts
Keeping screws and small parts organized is essential to avoid misplacing them. Use a small container or a magnetic tray to store screws, bolts, and other tiny components. Label each container with a description of where the parts came from. Another useful tip is taking photos during disassembly. This visual reference can be a lifesaver during reinstallation. You’ll thank yourself for the extra effort when everything goes back smoothly. Think of your future self who will appreciate having all the parts neatly organized and labeled. It’s a small step that makes a big difference in the process.
Credit: www.instagram.com
Tips For Reinstallation
Gently remove the car stereo by first disconnecting the car battery. Use the right tools to unscrew the stereo and carefully pull it out.
When you’re ready to reinstall your car stereo, a smooth and hassle-free process is essential. Proper preparation during the removal phase can make a world of difference. Here are some practical tips to ensure your reinstallation goes off without a hitch.Labeling Wires
Taking out a car stereo can often feel like unraveling a complex puzzle, especially with the tangle of wires involved. One trick that can save you a lot of headaches during reinstallation is labeling each wire. Use masking tape and a marker to tag each wire with its function or connection point. Imagine dealing with a dozen identical wires without any labels—it’s an unnecessary challenge. By labeling them, you ensure that each wire finds its way back to its rightful place. This step is a small investment of time with a big payoff in terms of simplicity and efficiency.Keeping Track Of Instructions
Car stereo systems often come with manuals or installation guides. Keeping these instructions handy can be invaluable during reinstallation. If you’ve misplaced the original manual, most manufacturers offer downloadable versions on their websites. Consider creating a dedicated folder on your smartphone or computer to store these instructions. This way, they’re easily accessible when you need them most. It’s like having a map when you’re navigating unfamiliar territory—essential for avoiding detours and ensuring everything is connected correctly. What strategies do you use to keep track of small but crucial details like these? By preparing ahead, you transform what could be a daunting task into a straightforward one, ensuring your car stereo is up and running without a hitch.Frequently Asked Questions
How Do I Disconnect The Car Battery?
To safely remove a car stereo, disconnect the battery first. Locate the battery in your vehicle and remove the negative terminal. This prevents electrical shorts and protects you from shocks while working on the stereo system.
What Tools Do I Need?
You’ll need basic tools like screwdrivers and a panel removal tool. A wrench may be required for the battery terminal. Some stereos might need a specialized removal tool. Having these tools handy ensures a smooth and damage-free removal process.
How Do I Remove The Stereo Faceplate?
To remove the stereo faceplate, gently pry it off using a panel removal tool. Be careful to avoid damaging the clips or surrounding components. Check for hidden screws and tabs that may need to be released before removal.
Are All Car Stereos Removed Similarly?
Not all car stereos are removed the same way. Different models and brands may require specific steps and tools. Always refer to the user manual or online guides for your particular stereo model to ensure proper removal.
Conclusion
Removing a car stereo can be simple. Start by gathering the right tools. Use a screwdriver and trim removal tool. Carefully detach trim pieces around the stereo. Unscrew and remove the stereo unit. Disconnect wires gently. Ensure you follow safety measures.
Keep track of all screws and parts. This prevents losing them later. Reinstalling is as easy as reversing steps. Practice patience and caution. Enjoy your upgraded car sound system soon. Remember, careful handling avoids damage. You’ve got this!