
Imagine driving with a clear view of what’s behind you, feeling more confident and secure each time you reverse. Setting up a backup car camera can transform your driving experience, providing you with peace of mind and enhancing your safety on the road.
Whether you’re a seasoned DIY enthusiast or a beginner looking to improve your car, this guide is tailored just for you. You’ll discover simple steps to install your backup camera, ensuring you’re equipped with the knowledge to tackle this project with ease.
As you read through, envision the convenience and reassurance that come with having an extra pair of electronic eyes watching your back. Don’t miss out on learning how this small upgrade can make a big difference in your daily driving routine. Dive in and take control of your car’s safety features today!
Choosing The Right Backup Camera
Choosing the right backup camera is essential for safe driving. A good camera helps you see obstacles while reversing. This enhances safety and boosts confidence. Understanding the types and features helps in making a wise choice.
Types Of Backup Cameras
Backup cameras come in various types. Each type has unique benefits. Here are a few:
- Wired Cameras:These cameras connect directly to your car’s system. They offer stable video quality.
- Wireless Cameras:They transmit video using a wireless signal. Installation is simpler.
- License Plate Cameras:These attach to your license plate. They are easy to install and discreet.
- Dash-mounted Cameras:These are installed on the dashboard. They provide a wide view of the rear.
Key Features To Consider
Look for specific features when selecting a backup camera. These features ensure better performance:
- Resolution:High resolution gives a clearer image.
- Night Vision:This feature allows visibility in low light.
- Field of View:A wider field covers more area behind the car.
- Weather Resistance:Waterproof cameras withstand harsh conditions.
- Audio Capability:Some cameras have microphones for sound input.
Choose a camera that suits your car and needs. Prioritize quality and reliability.
Gathering Necessary Tools
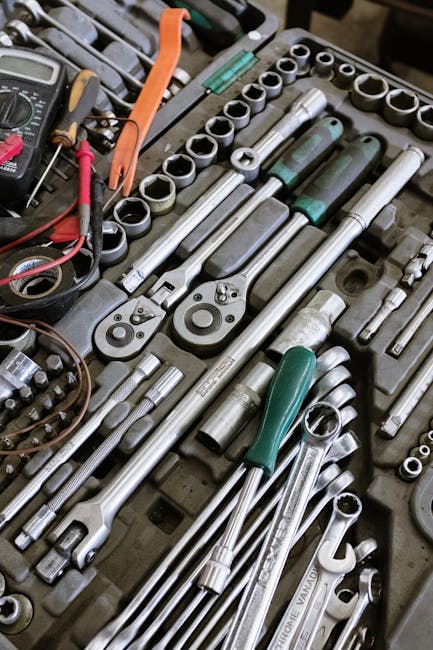
Setting up a backup car camera is a smart move for safety. Before installing, gather all necessary tools. Having the right tools ensures a smooth installation process. You will find essential and optional tools helpful. This section will guide you through what you need.
Essential Tools List
Begin with essential tools for the camera setup. These are crucial for the installation.
- Screwdriver:A flathead and Phillips screwdriver are needed.
- Drill:Required for mounting the camera.
- Wire strippers:Useful for connecting wires safely.
- Electrical tape:Secure wires and connections effectively.
- Multimeter:Check voltage and ensure connections are correct.
Optional Tools For Ease
These tools make the installation easier. They are not mandatory but helpful.
- Magnetized screwdriver:Keeps screws in place.
- Cable ties:Organize wires neatly.
- Heat shrink tubing:Protects wire connections.
- Work light:Provides better visibility during installation.
- Gloves:Protect hands while working with tools.
Preparing The Vehicle
Ensure your car is parked safely before starting. Gather necessary tools like a screwdriver and the backup camera kit. Disconnect the car battery to avoid any electrical mishaps.
Preparing the Vehicle Before diving into the technical aspects of setting up a backup car camera, it’s crucial to prepare your vehicle properly. A well-prepared vehicle not only makes installation smoother but also ensures the camera functions optimally. This preparation involves strategic parking and positioning, as well as cleaning the installation area.Parking And Positioning
Start by parking your vehicle on a flat surface. This ensures stability while you’re working. Imagine trying to install a camera on a slope; it becomes a balancing act rather than a straightforward task. Position your car in a well-lit area to have a clear view of the entire rear section. Natural daylight can be your best friend, but if it’s not available, consider using portable lights. Make sure there’s ample space around your vehicle. This helps you maneuver easily and avoid any accidental scratches or dents while working. Have you ever tried squeezing between two cars to work on yours? It’s less than ideal.Cleaning The Installation Area
Once your car is positioned, it’s time to clean the area where you’ll install the camera. Dirt and debris can prevent the camera from adhering properly, causing it to fall off or wobble. Use a mild cleaner to wipe the area thoroughly. Avoid harsh chemicals that might damage the paint or surface. A clean cloth or sponge should do the trick. Inspect the area for any rust or damage. Addressing these issues beforehand can save you a lot of hassle down the road. Have you ever installed something only to realize there’s underlying damage? It’s a frustrating experience you’ll want to avoid.Installing The Camera
Setting up a backup car camera enhances safety and provides peace of mind. Installing the camera requires precision and care to ensure optimal functionality. Follow the steps below to properly mount and connect the camera.
Mounting The Camera
Choose a suitable spot at the rear of your car. Ensure the location is central for a clear view. Clean the surface thoroughly to avoid dust and dirt interference. Secure the camera using screws or adhesive based on the design. Align the camera for the best viewing angle.
Connecting Power Supply
Locate the car’s reverse light wiring. This will power the camera when reversing. Strip a small portion of the wire insulation. Connect the camera’s power wire to the stripped section. Use electrical tape to secure the connection. Test the setup by putting the car in reverse. Ensure the camera activates correctly.
Wiring The System
Wiring the system is a crucial step in setting up your backup car camera. It might seem daunting, but breaking it down into manageable parts makes it simpler. With clear instructions and a bit of patience, you’ll have your backup camera wired and ready to go in no time.
Running The Cables
Start by planning the route for your cables. Consider the shortest and safest path, avoiding areas that might pinch or damage the cables. Typically, running the cables along the car’s existing wiring paths ensures they stay hidden and protected.
Begin at the camera, usually mounted near the license plate. Carefully thread the cables through the trunk or rear hatch, securing them with zip ties. This not only keeps them in place but also prevents any unwanted tangles or interference.
Once inside the car, continue to guide the cables along the floor, beneath the door sills, or through the car’s ceiling lining. If you run into obstacles, a wire snake can help guide the cables through tight spots. Remember, patience is key during this process!
Connecting To The Display Unit
Once the cables reach the front of the car, it’s time to connect them to the display unit. First, identify the input ports on your display that correspond to the camera. Most systems use RCA connectors, which are usually color-coded for easy identification.
Plug the camera cable into the designated port, ensuring a snug and secure connection. A loose connection can lead to intermittent video signals, causing frustration when you need it most.
Next, connect the power cables. Many backup cameras draw power from the reverse light circuit. This means they only activate when you shift into reverse. Double-check your connections and test the system before finalizing any setup to ensure everything works seamlessly.
Have you ever faced wiring challenges? Share your experiences in the comments below, and let’s help each other out!
Testing The Setup
Testing the setup ensures your backup car camera works correctly. Adjust the camera angle for optimal rear view visibility. Check the connections and monitor display for clear images.
Testing the setup of your backup car camera is crucial. It ensures safety and functionality. After installation, assess how well the camera performs. This involves alignment and image clarity. These steps will help you evaluate the system effectively.Checking Camera Alignment
Camera alignment affects how well you see obstacles. Ensure the camera is straight and centered. It should capture a wide view behind the car. Adjust the angle if the image is skewed. Use a level if necessary to perfect the alignment. Proper alignment enhances visual accuracy.Ensuring Signal And Image Quality
Signal strength is important for a clear image. Check for interference or weak signals. Test the image quality on your screen. It should be sharp and well-lit. Adjust brightness and contrast settings for clarity. Ensure the camera lens is clean and unobstructed. Good image quality aids in safe driving.Troubleshooting Common Issues
Installing a backup car camera can sometimes face issues like connectivity problems or incorrect angles. Check wiring connections and ensure the camera is securely mounted. Adjust the angle for a clear rearview.
Setting up a backup car camera can greatly enhance driving safety. Yet, common issues might arise during installation. Understanding these problems is crucial to ensure the camera works effectively. From signal interruptions to blurry images, each problem has a solution. This section provides solutions to common issues, ensuring your backup camera functions optimally.No Signal Problems
No signal might occur due to incorrect wiring. Check connections between the camera and monitor. Ensure cables are securely plugged in. Verify the power source is active. A blown fuse might stop power flow. Replace the fuse if necessary. Adjust the channel settings on your monitor. Sometimes, an incorrect channel selection causes signal loss.Poor Image Quality Fixes
Blurry images can result from dirty lenses. Clean the camera lens with a soft cloth. Avoid harsh chemicals that might damage it. Check for obstructions blocking the view. Adjust the camera angle for better visibility. Ensure the camera is correctly aligned. Improper alignment might distort the image. Verify the monitor resolution settings. An incorrect resolution can affect image clarity.Maintenance Tips
Installing a backup car camera involves choosing a suitable model and following the manufacturer’s guidelines for wiring. Regularly clean the camera lens to ensure clear visibility, and check connections periodically to prevent loose wires or malfunctions.
Maintaining your backup car camera ensures its longevity and optimal performance. Regular care and software updates are crucial. These efforts keep the camera functioning smoothly. Let’s explore some essential maintenance tips.Regular Cleaning Advice
Dirt and grime can obscure the camera lens. Use a soft, damp cloth to clean it regularly. Avoid harsh chemicals. They may damage the lens. Check the lens for scratches or cracks. Replace it if you notice significant damage. Keeping the camera clean enhances visibility.Software Updates And Checkups
Software updates often improve camera performance. Check the manufacturer’s website for updates regularly. Follow instructions carefully to install updates. Periodically test the camera’s functionality. Ensure it displays clear images. Adjust settings if the image is blurry. Regular checkups help detect issues early.Frequently Asked Questions
How Do I Install A Backup Car Camera?
To install a backup camera, first identify your car’s power source. Mount the camera on the rear, preferably above the license plate. Connect the camera’s wiring to the reverse light and monitor. Secure all connections and test the system to ensure proper functionality.
What Tools Are Needed For Backup Camera Setup?
You’ll need basic tools like a screwdriver, wire strippers, and electrical tape. A drill might be necessary for mounting. Additionally, a multimeter can help verify connections. Ensure you have the camera’s manual for specific instructions. Having these tools ready will streamline your installation process.
Can I Set Up A Camera Without Professional Help?
Yes, you can set up a backup camera yourself. Most systems come with detailed instructions. Basic knowledge of car wiring and tools is beneficial. Ensure you follow the manual closely. If unsure, consult online tutorials or seek help from a knowledgeable friend.
How Long Does It Take To Install A Camera?
Installing a backup camera typically takes around 1 to 2 hours. This depends on your car model and experience level. Carefully follow the instructions to avoid mistakes. Allocate ample time to ensure each step is completed correctly.
Conclusion
Setting up a backup car camera improves driving safety. This process is simple. Follow each step carefully for the best results. Use the right tools for installation. Double-check connections to ensure camera works properly. Adjust camera angle for clear visibility.
Regular maintenance keeps it functioning well. With patience, anyone can install a backup camera. Enjoy safer driving with enhanced rear visibility. A small effort for big peace of mind on the road. Now you’re equipped to handle parking and reversing challenges confidently.
Drive safely with your newly installed backup camera.