
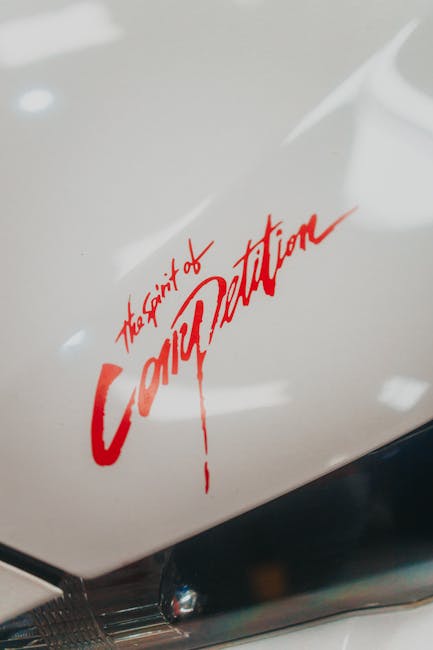
You’ve just driven off the lot with your new car, and while you’re thrilled about your purchase, there’s one little detail that’s bugging you: the dealership decal. It’s like a tiny billboard on your car, advertising the dealer’s name wherever you go.
But here’s the good news—you don’t have to keep it there. Removing that decal is easier than you might think, and with the right steps, you can restore your car’s sleek look without causing damage. Imagine cruising down the street, your car looking exactly how you want it, free from any unwanted logos.
Curious about how you can make it happen? Stick around, and you’ll learn how to safely remove that decal, leaving your car looking as flawless as the day you first laid eyes on it.
Preparation And Tools
Gather essential tools like a hairdryer, plastic card, and adhesive remover. Ensure the car surface is clean and dry.
Preparing to remove a dealership decal from your car is a task that requires a bit of patience and the right tools. The key to a smooth removal process is proper preparation, ensuring that you have everything you need before you start. Having a clear plan in place can save you from unnecessary frustration and potential damage to your vehicle’s paint.Gather Necessary Supplies
Begin by collecting all the supplies you’ll need for the job. A hairdryer or heat gun is essential for loosening the adhesive without damaging the paint. You’ll also need plastic scrapers or credit cards to gently peel off the decal. For adhesive residue, keep adhesive remover or isopropyl alcohol handy. A soft cloth or microfiber towel will help clean the area once the decal is removed. These tools are not just optional—they are crucial for a clean finish.Assess Decal Location And Size
Understanding the decal’s location and size will help you tailor your approach. If the decal is on a curved surface, extra care is needed to prevent scratching. Measure the decal to gauge how much time and effort the removal might take. Consider the weather and your workspace. Direct sunlight can make the process harder, as it may cause the adhesive to bond more strongly. Choose a cool, shaded area to work in for the best results. Have you ever removed a sticker and found your fingernail paint chipped? Imagine that but on your car! Preparation ensures you avoid such mishaps and keep your car looking pristine.Safe Removal Techniques
Removing dealership decals from a car requires gentle techniques. Apply heat using a hairdryer to soften the adhesive. Carefully peel off the decal with a plastic card to avoid scratching the paint.
Removing a dealership decal from your car can be a daunting task, but with the right techniques, you can do it safely and effectively. The key is to use methods that protect the paint and finish of your vehicle, ensuring it looks as good as new once the decal is gone. Let’s explore some safe removal techniques that you can try yourself.Heat Application Methods
Applying heat is a popular way to loosen adhesive. You can use a hairdryer or heat gun for this purpose. Keep the heat source moving to avoid damaging the paint. Gently heat the decal for about 30 seconds, and test if it becomes pliable. If it does, you can start peeling it off. Remember not to overheat as it might lead to unwanted consequences.Using Plastic Scrapers
Plastic scrapers are a safe option as they are less likely to scratch the surface. Opt for a scraper with a flexible edge. Once the decal is warm, you can gently slide the scraper underneath the edges. Work slowly to lift the decal, taking care not to apply too much force. Have you ever thought about how the wrong tool can make or break the job?Chemical Solvents
Chemical solvents can be effective but require caution. Choose a product designed for decal removal. Test it on a small, inconspicuous area first. Apply the solvent as per the instructions, and let it sit for the recommended time. Once the adhesive softens, you can peel off the decal. Don’t forget to wash the area thoroughly afterward to remove any residue. Which method will you try first, and why?Post-removal Care
After removing a dealership decal, gently wash the area with mild soap and water. Dry thoroughly to prevent any water spots or residue. Apply a layer of car wax to restore shine and protect the paint.
After successfully removing a dealership decal from your car, the next crucial step is post-removal care. This process ensures your vehicle’s surface remains pristine and free from any blemishes or damage caused during decal removal. Neglecting this step can lead to unwanted marks or residue that might affect your car’s aesthetic appeal.Cleaning Residual Adhesive
Once the decal is gone, you might notice some sticky adhesive residue left behind. Removing this requires a gentle touch and the right products. Start by applying a small amount of adhesive remover or isopropyl alcohol to a clean cloth. Gently rub the residue in a circular motion until it lifts away. If the adhesive is stubborn, consider using a plastic scraper but be cautious not to scratch the paint. Always test any product on a small, hidden area first to ensure it won’t damage your car’s finish.Polishing And Waxing
After removing all traces of adhesive, your car’s surface might look a bit dull. Polishing and waxing can restore its shine and offer protection against future elements. Use a high-quality car polish and apply it with a soft cloth or foam applicator. Work in small sections, using circular motions to achieve an even finish. Once polished, apply a layer of wax to seal the surface. This will not only enhance the shine but also provide a protective barrier against dirt and grime. Think of it as giving your car a fresh shield against the world. Have you ever wondered how a small decal can leave such a lasting impact on your car’s surface? Taking these post-removal steps ensures that your car looks as good as new, maintaining its value and appearance.Avoiding Common Mistakes
Removing dealership decals can be tricky. Softening the adhesive with a hairdryer helps. Use a plastic card to gently peel it off without scratching. Clean residue with soapy water for a smooth finish.
Removing a dealership decal from your car can be tricky. Many car owners make common mistakes that lead to damage. With careful planning, you can avoid these pitfalls.Preventing Surface Damage
Surface damage is a risk. Use the right tools to protect your car’s paint. Avoid sharp objects like knives or metal scrapers. These can scratch or gouge the paint. Opt for plastic scrapers or old credit cards instead. The right technique is crucial. Apply gentle pressure when scraping off the decal. Do not rush the process. Take your time to minimize the risk of damage. Heat guns or hair dryers can soften the adhesive. Use them on a low setting. Excessive heat can warp the paint. Keep the heat source moving to avoid concentrated heat spots.Choosing The Right Products
The products you use can make a difference. Select adhesive removers designed for cars. Avoid household cleaners that contain harsh chemicals. These can damage the paint or leave stains. Test the product on a small area first. Ensure it does not affect the paint. Consider products with citrus-based ingredients. They are gentle and effective. Follow the instructions on the product label. Incorrect usage can lead to poor results or damage.Expert Recommendations
Removing dealership decals requires patience and the right tools. Start by warming the decal with a hairdryer to loosen the adhesive. Carefully peel using a plastic scraper, then clean any residue with soapy water or adhesive remover.
Removing a dealership decal from your car can seem daunting, especially if you’re worried about damaging the paint. Whether you’re looking to enhance your car’s appearance or simply prefer a cleaner look, understanding the best methods is crucial. Here, we share expert recommendations to guide you through this process.Professional Services
Opting for professional services is a reliable choice if you’re uncertain about DIY methods. Experts have specialized tools and products that ensure a clean removal without harming your vehicle’s paint. Hiring a professional also saves you time and effort. They can often complete the task more quickly and efficiently than a DIY attempt. Additionally, professionals can address any adhesive residue, leaving your car’s surface smooth and pristine.Diy Vs. Professional Removal
Deciding between DIY and professional removal depends on your comfort level and resources. DIY methods can be cost-effective, using items like hair dryers and adhesive removers available at home. However, there’s a risk of scratching the paint if not done carefully. On the other hand, professional removal eliminates this risk but may cost more. Consider whether the peace of mind and quality finish justify the expense. Would you rather invest in professional help or try your hand at a DIY solution with the right guidance?Frequently Asked Questions
How Do I Remove Dealership Decal From My Car?
To remove a dealership decal, heat it with a hairdryer to loosen the adhesive. Peel slowly using a plastic scraper. Clean residue with an adhesive remover or vinegar solution. Buff the area with car wax for a polished finish. Always test solutions on a small area first.
How Do You Remove Car Decals Without Damaging Paint?
Use a hairdryer to heat the decal for easy removal. Peel slowly with a plastic scraper. Clean residue with soapy water or adhesive remover. Finish by waxing the area to protect the paint.
How To Get Dealership Paint Off Car?
Gently use a clay bar or automotive detailing spray to remove dealership paint. Wash the area with soap and water. Apply a mild polish to restore the shine. Finish with a wax or sealant to protect the car’s surface. Avoid abrasive tools to prevent scratches.
How To Take Off Dealership Sticker Reddit?
To remove a dealership sticker, use a hairdryer to heat it. Peel it off slowly, using a plastic scraper. Clean residue with adhesive remover or rubbing alcohol. Finish by washing the area with soap and water. Always test products on a small area first to avoid damage.
Conclusion
Removing dealership decals is easy with the right steps. Start by gathering necessary tools. Warm the decal with a hairdryer to loosen it. Gently peel it off using a plastic card. For residue, use adhesive remover or vinegar. Wipe the area clean with a soft cloth.
Always test products on a small area first. This prevents damage to your car’s paint. Follow these simple steps to keep your car looking its best. Enjoy your decal-free vehicle and drive with pride! Regular maintenance helps maintain your car’s appearance over time.