
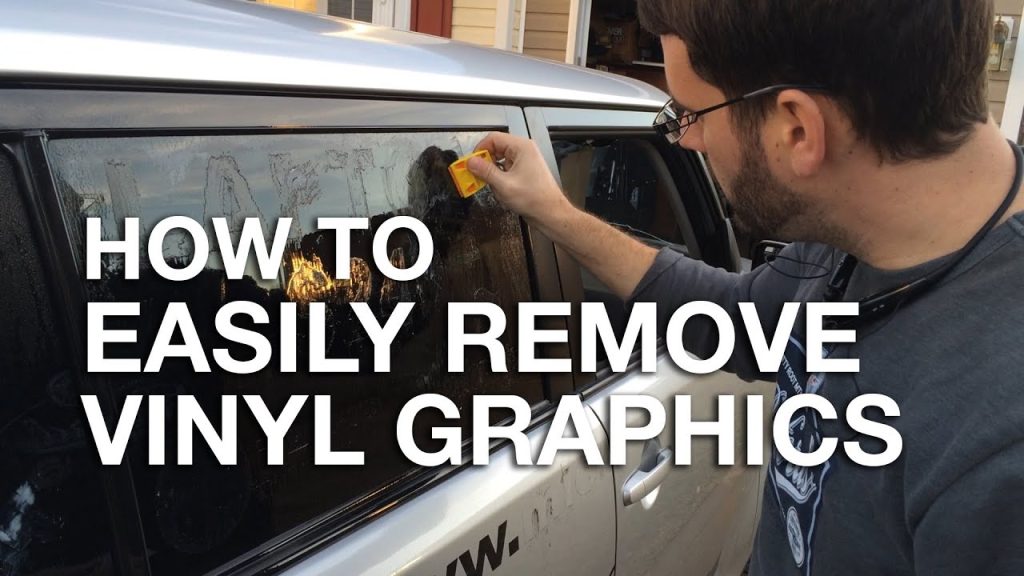
Imagine cruising down the road, your car gleaming under the sun with its stylish vinyl decal that once expressed your personality or supported your favorite team. Over time, tastes change, and now you’re ready for a fresh look or perhaps preparing to sell your vehicle.
You might wonder: How do you remove that vinyl decal without damaging your car’s paint? You’re in the right place. This task may seem daunting, but with the right steps, tools, and a bit of patience, you can achieve a clean, decal-free finish.
This guide will walk you through the process, ensuring you protect your car while saying goodbye to the old design. Whether your decal is peeling, outdated, or simply no longer your style, let’s explore how to remove it efficiently and safely, leaving your car looking as good as new.

Credit: grassrootsmotorsports.com
Tools Needed
Gather a hairdryer, plastic scraper, adhesive remover, microfiber cloth, and water. These tools will effectively remove the vinyl decal without damaging your car’s surface.
Removing a vinyl decal from your car can seem daunting, but with the right tools, the task becomes much more manageable. Having the proper equipment not only saves time but also ensures you won’t damage your car’s paint. Trust me, after my first decal removal attempt with just my fingernails, I quickly realized the importance of the right tools.Heat Gun Or Hair Dryer
Using heat is essential for loosening the adhesive on a vinyl decal. A heat gun is ideal for this job, but a household hair dryer can work just as well. It helps to soften the decal, making it easier to peel off without tearing.Plastic Scraper Or Credit Card
A plastic scraper or an old credit card is perfect for gently lifting the decal’s edges. Avoid using metal tools to prevent scratching your car’s surface. You’ll find that starting with a corner is often the easiest way to begin removing the decal.Adhesive Remover
Even when the decal is gone, adhesive residue often remains. A good adhesive remover can make all the difference. Look for one that is safe for automotive paint. It will help clean the surface thoroughly without any damage.Microfiber Cloth
A microfiber cloth is gentle yet effective for wiping away adhesive remover and cleaning the area. Unlike paper towels, it won’t leave any scratches or lint on the car’s surface. This final step ensures a clean, polished look.Soap And Water
Once you’ve removed the decal and adhesive, it’s important to wash the area with soap and water. This removes any leftover chemical residue. It’s a simple but essential step for maintaining your car’s finish. Consider this: are there any other everyday items at home that could help you in a pinch? Sometimes, a little creativity with household items can save the day.
Credit: www.youtube.com
Preparing The Area
Start by cleaning the decal area with soap and water. Ensure it’s free from dirt and debris for effective removal. Dry the surface completely before proceeding to avoid any residue.
Preparing the area before removing a vinyl decal is essential. A clean and suitable environment makes the removal process easier and prevents damage. Follow these steps to ensure a smooth experience.Clean The Surface
Start by washing the area around the decal. Use warm soapy water to remove dirt and grime. Rinse thoroughly and dry with a clean cloth. Dirt can cause scratches during removal. Inspect the decal for residue or sticky spots. These need extra attention to avoid leaving marks on the car. A clean surface ensures the adhesive comes off smoothly.Choose The Right Environment
Pick a shaded or indoor area to work. Direct sunlight can make the adhesive too sticky. A controlled environment reduces complications. Ensure the temperature is moderate. Extreme heat or cold affects the adhesive strength. A balanced setting helps in achieving better results.Heating The Decal
Heating the vinyl decal loosens its adhesive, making removal easier. Use a hairdryer to gently warm the decal. Keep the dryer moving to avoid damaging the car’s paint.
Heating the decal is a crucial step in removing vinyl decals from a car. Applying heat softens the adhesive, making it easier to peel off. This method ensures minimal damage to the car’s surface. Two effective tools for heating decals are hairdryers and heat guns.Using A Hairdryer
A hairdryer is a safe choice for heating vinyl decals. It provides gentle heat without risking damage to the car’s paint. Hold the hairdryer close to the decal. Move it back and forth evenly over the surface. This helps distribute the heat evenly. Keep the hairdryer moving to avoid overheating any spot. The adhesive will gradually soften, allowing easier removal.Utilizing A Heat Gun
A heat gun is more powerful than a hairdryer. It can generate higher temperatures quickly. Use caution to prevent damaging the car’s paint. Set the heat gun to a low setting initially. Gradually increase the temperature if needed. Hold the gun a few inches away from the decal. Move it in a circular motion to evenly heat the area. This technique effectively loosens the adhesive for removal. Always keep the gun moving to avoid concentrating heat in one spot.
Credit: www.wikihow.com
Peeling The Decal
Removing a vinyl decal from a car involves gentle heating. Use a hairdryer to soften the adhesive. Carefully peel off the decal with your fingers or a plastic scraper. Finish by cleaning any residue with adhesive remover.
Peeling a vinyl decal from your car can be tricky. You need patience and the right technique. This process helps avoid damage to your car’s paint. Follow these steps to make it easy and safe.Starting The Edge
Begin by finding an edge of the decal. Use your fingernail or a plastic scraper. Slide it under the decal’s corner. Be gentle to prevent scratches. If the edge is stubborn, apply some heat. A hairdryer works well. Warm the decal for a few seconds. This softens the adhesive. Now, try lifting the corner again.Slowly Removing
Once you’ve lifted an edge, peel the decal slowly. Pull it back at a sharp angle. This helps release the adhesive. Keep steady pressure while peeling. Go slowly to avoid tearing the decal. If it sticks, warm it with the hairdryer again. Continue peeling until the entire decal is removed. If any residue remains, clean it with soapy water.Removing Residue
Removing a vinyl decal from a car can be simple. First, gently heat the decal with a hairdryer. This loosens the adhesive. Next, peel it off slowly with a plastic scraper. Finally, clean any leftover residue with soapy water or rubbing alcohol for a smooth finish.
Removing a vinyl decal from your car can leave behind sticky residue that can be a real eyesore. It’s important to tackle this residue carefully to avoid damaging your car’s paint. The process might seem daunting, but with the right tools and techniques, you can restore your car’s surface to its original state. Here’s how you can effectively remove any leftover adhesive residue.Using Adhesive Remover
Adhesive removers are specifically designed to break down sticky residues. Products like Goo Gone or 3M Adhesive Remover can be lifesavers. – Apply a small amount: Pour a little adhesive remover onto a clean cloth. – Gently rub the area: Use circular motions to work the remover into the residue. – Wipe away: After a few minutes, wipe the area clean with a dry cloth. Be sure to test the remover on a small, hidden area first to ensure it doesn’t affect your car’s paint.Applying Soap And Water
If you prefer a gentler approach, soap and water can also do the trick. This method is great for smaller, less stubborn residues. – Create a solution: Mix warm water with a few drops of dish soap in a bucket. – Soak a sponge: Dip a soft sponge into the soapy water. – Scrub gently: Lightly scrub the residue, allowing the soap to lift the adhesive. Rinse the area thoroughly with clean water and dry it with a microfiber cloth. You may need to repeat the process for more persistent spots. Have you ever faced the frustration of sticky residue sticking stubbornly to your car? Next time, try these methods and notice how effortlessly your car’s surface becomes clean.Final Cleaning
Gently heat the vinyl decal with a hairdryer to loosen the adhesive. Use a plastic scraper to peel it off carefully. Clean any residue with soapy water and a soft cloth for a smooth finish.
Once you’ve successfully removed the vinyl decal, final cleaning is essential. This step ensures your car looks pristine and maintains its shine. Removing adhesive residue and polishing the surface will help restore the car’s original appearance.Polish The Surface
After decal removal, the car’s surface may appear dull. Use a high-quality polish to restore its luster. Apply a small amount of polish on a clean cloth. Gently rub it in circular motions over the affected area. This will remove any remaining adhesive and improve shine. Make sure to cover the entire area evenly for a consistent finish.Inspect For Damage
Check the area for any signs of damage. Look for scratches, discoloration, or faded paint. If you spot any issues, address them promptly. Use touch-up paint to cover small scratches. Consult a professional for larger damage. Regular inspection helps maintain the car’s value and appearance.Tips For Success
Removing a vinyl decal from a car requires careful attention. To achieve a smooth removal, follow these tips for success. These guidelines will help maintain your car’s appearance while safely eliminating the decal.
Avoid Scratching
Prevent scratches by using a plastic scraper. Metal tools can damage the paint. Use gentle motions to lift the decal’s edge. Keep the scraper flat against the surface to avoid gouges. Regularly check the car’s paint condition during the process.
Work With Patience
Take your time removing the decal. Rushing can lead to mistakes. Heat the decal with a hair dryer to soften the adhesive. Peel slowly to prevent tearing. If resistance occurs, reheat the area. Ensure the adhesive is fully softened before continuing. This ensures a clean removal without residue.
Frequently Asked Questions
How Do You Remove Vinyl Decals From A Car Without Damaging Paint?
Gently heat the decal with a hairdryer to soften the adhesive. Peel it off slowly using a plastic scraper. Clean any residue with adhesive remover or soapy water. Rinse and dry the area thoroughly. Wax the spot to restore shine and protect the paint.
Does Wd-40 Remove Car Decals?
WD-40 can help remove car decals by loosening the adhesive. Spray it on, let it sit briefly, and peel. Ensure you wash the area afterward to prevent residue buildup. Use gentle tools to avoid scratches. Always test on a small area first to ensure paint safety.
Are Vinyl Car Decals Removable?
Vinyl car decals are removable. Use heat or a plastic scraper for easy removal. Clean the surface afterward. Avoid harsh chemicals to prevent damage. Proper techniques ensure a clean removal without residue. Choose high-quality decals for easier removal and less risk of paint damage.
What Is The Easiest Way To Remove Permanent Vinyl?
Use a heat gun to soften the vinyl for easy removal. Peel it off gently using a scraper. Clean residue with rubbing alcohol or adhesive remover for a smooth surface.
Conclusion
Removing a vinyl decal from a car is straightforward. Follow the steps carefully. Use the right tools for a smooth process. Heat the decal with a hair dryer. This loosens the adhesive. Peel gently to avoid damage. Clean any residue with a safe cleaner.
Your car looks fresh and new again. Practice patience for best results. Always check the surface condition. This prevents scratches or paint damage. Regular care maintains your car’s appearance. Removing decals can be easy and stress-free. Enjoy your car’s clean look.
Share these tips with friends who need help.