
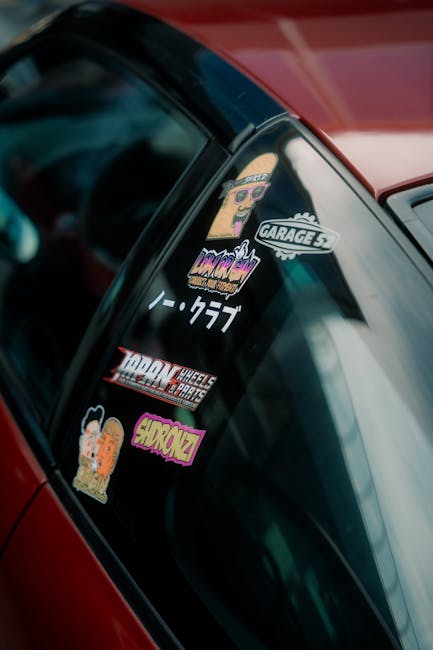
Ever found yourself staring at those sleek car window decals, wondering how you can get one on your vehicle without a hitch? You’re not alone.
Car window decals are a fantastic way to personalize your ride, flaunt your style, or even promote your business. But, let’s face it: the idea of sticking something on your car can be a bit intimidating. What if it bubbles up, peels off, or ends up crooked?
Imagine cruising around town with a perfectly applied decal that turns heads and gets compliments. The good news is, achieving that polished look is simpler than you think. You’ll discover the step-by-step guide that takes the guesswork out of the process. You’ll learn the secrets to avoiding common pitfalls, ensuring your decal stays put and looks amazing. By the end, you’ll feel confident and ready to transform your car windows into a canvas of self-expression. So, are you ready to dive in and master the art of car window decals? Let’s get started!
Choosing The Right Decals
Choosing the right decals for your car windows can enhance your vehicle’s look. It’s important to consider factors like design, material, and durability. The right decal can add personality and style to your vehicle. Let’s explore some key points to help you make the best choice.
Types Of Car Window Decals
Car window decals come in various types. These include:
- Vinyl Decals:Durable and easy to apply. Ideal for outdoor use.
- Static Cling Decals:No adhesive. Easy to remove and reposition.
- Perforated Decals:Allow visibility from inside. Great for full window coverage.
Each type offers unique benefits. Consider your needs before deciding.
Decal Material Considerations
Material choice affects decal durability and appearance. Common materials include:
- PVC Vinyl:Water-resistant and long-lasting. Suitable for all weather conditions.
- Polyester:Lightweight and flexible. Good for temporary decals.
- Reflective Material:Shiny and visible at night. Enhances safety.
Think about where you will place the decal. Choose a material that suits your environment and needs.
Preparing Your Car Window
Before applying car window decals, prepare the surface properly. A clean and smooth window ensures the decal adheres well and looks great. Follow these steps to get your car window ready.
Cleaning Techniques
Start by washing the window with warm soapy water. Use a soft cloth to avoid scratches. Rinse thoroughly to remove soap residue. Dry the window with a microfiber towel. Ensure there are no water spots left.
Inspect the window for stubborn dirt or grease. Apply a mixture of vinegar and water to tackle tough grime. Spray it on the window and wipe gently with a clean cloth. This mixture helps in removing residues and leaves the glass clear.
For a final touch, use rubbing alcohol on a soft cloth. Wipe the window to eliminate any remaining oils or residue. Alcohol evaporates quickly, leaving the glass spotless.
Ensuring A Smooth Surface
Check the window for any chips or cracks. They can interfere with decal application. If present, consider repairing them before proceeding.
Feel for bumps or imperfections. Use a plastic scraper to gently remove any stickers or adhesives. Avoid using metal tools which can damage the glass.
Once the surface is smooth, inspect it under good lighting. Look for any lint or particles that might be left. Clear them away with a lint-free cloth.
Finally, run your hand over the window to ensure it feels smooth. A well-prepared window ensures your decal adheres perfectly.
Applying The Decal
Applying car window decals can transform your vehicle, adding a touch of personality and style. But, ensuring that your decal is applied neatly and correctly can make all the difference. Whether you’re adding your favorite team’s logo or a quirky design, the process requires a bit of patience and precision. Let’s dive into how you can confidently apply your car window decal.
Positioning The Decal
Before you start, decide exactly where you want your decal to be placed. Consider visibility and aesthetics. A decal placed in the wrong spot can be distracting or even block your view.
Use a measuring tape or ruler to ensure symmetry. Are both sides balanced? Does it look straight? Taking these extra steps can prevent a crooked or awkwardly placed decal.
Once you’re happy with the positioning, secure it temporarily with masking tape. This helps you visualize the end result and make any last-minute adjustments.
Using Application Tools
Having the right tools can make the application smooth and seamless. A squeegee or credit card works perfectly to smooth out the decal and eliminate air bubbles.
Gently start from the center of the decal and move outward. This technique ensures that any trapped air escapes, providing a clean finish.
If you encounter stubborn bubbles, use a pin to puncture them and smooth the area gently. This small trick can save your decal from looking amateurish.
Think about how satisfying it will be to see your perfectly applied decal every time you approach your car. With careful positioning and the right tools, you’ll achieve a professional look that lasts.
Securing And Finalizing
Ensure the decal is dry and free of bubbles. Use a squeegee to smooth it firmly onto the window. Check the edges to confirm they are securely attached.
Securing and finalizing your car window decal is crucial. It ensures longevity and a professional look. Carefully following the steps can enhance the decal’s appearance. This process involves removing air bubbles and setting the decal properly. Let’s dive into these key steps.Removing Air Bubbles
Air bubbles can ruin the appearance of your decal. Use a soft squeegee or credit card to push them out. Start from the center and move to the edges. Apply gentle pressure to avoid damage. For stubborn bubbles, use a pin to prick them. Then, smooth them out with the squeegee. This technique ensures a flat, smooth finish.Setting The Decal
After bubble removal, focus on setting the decal. Press down on the entire surface firmly. Use your fingers or a soft cloth to ensure good adhesion. Pay attention to the edges, as they can peel over time. If necessary, apply a hairdryer on low heat. This softens the adhesive, ensuring a better bond. Ensure the decal is fully adhered before washing the car. Proper setting keeps your decal secure and looking great.Maintaining Your Decals
Clean the car window with soap and water before applying decals. Peel off the decal backing and firmly press the decal onto the window, smoothing out air bubbles.
Maintaining your car window decals ensures they stay vibrant and eye-catching for years. Over time, exposure to the elements and regular use can take a toll on their appearance. By taking a few simple steps, you can keep your decals looking fresh and new.Weather Protection
Weather can be harsh on decals, but there are ways to shield them. Consider parking your car in a garage or under a carport to protect it from the sun’s UV rays, which can fade colors. If covered parking isn’t an option, you might use a car cover when your vehicle is parked for extended periods. Rain and snow can also affect the adhesive quality of your decals. Applying a clear coat spray designed for decals can offer an additional layer of protection. It’s a small investment that can significantly extend the life of your decals.Cleaning Tips
Keeping your decals clean is essential for maintaining their appeal. Use a soft, damp cloth and mild soap to gently wipe away any dirt or grime. Avoid using harsh chemicals or abrasive materials, as they can damage the decal surface. Regular cleaning prevents dirt buildup, which can weaken the adhesive over time. Consider setting a reminder to clean your decals monthly. Have you noticed how a simple cleaning can make them look brand new? Maintaining your decals doesn’t have to be a chore. By incorporating these easy steps into your routine, you can ensure your car always stands out on the road.Troubleshooting Common Issues
Applying car window decals can sometimes be tricky. Ensure the surface is clean and dry for best results. Smooth out bubbles gently using a credit card or similar tool.
Putting on car window decals can be tricky. Common issues might arise during application. These problems can affect the look and durability of your decals. Knowing how to solve these issues helps maintain a neat appearance. Here’s how to tackle some frequent challenges.Decal Peeling
Decals often peel because of dust or moisture. Clean the window thoroughly before application. Use a lint-free cloth and alcohol-based cleaner. Make sure the surface is dry. Avoid applying decals in high humidity or extreme temperatures. Press firmly, smoothing out bubbles with a squeegee. For persistent peeling, use a small amount of adhesive spray. Apply it on the edges to secure the decal.Uneven Application
An uneven decal looks unattractive. Measure and mark the placement area with tape. This ensures straight alignment. Start applying from one edge, smoothing as you go. Use a squeegee to remove air bubbles. If the decal goes crooked, gently lift and reposition. Avoid stretching the decal during adjustments. This can cause distortion or tearing. Practice patience for a perfect, even finish.Frequently Asked Questions
How To Attach Decal To Car Window?
Clean the car window thoroughly. Peel the decal’s backing and position it carefully. Smooth out air bubbles using a squeegee or credit card. Ensure it adheres firmly by pressing down. Avoid water exposure for 24 hours.
Is It Better To Apply Decals Wet Or Dry?
Wet application allows for easier positioning and fewer bubbles. Dry application offers faster results but requires precision. Choose wet for complex decals or beginners; dry for simple designs or experienced users.
Do Car Window Decals Go On The Inside Or Outside?
Car window decals usually go on the outside. This ensures better visibility and durability. Always clean the surface before application for best results. Some decals may be designed for interior application, so check manufacturer instructions.
How To Get Window Decals To Stick?
Clean the window surface with soap and water. Ensure it’s dry and lint-free. Position the decal carefully. Press firmly from the center outward to remove air bubbles. For better adhesion, use a squeegee or credit card to smooth the decal.
Conclusion
Putting on car window decals is simple. Follow steps carefully for best results. Clean the glass surface first. Ensure it’s dry and dust-free. This helps decals stick better. Peel the backing slowly. Place the decal on the window. Use a card to remove air bubbles.
Press firmly for a smooth finish. Let it settle for a few hours. This prevents peeling or shifting. Now your car looks stylish with decals. Enjoy the new look on your drive. Impress others with your creativity. Keep these tips handy for future decal projects.