
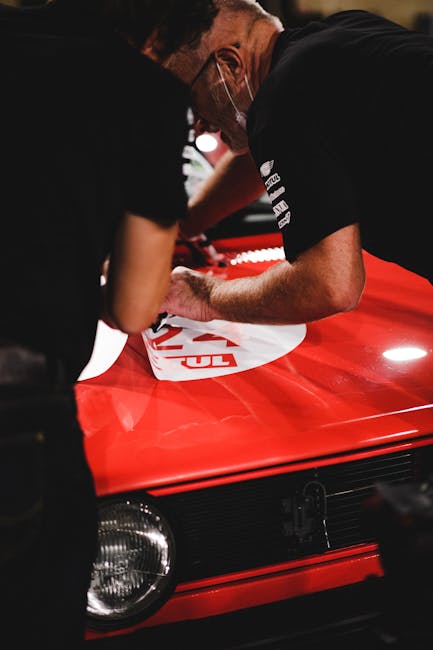
Imagine transforming your car into a canvas of creativity, showcasing your unique style with custom decals. With printable vinyl, you can do just that without breaking the bank.
Have you ever wondered how those eye-catching designs on vehicles come to life? The answer lies in the simplicity and versatility of printable vinyl. You’re about to discover the secrets to crafting your own car decals that not only turn heads but also tell your personal story.
Whether you’re a DIY enthusiast or a beginner, this guide will show you how easy it is to create decals that make a statement. Your car is more than just a vehicle; it’s an extension of you. Are you ready to make it as unique as you are? Dive in and learn how you can make your car stand out on the road.
Materials Needed
Gather printable vinyl sheets, a cutting machine, transfer tape, and design software. These essentials help create personalized car decals.
Creating your own car decals with printable vinyl is an exciting project that can add a personal touch to your vehicle. Before you get started, it’s essential to gather all the necessary materials. This ensures a smooth crafting process and a professional-looking finish. Below, you’ll find a detailed list of what you’ll need to embark on this creative journey.Printable Vinyl Options
Choosing the right printable vinyl is crucial for a successful decal. There are several options available, each with its unique features: – Inkjet Printable Vinyl: Ideal for home printers, providing vibrant colors and easy application. – Laser Printable Vinyl: Suitable for laser printers, offering durability and resistance to smudging. – Clear Printable Vinyl: Perfect for designs where you want the car color to show through the decal. Consider what type of printer you have and the look you want to achieve before purchasing your vinyl.Additional Tools And Supplies
Once you have your vinyl, you’ll need a few more tools and supplies to complete the project: – Printer: Ensure it’s compatible with your chosen vinyl, whether inkjet or laser. – Cutting Machine: While not essential, a cutting machine like a Cricut can help achieve precise cuts. – Scissors or Craft Knife: Handy for trimming and fine-tuning your decals. – Transfer Tape: Used to move your decal from the backing paper to your car without damaging it. – Squeegee or Credit Card: Helps smooth out air bubbles and secure the decal onto the car surface. Do you have all these tools at hand, or will you need to make a quick trip to the craft store? Being well-prepared with the right materials can transform a simple idea into a stunning reality. Are you ready to see your unique design cruising down the street?Design Preparation
Gather your design ideas and plan the layout. Choose colors that stand out and complement your car. Ensure text is readable and images are clear for a polished look.
Design preparation is a crucial step in making car decals with printable vinyl. It sets the foundation for a stunning and durable decal. Before printing, you need to design your decal. This involves choosing the right software and creating a design that fits your vision.Software Choices
Choosing the right software is essential for design success. Popular options include Adobe Illustrator and CorelDRAW. These programs offer powerful tools for creating detailed designs. For beginners, Canva provides an easy-to-use interface with drag-and-drop features. Free alternatives like Inkscape can also get the job done. It’s important to pick software that matches your skill level and project needs.Creating The Design
Start by visualizing your decal design. Think about shapes, colors, and text. Open your chosen software and create a new project. Use the tools provided to sketch your ideas. Experiment with different fonts and color combinations. Ensure your design is the right size for your intended space. Precision is key for a clean, professional look. Save your design in a high-resolution format. This ensures the best print quality later on.Printing The Decal
Printing the Decal Choose the right printable vinyl and design your decal using software. Make sure to adjust the printer settings for high quality. After printing, cut the design with precision and apply transfer tape for easy application.
Printing the decal is a crucial step in creating vibrant car decals. This process transforms your design into a tangible piece of art. It’s essential to get the settings right to ensure the best print quality. Let’s explore how you can achieve perfect results.Printer Settings
Adjusting your printer settings is key to a successful decal. Start by selecting the correct paper type. Choose “Photo Paper” or “Glossy” for vibrant results. Set the print quality to “High” for sharp details. Always check if your printer supports the vinyl paper you are using.Ink Considerations
Ink plays a vital role in decal quality. Use high-quality ink cartridges for rich colors. Ensure the ink is compatible with your printable vinyl. This prevents smudging and fading. Pigment-based inks are ideal for water-resistant decals.Cutting The Decal
Trim the printed vinyl to your desired shape and size. Ensure clean edges for a professional look. Use scissors or a craft knife for precision.
Cutting the decal is where the magic begins. It’s the step that transforms your design from a digital file into a tangible piece of art. Whether you’re using a cutting machine or going the manual route, precision is key. Each cut defines the quality of your final product. Let’s dive into the techniques to ensure your decals look professional and polished.Using A Cutting Machine
A cutting machine can be your best friend when making car decals. It’s fast, accurate, and easy to use once you get the hang of it. – Choose the Right Blade: Different vinyl thicknesses require specific blades. Ensure you’re using the appropriate one to avoid ruining your material. – Test Cuts: Before committing to your entire sheet, do a test cut. This small step can save you from potential errors and wasted vinyl. – Settings Matter: Adjust the speed and pressure settings based on your vinyl type. You want clean cuts, not torn edges. A cutting machine simplifies the process, but it’s essential to familiarize yourself with its features to maximize its potential. Don’t rush through the learning curve.Manual Cutting Tips
If you prefer a hands-on approach, manual cutting is a rewarding skill to master. It requires patience and precision. – Use Sharp Tools: A sharp craft knife or scissors is crucial. Dull blades can lead to jagged edges and frustration. – Trace Carefully: Use a ruler and pencil to outline your design before cutting. This helps in maintaining straight lines and symmetry. – Steady Hands: Take your time and cut slowly. Rushing can lead to mistakes and uneven edges. Manual cutting gives you control, but it also demands more attention to detail. Are you up for the challenge? Practice and patience are your allies. Whichever method you choose, remember that each cut brings you closer to seeing your vision come to life on your car.Applying Transfer Tape
Applying transfer tape to printable vinyl decals ensures precise placement on car surfaces. Carefully align the tape over the design, smoothing out bubbles for a flawless finish.
Applying transfer tape is a crucial step in creating stunning car decals with printable vinyl. The right technique ensures your design transfers smoothly from the backing paper to the car’s surface, maintaining its vibrant look and durability. Many hobbyists find this step challenging, but with a few tips, you can master it and achieve professional-quality results.Selecting Transfer Tape
Choosing the right transfer tape is essential for a successful decal application. Consider the type of vinyl you’re using; some tapes work better with glossy finishes, while others are suited for matte textures. Opt for a tape with a medium tack if you’re unsure. It offers a good balance between grip and ease of removal. Test different tapes on a small section of your vinyl to see which one transfers the design without leaving residue or damaging the decal. Remember, the wrong tape can lead to frustration and wasted materials. Invest a little time upfront in selecting the perfect tape to save headaches later.Applying Tape Correctly
To apply transfer tape effectively, begin by cutting a piece of tape slightly larger than your decal. This gives you room to maneuver without compromising the design. Place the tape over the decal and press firmly from the center outward using a squeegee or a credit card. This technique minimizes air bubbles and ensures the tape adheres evenly. Once applied, peel the backing paper away slowly. If parts of the decal stick to the backing, press the tape down again and rub over the stubborn areas. Are you applying the tape in a rush? Slow down. A careful approach can mean the difference between a flawless decal and one with wrinkles or trapped air.Surface Preparation
Clean the car surface thoroughly before applying decals. Ensure it’s free from dirt and grease for better adhesion. Dry the area completely to prevent moisture from affecting the vinyl’s stickiness.
Preparing the surface is a crucial step in making car decals with printable vinyl. It might seem like a minor detail, but getting this right can mean the difference between a decal that lasts and one that peels off after a week. Are you ready to make your decals stick perfectly? Let’s dive into the essentials of surface preparation.Cleaning The Surface
Before you even think about applying your decal, ensure the surface is squeaky clean. Dirt, dust, and oils are your worst enemies when it comes to adhesion. Use a gentle dish soap mixed with water to wash the area thoroughly. Then, rinse it with clean water to remove any soap residue. You might be tempted to skip this step, but trust me, it’s vital. Once, I applied a decal without cleaning properly, and it peeled off in just two days! For stubborn grime, consider using isopropyl alcohol. It’s excellent for removing oils and dries quickly without leaving a residue. Just apply it using a clean cloth and wipe the area. Be cautious with alcohol on sensitive car paints—test a small area first.Ensuring Proper Adhesion
After cleaning, it’s time to focus on adhesion. Make sure the surface is completely dry before proceeding. Any moisture can compromise the adhesive’s effectiveness. Temperature plays a key role here. Try to apply decals when the surface temperature is between 50°F and 90°F. Extreme temperatures can affect the adhesive properties of the vinyl. For a smooth application, consider using a squeegee or a similar tool to press the decal onto the surface. This ensures that no air bubbles are trapped, which can cause premature peeling. Have you ever wondered why some decals last longer than others? Proper adhesion is the secret sauce. By following these steps, you’re setting yourself up for success with long-lasting, professional-looking car decals.Applying The Decal
Clean the car surface thoroughly before applying the decal. Peel the backing paper off the vinyl, then carefully position the decal on your car. Smooth out any bubbles using a squeegee or a credit card for a flawless finish.
Applying a car decal can be a fun and rewarding process. Printable vinyl makes it easy to customize your car with unique designs. This section will guide you through the essential steps to apply your decal smoothly. Follow these techniques for a perfect finish.Positioning Techniques
Start by cleaning the area where the decal will go. Dirt or dust can ruin the adhesive. Use mild soap and water, then dry it well. Next, decide on the exact spot for your decal. Use masking tape to hold the decal in place temporarily. This allows you to adjust it until you are satisfied with the position. You can also mark the spot with a light pencil line as a guide.Smoothing Out Air Bubbles
Begin applying the decal from one corner. Peel away the backing slowly as you press the decal onto the surface. Use a squeegee or a credit card to smooth the decal. Move from the center outwards to push out air bubbles. If bubbles remain, use a pin to gently release the air. Press down again to ensure a firm bond. Remember, patience is key to a smooth finish.Finishing Touches
Adding the final touch involves cutting and applying your vinyl design. Ensure the surface is clean before placing the decal. Use a squeegee to smooth out air bubbles for a neat finish.
In the final stage of making car decals with printable vinyl, attention to detail makes all the difference. These finishing touches ensure your decal withstands the elements and maintains its vibrant appearance. Let’s explore how to seal the edges and maintain the decal effectively.Sealing The Edges
Sealing the edges prevents peeling and extends the decal’s lifespan. Use clear sealant spray or vinyl sealant. Apply a thin, even layer around the edges. Ensure complete coverage without oversaturating the vinyl. Allow it to dry thoroughly before applying the decal to your car.Maintaining The Decal
Proper maintenance keeps your decal looking fresh. Regularly clean the decal with mild soap and water. Avoid harsh chemicals that may damage the vinyl. Use a soft cloth to gently wipe the surface. Inspect for any signs of wear or peeling. Touch up with sealant as needed to keep edges intact.Frequently Asked Questions
Can I Use Printable Vinyl For Car Decals?
Yes, printable vinyl is suitable for car decals. Ensure it’s high-quality and weatherproof for long-lasting results. Choose vinyl with UV protection to prevent fading. Proper installation ensures durability and vibrant designs.
How To Seal Printable Vinyl For Car Decals?
Clean vinyl, apply clear spray sealant, let it dry. Sealant protects decals from fading and weather damage.
What Kind Of Vinyl Do You Use To Make Car Decals?
We use high-quality, durable, and weather-resistant adhesive vinyl for car decals. Oracal 651 and 3M 2080 are popular choices. These vinyls ensure vibrant colors and long-lasting performance. They are designed for outdoor use and withstand various weather conditions without fading or peeling.
How To Make Vinyl Car Decals?
Start by designing your decal on graphic software. Cut the vinyl using a plotter. Weed excess vinyl. Apply transfer tape over the design. Clean the car surface and position the decal. Smooth out bubbles with a squeegee. Carefully remove the transfer tape, leaving the decal on the car.
Conclusion
Creating car decals with printable vinyl is simple and fun. You can personalize your car with unique designs. Gather your materials, print your design, and apply it carefully. Enjoy the satisfaction of seeing your creation on display. Experiment with different designs and colors to enhance your car’s appearance.
It’s a cost-effective way to showcase your style. Remember to follow the steps for a smooth application. With practice, your skills will improve. Start your vinyl decal project today and express your creativity on the road. Your car will reflect your personality and stand out.