
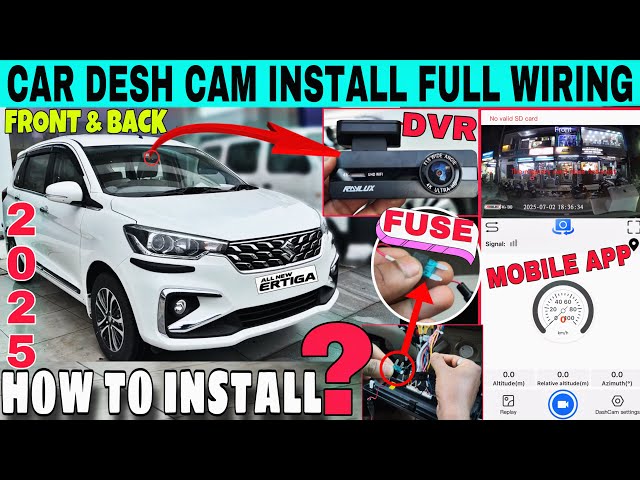
Installing a dash cam in your car is like adding an extra pair of eyes to your driving experience. Imagine having a reliable witness on the road, ready to capture every moment and provide peace of mind.
Whether you’re driving through busy city streets or taking a scenic road trip, a dash cam can be your silent guardian. But how do you install one without hassle or confusion? You’re about to find out. In this guide, you’ll discover simple steps to set up your dash cam, ensuring it functions perfectly and stays secure.
Don’t let uncertainty hold you back; with the right guidance, you can master this task effortlessly. Ready to enhance your driving safety and keep those memorable road moments intact? Let’s dive into the essentials of installing a dash cam in your car.
Choosing The Right Dash Cam
Choosing the right dash cam ensures safety and security. Begin by identifying a suitable location for mounting. Connect the power cable to the vehicle’s power source. Securely attach the dash cam, ensuring it doesn’t obstruct the driver’s view.
Choosing the right dash cam is crucial for enhancing your driving experience. With so many options, selecting the best one can seem overwhelming. But don’t worry, a few key factors can guide your decision.Features To Consider
When selecting a dash cam, consider essential features. Look for high-resolution video quality for clear footage. Night vision is important for recording in low light. A wide viewing angle captures more of the road. GPS functionality tracks your location and speed. Some dash cams offer Wi-Fi connectivity, allowing easy access to videos on your phone. Ensure the dash cam has a loop recording feature. This overwrites old footage to free up space.Types Of Dash Cams
Different dash cams suit different needs. Single-channel dash cams record the front view. They are simple and affordable. Dual-channel dash cams record both front and rear views. They provide comprehensive coverage. Some dash cams are integrated with rearview mirrors. These are discreet and save space. Choose a type that fits your vehicle and security needs.Budget And Quality
Balancing budget and quality is important. Basic dash cams are budget-friendly but may lack features. Mid-range dash cams offer a good mix of features and price. High-end dash cams provide top-notch features and quality. Decide what features are essential and set your budget accordingly. Remember, a reliable dash cam is an investment in your safety.Preparing For Installation
Gather necessary tools and materials for easy installation of the dash cam in your car. Ensure the camera’s location allows a clear view of the road. Check power sources and plan cable routes to avoid interference with vehicle functions.
Preparing for Installation Getting ready to install a dash cam in your car is an exciting step towards enhancing your driving experience and safety. Before diving into the installation process, setting up a solid foundation is crucial. This preparation ensures not only a smoother installation but also optimal performance of your dash cam. Let’s explore the essentials you need to get started.Tools Needed
Equipping yourself with the right tools can make the installation process seamless. Basic items like a screwdriver, adhesive tapes, and a power cable are essential. A trim removal tool can be particularly handy for accessing hidden areas without causing damage. Having these tools ready will save you time and frustration. Picture yourself midway through the installation, only to realize you’re missing a crucial tool. Avoid this by laying everything out beforehand.Safety Precautions
Your safety should always be a priority during installation. Make sure your car is parked on a flat surface and the engine is off to prevent accidental starts. It’s wise to disconnect the car battery to avoid any electrical mishaps. Consider wearing gloves to protect your hands from sharp edges. Have you ever thought about the importance of ensuring all electrical components are grounded before installation? This could prevent potential shocks and safeguard your car’s electronics.Reviewing The User Manual
The user manual is your guiding star in this process. It provides detailed instructions tailored to your specific dash cam model. Spend a few minutes familiarizing yourself with the manual to understand the nuances of the device. Not all dash cams are created equal, and the manual will highlight unique features and installation tips. Have you ever skipped reading a manual only to struggle later? Avoid unnecessary hurdles by taking this step seriously. Preparing thoroughly not only simplifies the installation but also ensures your dash cam operates effectively, capturing every moment of your drive.Positioning The Dash Cam
Mount the dash cam behind the rearview mirror for clear visibility. Ensure the camera lens faces straight ahead. Secure cables neatly along the windshield edge to avoid distractions.
Positioning your dash cam correctly is a crucial step to ensure you get the best possible coverage and recording quality. Proper placement can be the difference between capturing critical footage and having an obstructed view. Whether you’re installing a new dash cam or repositioning an existing one, understanding the nuances of dash cam placement can help maximize its effectiveness.Optimal Placement
Placing your dash cam centrally behind the rear-view mirror is often the best spot. This position gives a balanced view of the road ahead and minimizes distractions. It also keeps the camera out of your direct line of sight, ensuring your focus remains on driving.Avoiding Obstructions
Make sure the dash cam is not blocked by windshield tints, wipers, or sun visors. Even a small obstruction can hinder the camera’s ability to record clearly. Before finalizing the position, sit in the driver’s seat and check the dash cam’s view to ensure it’s clear and unobstructed.Considerations For Rear Dash Cams
If you decide to install a rear dash cam, think about the best way to route the wiring to avoid clutter. The rear windshield is usually the preferred spot, but ensure it doesn’t interfere with rear window defrosters or wipers. Consider how the rear cam complements the front cam; together, they should cover any potential blind spots.
Credit: www.youtube.com
Mounting The Dash Cam
Mounting the dash cam is simple. Clean the windshield area for the mount, ensuring a clear view. Attach the camera securely, then plug it into your car’s power source.
Mounting the dash cam is a crucial step in installation. A stable mount ensures clear footage and prevents shaking during driving. Different mounting options are available. Choose the one that fits your needs and vehicle type.Using Adhesive Mounts
Adhesive mounts offer a strong hold on flat surfaces. These mounts stick directly to the windshield or dashboard. Clean the area with an alcohol wipe before applying. Press firmly to ensure a secure bond. This type of mount is permanent.Installing Suction Mounts
Suction mounts are ideal for temporary setups. These mounts attach to the windshield with a suction cup. Moisturize the cup slightly for better grip. Press the suction cup firmly against the glass. Lock the lever to secure it in place. They allow easy repositioning.Securing The Mount
Ensure the mount is tight and stable. Check if the dash cam shakes or moves. Adjust and tighten screws if necessary. Test by driving on bumpy roads. Stability is key for clear recordings.Connecting Power Supply
Properly connecting the power supply is vital for dash cam installation in a car. Use the car’s fuse box or a cigarette lighter adapter for power. Ensure connections are secure to avoid interruptions in recording.
Connecting a dash cam’s power supply is crucial for its operation. Different methods ensure the camera receives consistent power. Each method has its own benefits and challenges. Choose the one that suits your needs and vehicle setup.Using The Cigarette Lighter
The simplest method involves using the car’s cigarette lighter socket. Most dash cams come with a power adapter for this port. Plug the adapter into the socket and connect the dash cam. This method is quick and requires no technical skills. It’s ideal for temporary installations or rental cars. The downside? It can clutter the dashboard with visible cables. Make sure the adapter fits securely to avoid power interruptions.Hardwiring To The Fuse Box
Hardwiring connects the dash cam directly to the car’s fuse box. This offers a cleaner look with hidden cables. Choose a fuse that powers only when the car is on. Use a fuse tap to connect the cam’s power cable. This method requires basic electrical knowledge. It provides a more permanent solution with a reliable power source. Consider professional installation if unsure about handling car electronics.Managing Cable Routing
Cable management improves aesthetics and functionality. Start by mapping the cable path from the cam to the power source. Use the car’s interior trim to hide cables. Tuck the cable under the roof liner or along the windshield edge. Secure cables with adhesive clips or ties. This prevents cables from obstructing your view or getting tangled. Proper routing protects cables from damage and ensures a neat installation.
Credit: www.tiktok.com
Setting Up The Dash Cam
Setting up a dash cam involves placing it on the windshield for a clear view. Connect the power cable to the car’s power outlet. Adjust the camera angle to capture the road ahead effectively.
Setting up your dash cam correctly is crucial to ensure it functions optimally. A properly configured dash cam not only captures high-quality footage but also provides peace of mind on the road. Let’s dive into the essential steps for setting up your dash cam.Configuring Settings
Start by powering up your dash cam and accessing the settings menu. Most dash cams have a user-friendly interface that lets you configure essential settings. Adjust the time and date first. This is important for timestamping your recordings, which can be vital in case of incidents. Next, set the video resolution. Higher resolution provides clearer images, but it might also require more storage. Find a balance that suits your needs and storage capacity. Many dash cams offer features like motion detection and parking mode. Decide if these features are beneficial for you and activate them accordingly.Testing Video Capture
Once the settings are configured, it’s time to test the video capture. Drive around the block and record a short clip. Check the footage on your computer or smartphone. Is the video clear? Can you read license plates easily? If the video quality isn’t up to your expectations, revisit the settings. Sometimes a minor tweak can make a big difference.Adjusting Camera Angles
The right angle can mean the difference between capturing a crucial detail or missing it altogether. Position your dash cam so it captures a wide view of the road ahead. Ensure the horizon is in the middle of the frame to avoid overexposure from the sky or dashboard glare. Take a few test drives and review the footage. Adjust the angle if needed to make sure you’re getting the best possible view. Have you ever had an incident where dash cam footage came in handy? Share your stories or questions in the comments below! Your insights could help others in the community.Troubleshooting Common Issues
Installing a dash cam can be simple with the right steps. Ensure the camera is securely mounted and positioned for a clear view. Check the power connection and test the recording functions to avoid any common installation issues.
Installing a dash cam is a smart move for enhancing your driving security. Yet, encountering common issues during installation can be a real headache. Troubleshooting these issues doesn’t have to be daunting. With a bit of guidance, you can address these problems like a pro. Let’s dive into some common issues and how you can resolve them.Addressing Power Failures
Power failures are a frequent hurdle when setting up your dash cam. Start by checking the power cable for any visible damage or loose connections. Ensure that the cable is securely plugged into both the dash cam and your car’s power outlet. You might also want to test the car’s power outlet with another device to confirm it’s working properly. If the dash cam still doesn’t power on, consider trying a different power cable. Sometimes, the simplest swaps can save you a lot of hassle.Resolving Video Quality Problems
Poor video quality can defeat the purpose of having a dash cam. Ensure that the lens is clean and free from fingerprints or smudges. A quick wipe with a microfiber cloth can work wonders. Check the dash cam settings for resolution adjustments. You may have inadvertently set it to a lower resolution. Make sure your memory card is of high quality and compatible with your dash cam to avoid recording glitches.Fixing Mounting Issues
A dash cam that won’t stay put is not only frustrating but also unsafe. If the adhesive isn’t holding, clean the mounting surface with alcohol wipes to remove any dust or grease. Reapply the adhesive or use a suction mount for a more flexible solution. Consider repositioning the dash cam if it obstructs your view. Ensure that it’s installed at a slight downward angle to capture the road effectively. Adjusting the angle can often improve both stability and video coverage. Are you facing any other issues with your dash cam installation? Remember, patience and a bit of trial and error can often lead you to the right solution.
Credit: www.youtube.com
Maintenance And Care
Secure the dash cam on the windshield using the mount. Hide the cable along the car’s interior trim. Connect it to the car’s power source for seamless operation.
Maintaining and caring for your dash cam is crucial to ensure it functions optimally and lasts for years. Proper maintenance not only extends the lifespan of your device but also guarantees that you capture high-quality footage when you need it most. With a little attention to regular cleaning, software updates, and effective data management, you’ll have a reliable companion on the road.Regular Cleaning
Think of your dash cam as your car’s vigilant eye. It’s exposed to dust, dirt, and fingerprints, which can obscure the lens and affect video quality. Use a microfiber cloth to gently wipe the lens and body of the camera. Avoid using harsh chemicals that could damage the device. A clean dash cam ensures clear recordings, capturing every detail when it matters.Software Updates
Your dash cam’s software is its brain, processing footage and managing settings. Manufacturers often release updates to enhance performance and add features. Check your dash cam’s website for updates regularly and follow their instructions to install them. An updated device not only runs smoother but also keeps you ahead with the latest functionalities.Storage And Data Management
A dash cam is only as good as its storage capabilities. Managing your footage effectively is key to not running out of space at a critical moment. Invest in a high-quality, high-capacity SD card. Regularly review and delete unnecessary footage to free up space for new recordings. Consider backing up important videos to your computer or cloud storage. This proactive approach ensures you’re always ready to capture the unexpected. By taking these simple steps, you can keep your dash cam in peak condition, always ready to safeguard your journeys. Have you ever missed capturing a critical moment due to poor dash cam maintenance?Frequently Asked Questions
How Do I Choose The Right Dash Cam?
Choosing a dash cam depends on your needs. Consider factors like video quality, storage capacity, ease of installation, and connectivity features. Look for models with high-resolution video and wide-angle lenses for better coverage. Check online reviews and compare specifications to make an informed decision.
Where Should I Place My Dash Cam?
Install your dash cam behind the rear-view mirror for an unobstructed view. Ensure it doesn’t block your windshield. Position it to capture the road ahead clearly. Some models come with mounting kits for easy installation. Follow the manufacturer’s instructions for optimal placement and angle.
Do I Need Professional Installation For My Dash Cam?
Most dash cams are designed for easy self-installation. They come with detailed instructions and mounting kits. However, if you’re unsure, seek professional help. A professional can ensure optimal placement and wiring. This avoids potential issues and ensures your dash cam functions correctly.
Can I Install A Dash Cam Myself?
Yes, you can install a dash cam yourself. Most models come with user-friendly instructions. Follow the step-by-step guide included in the package. Mount the camera, connect the power source, and adjust settings. Ensure proper placement for clear recording and test the device before use.
Conclusion
Installing a dash cam is simple and enhances your car’s safety. Follow instructions carefully. Always ensure the camera has a clear view. Secure cables neatly to avoid distractions. Test the camera to check recordings. Regularly review footage for any issues.
A dash cam provides peace of mind on the road. It captures important events, protecting against false claims. Investing in one is a smart choice for every driver. Enjoy safer journeys with this handy device installed. Remember, a well-installed dash cam can be your best witness.
Happy driving!