
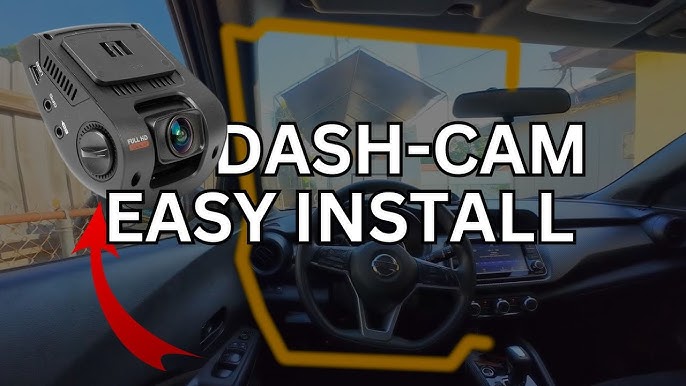
Imagine cruising down the highway, knowing you have an extra set of eyes watching over you. That’s the peace of mind a dash cam can bring.
You’re not just recording your journey; you’re safeguarding your ride against unforeseen incidents. Whether it’s capturing memorable road trips or providing crucial evidence in case of an accident, a dash cam is a worthy investment. But how do you get it up and running in your car?
You might think installing a dash cam is complicated, but it’s easier than you imagine. This guide will walk you through the steps, ensuring you have a seamless installation experience. Ready to enhance your driving security and record those beautiful sunsets on the road? Let’s dive in and transform the way you drive.
Choosing The Right Dash Cam
Installing a dash cam involves selecting a suitable location on the windshield for clear visibility. Secure the dash cam using suction or adhesive mounts, ensuring it doesn’t obstruct your view. Connect the power supply to the car’s cigarette lighter or hardwire it for a seamless integration.
Choosing the right dash cam can feel overwhelming. With so many models available, it’s important to pick one that suits your needs. A dash cam is more than just a camera; it’s your silent witness on the road.Types Of Dash Cams
Several types of dash cams are available. Front-facing dash cams capture footage from the front of your vehicle. Dual dash cams record both the front and rear views. Mirror dash cams replace your rear-view mirror with a camera screen. Each type offers different advantages depending on your needs.Features To Consider
Certain features make dash cams more effective. High-resolution video ensures clear footage. Night vision is crucial for recording in low light. A wide-angle lens captures more of the surroundings. Loop recording saves space by overwriting old footage. GPS tracking records your location and speed. Parking mode activates the camera when the car is parked and detects motion. These features enhance the functionality of your dash cam.Gathering Necessary Tools
Gather essential tools like a dash cam, mounting kit, and wire connectors before installation. Ensure you have a screwdriver and adhesive tape for secure attachment. Preparing these items simplifies the setup process and enhances your experience.
Gathering the necessary tools is the first step to installing a dash cam. This preparation ensures a smooth installation process and avoids frustration. It’s important to have everything ready before starting. The right tools make the job easier and quicker.Required Tools List
Before starting the installation, gather these essential tools:- Screwdriver: Useful for removing panels and screws.
- Trim removal tool: Helps in taking off interior panels without damage.
- Dash cam mount: Keeps the camera steady on the windshield.
- Power cable: Connects the dash cam to the car’s power source.
- Memory card: Stores video footage captured by the dash cam.
Optional Accessories
Consider these optional accessories to enhance your setup:- Hardwire kit: Provides a cleaner installation with hidden wires.
- Rear camera: Offers additional coverage for the back of the vehicle.
- Battery pack: Powers the dash cam when the car is off.
- GPS module: Adds location tracking to your recordings.
- Polarizing filter: Reduces glare and improves image quality.
Preparing Your Car
Installing a dash cam involves selecting a suitable location, usually near the rearview mirror. Secure it using adhesive or mounts, then connect the power source to the car’s fuse box for consistent operation.
Preparing your car for a dash cam installation is crucial. A clean and well-prepared surface ensures the device works effectively. This preparation involves cleaning and selecting the right spot for the dash cam. Let’s dive into the details.Cleaning The Windshield
Start by cleaning the windshield thoroughly. Use a good glass cleaner for this task. Spray the cleaner on the glass, and use a microfiber cloth. Wipe in circular motions for best results. Remove all dirt, dust, and streaks. A clean surface helps the dash cam adhere better. Ensure the glass is dry before proceeding.Selecting The Mounting Location
Choose the best spot for mounting. The dash cam should not obstruct your view. Consider placing it near the rearview mirror. This location provides a clear view of the road. Ensure the cam can record both lanes. Test the view by sitting in the driver’s seat. Adjust the position if necessary for optimal recording.
Credit: www.tiktok.com
Mounting The Dash Cam
Position the dash cam on the windshield near the rearview mirror for optimal view. Secure it with adhesive mounts or suction cups. Connect the power cable to the car’s cigarette lighter socket.
Mounting the dash cam is a crucial step in ensuring your device captures clear, unobstructed footage. Whether you’re a tech-savvy enthusiast or a first-time installer, placing your camera correctly can make all the difference. You want to ensure it’s secure yet adjustable, allowing you to capture the right angles without hassle. Let’s dive into the essentials of mounting your dash cam effectively.Attaching The Camera
Start by cleaning the area where you’ll attach the dash cam. A clean surface ensures the adhesive or suction cup holds firmly. Use a microfiber cloth and a mild cleaning solution to wipe away dust and grime. Consider the best spot on your windshield. Typically, the area behind the rearview mirror is ideal. This position keeps the camera discreet and centered, offering a balanced view of the road. Use the adhesive mount or suction cup provided with your dash cam. Press firmly to secure it, ensuring it won’t fall off during bumpy rides. Remember, a strong attachment is key to preventing shaky footage.Adjusting The Angle
Once your dash cam is mounted, adjusting its angle is the next step. You want it to capture the road ahead clearly, without unnecessary distractions. Tilt the camera slightly downward to avoid glare from the windshield. This will also help in reducing reflections that might obscure your footage. Check the display or use the app to preview the camera’s view. Adjust the angle until you have a clear, unobstructed view of both lanes and a portion of the sky. This ensures you’re capturing important details like traffic lights and street signs. Have you considered how weather conditions might affect your dash cam’s view? Adjusting for rain or sun glare can enhance the quality of your recordings. Regularly review your footage and tweak the angle as needed to maintain optimal performance.Routing The Power Cable
Routing the power cable involves tucking it along the car’s edges. This keeps it hidden and secure. Ensure the cable doesn’t interfere with airbags or vehicle controls.
Routing the power cable for your dash cam might seem like a daunting task, but with a bit of patience and attention to detail, it can be done smoothly. A well-routed cable ensures not only a tidy appearance but also the safety and longevity of your dash cam setup. The two most common methods of routing the power cable are using the cigarette lighter socket and connecting to the fuse box. Each method comes with its own set of advantages and considerations.Using The Cigarette Lighter Socket
This method is often the simplest and quickest way to power your dash cam. Most dash cams come with a power cable designed to fit into the cigarette lighter socket. – Convenience: Simply plug the cable into the socket, and you’re good to go. This makes it an excellent choice if you want to get your dash cam up and running quickly. – Visibility: The downside is that the cable can be quite visible, running from the dash cam to the socket. To minimize clutter, use cable clips or adhesive mounts to tuck the cable along the edges of your dashboard. – Temporary Setup: If you frequently switch cars or don’t want a permanent installation, this method is ideal. It allows for easy removal and reinstallation in another vehicle. Would this setup work for you, or do you prefer a more discreet option?Connecting To The Fuse Box
For those who prefer a cleaner look and a more permanent installation, connecting the dash cam to the fuse box is the way to go. – Discreet: This method hides the cables within the car’s interior, giving a professional and clean appearance. You’ll need a hardwiring kit that includes a fuse tap and voltage converter. – Continuous Power: Unlike the cigarette lighter method, connecting to the fuse box can provide continuous power, allowing features like parking mode to function. This ensures your dash cam is always ready to record incidents even when you’re not driving. – Technical Skills: While this method requires a bit more technical know-how, many car enthusiasts find it rewarding. You’ll need to identify the right fuse to tap into, typically one that powers on and off with the ignition. Are you ready to take on this challenge for a seamless installation? Each method has its own merits, and the choice ultimately depends on your preferences and technical comfort level. Whether you opt for simplicity or a seamless finish, the key is ensuring your dash cam is powered effectively and safely.
Credit: www.youtube.com
Configuring The Dash Cam
Mount the dash cam on the windshield for a clear view. Connect the power cable to the car’s power outlet. Adjust the camera angle to cover the road ahead.
Configuring your dash cam is a crucial step that ensures it captures what you need, when you need it. Proper configuration can make the difference between clear evidence and a blurry mess in critical situations. Imagine having footage ready to protect yourself in the event of an accident or misunderstanding. Let’s dive into some essential settings you need to get right to make sure your dash cam is your trusty road companion.Setting Date And Time
Getting the date and time right is more than just a formality. Accurate timestamps are vital for verifying incidents. Imagine being involved in an accident and needing to prove exactly when it happened. Most dash cams have a simple interface for setting the date and time. Navigate to the settings menu and look for an option labeled ‘Date & Time.’ Use the arrow keys to adjust each field to match your current timezone. Once set, make sure to check that your dash cam retains these settings after turning off the car. Some may require you to reset it periodically, especially after a long period of inactivity.Adjusting Video Quality
Video quality is where your dash cam truly proves its worth. High-resolution footage can capture crucial details like license plates, road signs, and even facial features. But higher quality means larger file sizes, which can fill up storage quickly. Consider your storage capacity when choosing video quality. If your dash cam supports Full HD or 4K, you may opt for these settings if you have ample storage or a habit of frequently transferring files to a computer. On the other hand, if you prefer to let the cam roll without frequent management, choosing a lower resolution such as 720p might be more practical. This balances decent quality with manageable file sizes. Experiment with different settings to see what works best for your needs and ensure you have enough storage for extended recording sessions. By configuring these settings properly, your dash cam will be ready to capture reliable footage whenever you hit the road. Are you ready to make your dash cam work for you?Testing The Dash Cam
Testing your dash cam is crucial to ensure it’s ready to capture those important moments on the road. After all, what’s the point of having a dash cam if it doesn’t function properly when you need it? Let’s dive into the essential steps to make sure your dash cam is operating as it should.
Checking Video Playback
After installing your dash cam, the first thing you should do is check the video playback. Take a short drive and then review the footage. Are the images clear and the audio crisp? If not, consider adjusting the camera angle or reviewing the settings.
Connect the dash cam to your computer or use its app to view the recorded footage. This step ensures the camera is capturing the right areas of the road. Imagine capturing crucial evidence during an unexpected road incident—clear footage could make all the difference.
Ensuring Stable Installation
Ensuring that your dash cam is securely mounted is just as important as the video quality. A shaky or unstable camera can result in blurry footage, which might not be useful when you need it. Check that the mount is firmly attached, whether it’s a suction cup or adhesive.
- Drive over speed bumps or uneven surfaces to test the stability.
- Listen for any rattling sounds which might indicate a loose mount.
Addressing these issues early can save you from potential hassle in the future. Does your dash cam stay put through turns and stops? Ensuring a stable installation now prevents future distractions and maintains focus on capturing clear footage.
Remember, a well-tested dash cam is your silent ally on the road. Is your setup ready to handle the unexpected?
Troubleshooting Common Issues
Installing a dash cam can face common issues like loose wires or poor mounting. Ensure secure connections and position the camera for optimal view. Adjust settings for video quality and storage to prevent recording errors.
Installing a dash cam can greatly enhance your driving experience. Yet, issues may arise during or after installation. Addressing these issues ensures your dash cam functions properly. Let’s explore some common problems and how to solve them.Power Supply Problems
A dash cam without power is useless. Check the power cable connection first. Ensure it’s plugged securely into the car’s power outlet. Inspect the cable for any visible damage. Replace it if necessary. Check the fuse in the power adapter. A blown fuse can disrupt power supply. The car’s battery may be the culprit. Some dash cams require constant power. Verify the car’s battery health. Low battery could affect the dash cam’s operation. Consider using a hardwire kit. It provides a stable power source from the car’s battery.Video Recording Errors
Video recording errors can be frustrating. First, check the memory card. Ensure it’s properly inserted. A loose card won’t record video. Format the card using the dash cam’s menu. This prevents recording errors due to file corruption. Inspect the dash cam’s settings. Ensure it’s set to record automatically. Adjust the recording resolution if necessary. Lower resolutions use less memory. It might solve recording interruptions. Consider upgrading to a larger memory card for longer recordings. Keep your dash cam’s firmware updated. Manufacturers release updates to fix bugs. Regular updates ensure optimal performance and reduce errors.
Credit: www.youtube.com
Frequently Asked Questions
How Do I Choose The Right Dash Cam?
To choose the right dash cam, consider video quality, storage capacity, and features like GPS and night vision. Ensure it fits your budget and installation preferences. Research user reviews for reliability and customer satisfaction. Compatibility with your car and ease of use are also essential factors.
What Tools Do I Need To Install A Dash Cam?
To install a dash cam, you’ll need a screwdriver, adhesive mount, and cable clips. If hardwiring, a fuse tap and wire stripper are necessary. Ensure the tools fit your car’s specifications. Some dash cams come with installation kits, so check the package contents.
Can I Install A Dash Cam Myself?
Yes, you can install a dash cam yourself. Most dash cams come with straightforward instructions. Basic tools are usually sufficient. Ensure you follow the manufacturer’s guidelines for proper installation. If unsure, consult online tutorials or consider professional installation for complex setups.
How Do I Hide Dash Cam Wires?
To hide dash cam wires, use cable clips and run them along the vehicle’s edges. Tuck wires into the car’s headliner, A-pillar, and trim panels. Use a trim removal tool if necessary. Keep wires organized and secure to avoid interference with vehicle functions.
Conclusion
Installing a dash cam enhances your car’s safety. It’s a straightforward process with clear steps. Start by choosing the right spot on your windshield. Secure the dash cam with the provided mount. Connect the power cable to your car’s power source.
Ensure the camera records properly. Check the footage quality before driving. Adjust settings for optimal performance. With a dash cam, you capture essential road moments. It offers peace of mind and potential evidence if needed. Now, you’re ready to drive with extra protection.
Enjoy your safer driving experience!