
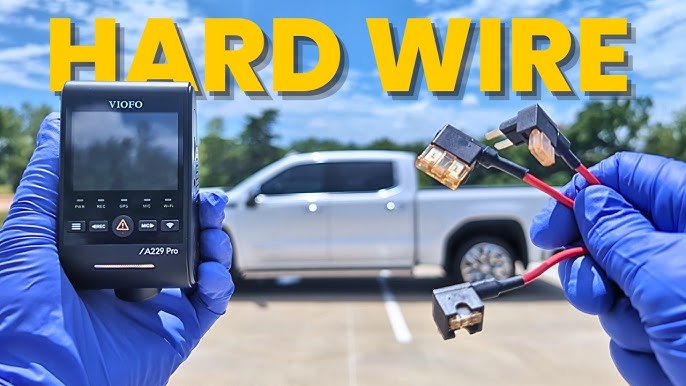
Are you tired of dealing with messy wires and constantly plugging in your dash cam every time you get in the car? Hardwiring your dash cam can be a game-changer.
It not only keeps your dashboard neat and tidy but also ensures your dash cam is always ready to capture crucial moments on the road. Imagine never having to worry about your device’s battery draining mid-journey or missing important footage.
By learning how to hardwire a dash cam into your car, you’ll gain peace of mind and a reliable witness for any unexpected events. Dive into this guide, and discover how you can effortlessly transform your driving experience with a simple, yet effective installation.
Choosing The Right Dash Cam
Choosing the right dash cam is a crucial step in ensuring your car is equipped with a reliable surveillance system. With numerous options on the market, finding the perfect match for your needs can be overwhelming. However, by focusing on specific features and considering your budget, you can make an informed decision that aligns with your requirements.
Features To Consider
When selecting a dash cam, think about the features that will benefit you the most. Do you need high-definition video recording? Look for cams that offer 1080p or even 4K resolution. Night vision capabilities are essential if you often drive after dark. Some dash cams come with built-in GPS, which can be useful for tracking your route.
Consider whether you need a wide-angle lens to capture more of the road. If you want protection from collisions, choose a model with motion detection and parking mode. These features ensure your dash cam records events even when you’re not around.
Budget And Quality
Your budget will play a significant role in the dash cam you choose. While it might be tempting to go for the cheapest option, remember that quality often correlates with price. A higher-end dash cam may offer better video quality, durability, and additional features. Balance your budget with the quality you need.
Think about what you’re willing to invest for peace of mind. Are you prioritizing longevity and reliability? If so, spending a bit more might be worthwhile. Remember, a dash cam is an investment in your safety and security, so choose wisely.

Credit: www.youtube.com
Gathering Necessary Tools
Gather essential tools like a dash cam, wiring kit, and fuse taps. Ensure you have a multimeter to test connections. Safety gear such as gloves and eye protection is also crucial.
Gathering the necessary tools is a crucial step in hardwiring a dash cam. Having the right tools makes the process smooth and efficient. It reduces the risk of damaging your car’s electrical system. With the right preparation, the installation becomes straightforward. Equip yourself with essential and optional tools to ensure a successful setup.Essential Tools List
- Screwdriver set for removing panels
- Wire crimper to secure connections
- Wire stripper for stripping insulation
- Fuse tap for connecting to the fuse box
- Cable ties to manage wires neatly
Optional Tools For Convenience
- Multimeter for checking voltage levels
- Trim removal tool to avoid damaging the car interior
- Flashlight for better visibility in dark areas
- Electrical tape for securing loose wires
- Heat shrink tubing for protecting wire connections
Locating The Fuse Box
Locating the fuse box is crucial for hardwiring a dash cam. The fuse box houses the fuses that power your car’s electrical components. To start, you need to know where the fuse box is located in your car. Different cars have fuse boxes in different places. Once you find it, you can proceed with hardwiring your dash cam.
Common Fuse Box Locations
Fuse boxes are typically located in a few common places. Under the dashboard is a popular spot. Some cars have them near the driver’s side footwell. Another common location is under the hood. Check your car’s manual for specific guidance. Knowing these locations can save time and effort.
Identifying The Correct Fuse
Once you’ve found the fuse box, identifying the correct fuse is important. You need a fuse that powers your dash cam properly. Look for a fuse that powers devices like the radio or interior lights. Avoid using fuses for essential functions like airbags. Use a fuse tap to safely connect your dash cam. This ensures it receives power without affecting other devices.
Selecting The Power Source
Choosing the right power source is crucial for hardwiring a dash cam. Select between the fuse box or battery connection to ensure stable power supply.
Selecting the right power source is crucial for hardwiring a dash cam. It ensures your device functions seamlessly while parked or driving. Understanding your options helps in making the best choice for your vehicle and needs.Constant Vs. Switched Power
A constant power source provides continuous electricity to your dash cam. This means the camera stays on even when the car is off. It’s beneficial for recording incidents when the car is parked. But it might drain your battery if left unchecked. Switched power connects to sources active only when the car is on. This setup ensures the dash cam powers down with the engine. It prevents unnecessary battery drain.Determining The Best Option
Evaluate how often you need parking surveillance. If frequent, consider a constant power source. Ensure your car battery can handle the load. If driving is your main concern, a switched power source is suitable. It offers reliability without draining the battery. Check your vehicle’s fuse box. Identify available constant and switched sources. This helps in selecting the right connection for your dash cam. Consider consulting a professional if unsure. Proper installation guarantees a trouble-free operation.Routing The Dash Cam Cable
Ensure the cable is tucked along the edges of the windshield. This keeps it hidden and secure. Use the vehicle’s trim panels to guide the cable towards the fuse box. This method prevents obstruction and maintains a clean interior look.
Routing the dash cam cable is a crucial step in ensuring a clean and efficient installation. A poorly routed cable can be an eyesore and may even interfere with your car’s functionality. By carefully planning your cable path, you can maintain the aesthetics of your vehicle’s interior while ensuring your dash cam operates without a hitch.Planning The Cable Path
Before you start, visualize the path you want your cable to take. Consider the length of the cable and the nearest power source. Identify potential entry points like the A-pillar or the headliner, as these are typically inconspicuous. Use a wire fish tape or a similar tool to gently guide the cable through tight spots. Remember, the goal is to make the cable as invisible as possible while keeping it secure.Avoiding Interference With Airbags
Safety should always be your top priority. Ensure that your cable does not obstruct or interfere with any airbags. Check your car’s manual to locate all airbag positions. This will help you understand where not to route the cable. If your cable path crosses an airbag area, adjust your route immediately. The last thing you want is a cable interfering with the deployment of an airbag in an emergency. Wouldn’t you agree that a little extra planning now can prevent potential safety hazards later? By giving attention to these details, you ensure that your dash cam is both functional and seamlessly integrated into your vehicle.Connecting To The Fuse Box
Connecting to the fuse box allows you to hardwire your dash cam for constant power. Locate your car’s fuse box, usually found under the dashboard or in the glove compartment. Use a fuse tap to connect the dash cam’s wiring, ensuring a secure and reliable connection.
Connecting your dash cam to the fuse box can seem challenging. But it’s simpler with the right guide. This connection ensures your dash cam powers on with your car. It also eliminates cable clutter. Let’s dive into the steps for a neat, professional installation.Using A Fuse Tap
A fuse tap is essential for this process. It allows you to connect your dash cam without cutting wires. First, identify an accessory fuse in the box. This fuse should power on with the car, such as the radio or cigarette lighter. Remove the identified fuse and insert it into the fuse tap. Next, insert the fuse tap into the vacant slot. This setup provides power to both the dash cam and the original circuit.Securing The Connection
Properly securing the connection is crucial. Ensure the fuse tap is snugly fitted into the fuse box. Loose connections can cause power interruptions. Use cable ties to secure any loose wires. This prevents them from interfering with car functions. Ensure all connections are tight and stable. A well-secured connection ensures reliable dash cam performance.Grounding The Dash Cam
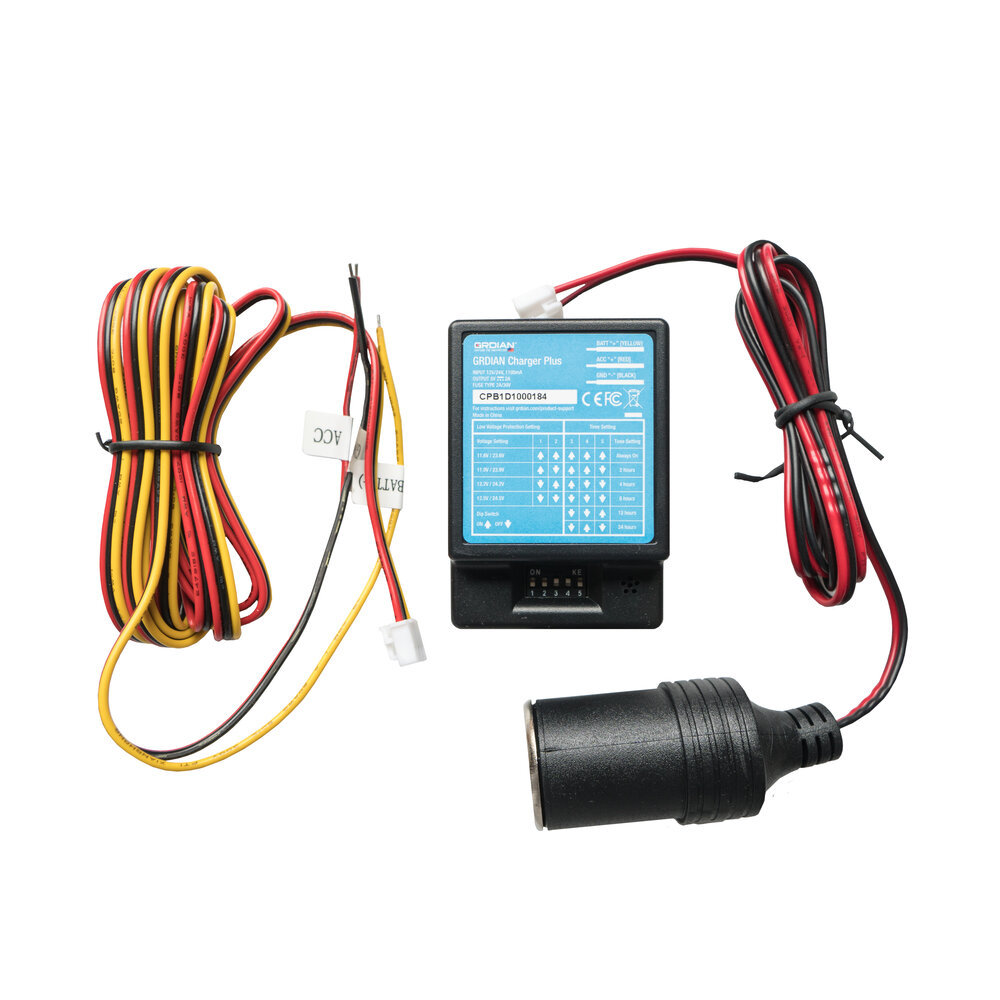
Grounding the dash cam is a critical step in ensuring that it functions smoothly and reliably. Without proper grounding, you might face issues like flickering video footage or even a completely non-functional dash cam. Grounding not only stabilizes the power supply but also safeguards against electrical noise, ensuring clear and uninterrupted recordings.
Choosing A Grounding Point
Picking the right grounding point in your car can make all the difference. Look for a metal part of the car’s chassis that is free from rust, paint, or any insulating material. This ensures a solid electrical connection. Often, bolts or screws in the footwell area or under the dashboard are ideal choices.
When I installed my first dash cam, I opted for a grounding point near the driver’s side footwell. It was easily accessible and provided a stable connection. Remember, the closer the grounding point to your dash cam, the better, as this minimizes the length of the wire and potential interference.
Ensuring A Stable Connection
Ensuring a stable connection is crucial for the dash cam’s operation. Start by cleaning the chosen grounding area with sandpaper to remove any dirt or paint. This exposes the bare metal, which is essential for a strong connection.
Use a ring terminal to connect the grounding wire securely. Fasten it with a bolt or screw, ensuring it’s tightly fitted. A loose connection might lead to intermittent power issues, which can be frustrating when you need reliable footage during a road trip or daily commute.
Have you ever experienced a dash cam that suddenly turned off? Often, a poor grounding connection is the culprit. Double-check your connection if you encounter such issues. It’s a simple fix that can save you a lot of hassle on the road.
Credit: www.grdian.com
Testing The Installation
Testing the Installation Ensure the dash cam powers on and records properly when the car starts. Check for secure connections and proper wire concealment to prevent distractions while driving.
Testing the installation of your dash cam is crucial. It ensures everything functions correctly. This step involves powering the dash cam and checking its operation. A thorough test can save time and prevent future issues.Powering On The Dash Cam
First, switch on the car’s ignition. The dash cam should power up automatically. Watch the LED indicators on the dash cam. They should light up, indicating power. If not, recheck the connections. Ensure the fuse is secure and wires are connected properly. Sometimes, loose wires can cause power issues.Checking For Proper Operation
Once powered, observe the dash cam’s display. It should show a clear view of the road. Navigate through the menu options. Ensure each function responds correctly. Test the recording feature by driving a short distance. Playback the recording to verify quality. Listen for sound and check video clarity. Adjust the camera angle if needed for optimal view. Confirm the dash cam turns off when the ignition is off. This feature prevents battery drain. If problems persist, consult the user manual or seek professional help. A well-tested dash cam provides peace of mind and enhanced safety.Tidy Up And Final Adjustments
Tidy up the wiring for a clean look after installing your dash cam. Secure cables to prevent any distractions. Make final adjustments to the camera angle for the best view of the road.
Tidy up and final adjustments are crucial after installing your dash cam. This ensures everything looks neat and functions well. Proper organization makes a big difference in your car’s interior appearance. It also prevents distractions while driving. Below, we will discuss securing loose wires and adjusting camera angles.Securing Loose Wires
Loose wires can be a safety hazard. They can also look untidy. Use cable clips or zip ties to secure wires. Attach them along the car’s edges. This keeps them hidden and organized. Avoid placing wires in moving parts. This prevents wear and tear. Check connections to ensure they are firm. Loose connections can cause the dash cam to malfunction.Adjusting Camera Angles
Proper camera angles are essential for clear footage. Adjust the dash cam to cover the entire road. Ensure it doesn’t obstruct your view. Check the rearview mirror alignment too. This helps capture different perspectives. Use the dash cam’s display to fine-tune angles. Make sure the horizon is level. This provides balanced footage. Regularly review footage to ensure optimal settings.Troubleshooting Common Issues
Troubleshooting common issues when hardwiring a dash cam involves checking connections and ensuring power supply compatibility. Securely attaching wires to the fuse box and avoiding loose connections can prevent malfunctions. Regular inspections of wiring and power source can help maintain optimal dash cam performance.
Troubleshooting Common Issues Hardwiring a dash cam offers many benefits. Yet, it may bring challenges. Knowing how to tackle these problems can save time and effort. Let’s explore some common issues and their solutions.Resolving Power Problems
Power issues are frequent when installing dash cams. First, check the fuse. Ensure it’s not blown and properly connected. Use a multimeter to test voltage output. This confirms if power reaches the dash cam. Verify the cable is intact. Damaged cables can cause disruptions. Replacing them might solve the problem. Sometimes, the issue lies in the power source. Try using another socket to see if it helps.Dealing With Video Quality Issues
Poor video quality is frustrating. Start by cleaning the lens. Dust and smudges affect clarity. Adjust the camera angle for a better view. Ensure the resolution settings are correct. High-quality settings give better results. Inspect the memory card. A full or faulty card can lower video quality. Formatting or replacing it may resolve the issue. Software updates can enhance performance. Check if your dash cam has the latest version.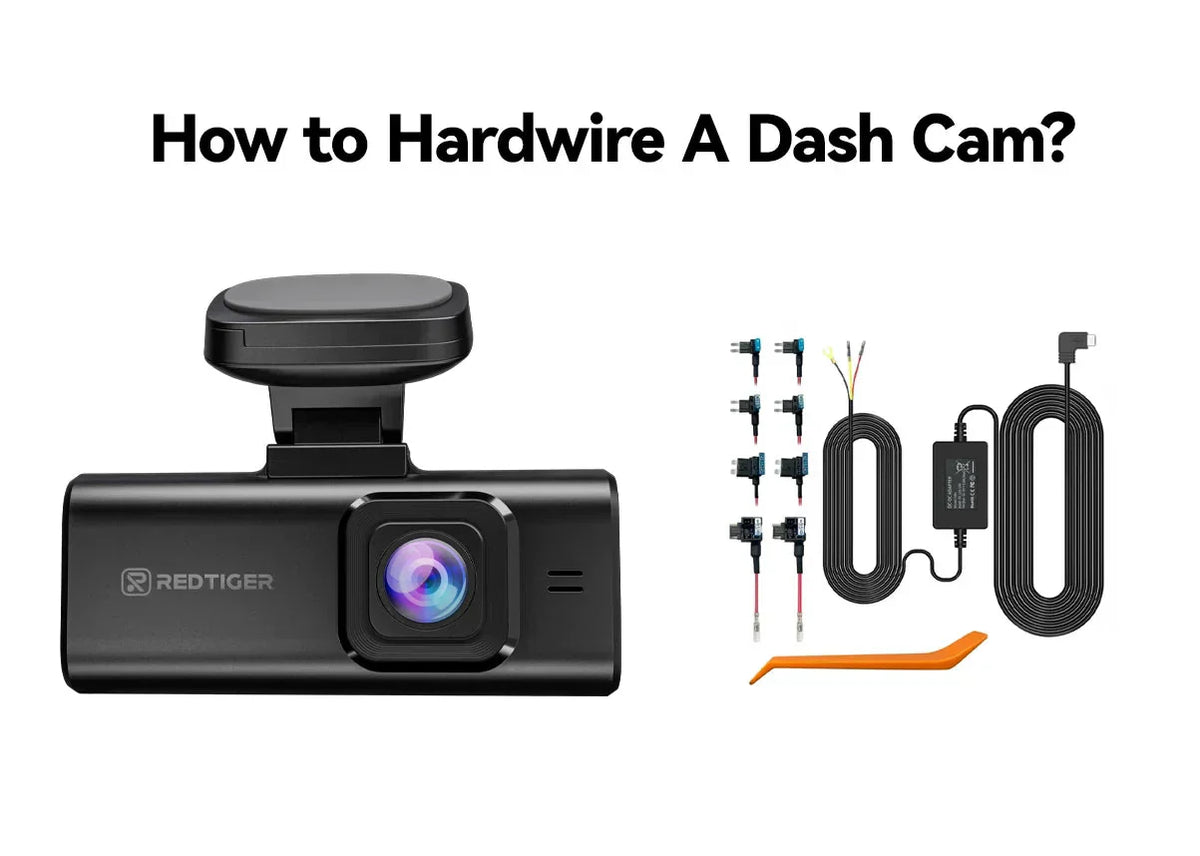
Credit: www.redtigercam.com
Frequently Asked Questions
How To Choose The Right Dash Cam For Hardwiring?
Choosing the right dash cam involves considering features like resolution, night vision, and loop recording. Ensure it has a parking mode for security. Look for compatibility with your car’s power system. Check reviews and ratings for reliability and ease of installation.
What Tools Are Needed To Hardwire A Dash Cam?
You’ll need a hardwire kit, trim removal tool, fuse taps, and a multimeter. These tools help in safely connecting the dash cam to your car’s electrical system. Having these tools ready ensures a smooth installation process, minimizing potential issues.
Is It Safe To Hardwire A Dash Cam Myself?
Yes, it is safe if you follow instructions carefully. Ensure the car is off and use a multimeter to identify fuses. Take your time and double-check connections. If unsure, consult a professional to avoid damaging your vehicle’s electrical system.
How Long Does It Take To Hardwire A Dash Cam?
Hardwiring a dash cam typically takes about 1 to 2 hours. The time varies based on your car’s complexity and familiarity with the process. Preparing tools and reading the instructions beforehand can help streamline the installation process.
Conclusion
Installing a dash cam can improve your driving experience. Hardwiring ensures the camera runs smoothly. You won’t worry about battery life anymore. It keeps recording, even when parked. A neat installation minimizes clutter. Follow the steps carefully for best results.
Safety and convenience make it worthwhile. You’ll feel more secure on the road. A dash cam provides valuable evidence in incidents. Consider professional help if unsure. Enjoy peace of mind while driving. It’s a smart investment for any car owner.
Protect yourself and others with a reliable dash cam setup.