
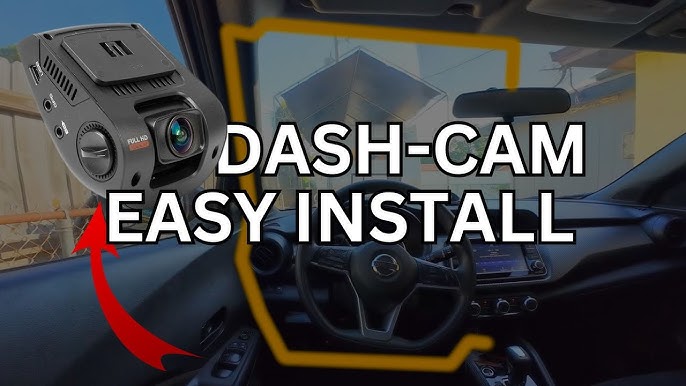
Imagine being able to capture every moment of your drive with crystal-clear accuracy. A dash cam is not just a gadget; it’s your silent witness, your safety net, and sometimes, your best storyteller.
Whether you’re worried about unexpected events, want to document road trips, or simply keep an eye on your car when parked, fitting a dash cam is your first step towards peace of mind. But how exactly do you get it up and running?
Don’t worry; you don’t need to be a tech wizard to install one. With the right guidance, you can have your dash cam up and running in no time. This guide will walk you through the process, ensuring you make the most out of your new tool without any hassle. Ready to transform your driving experience? Let’s dive in!
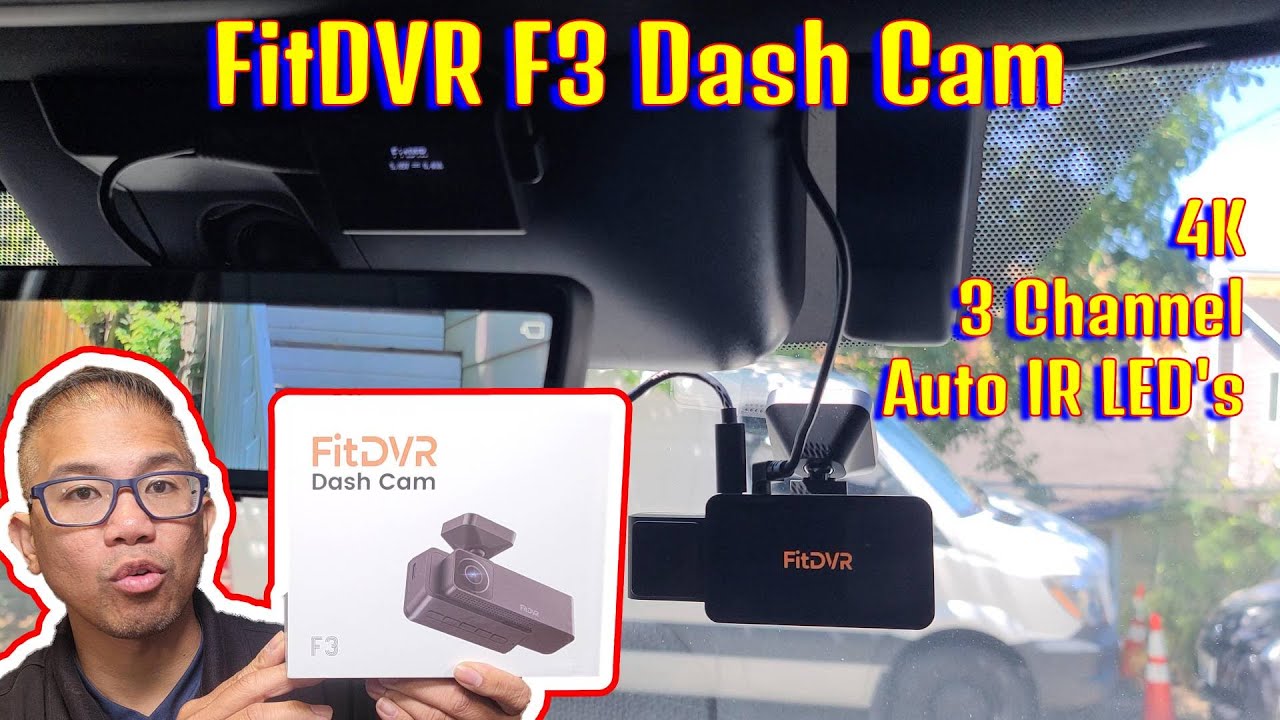
Credit: www.youtube.com
Choosing The Right Dash Cam
Choosing the right dash cam is crucial for capturing clear footage of your drive. A dash cam can be your eye on the road, providing important evidence in case of accidents. There are several factors to consider before making a purchase. Here, we’ll discuss key features, budget, and recommended brands.
Features To Consider
Dash cams come with a variety of features. Resolution is important; higher resolution means clearer video. Look for full HD or 4K options. Night vision is a must for recording in low light. Consider GPS tracking to log your location and speed. Some cams offer Wi-Fi for easy file transfer. Parking mode records while your car is parked, useful for catching vandals.
Budget Considerations
Dash cams range from affordable to pricey. Set a budget based on your needs. Basic models start at around $50. Mid-range options, with more features, cost between $100 and $200. Premium models can exceed $300, offering advanced features like dual cameras. Remember, investing more can mean better quality and reliability.
Best Brands And Models
Several brands are known for quality dash cams. Thinkware offers reliable models with great features. Nextbase is praised for ease of use and high-resolution cameras. Garmin provides durable cams with excellent GPS functions. Check out BlackVue for top-notch image quality. Each brand has models to fit different needs and budgets.

Credit: www.tiktok.com
Gathering Necessary Tools
Begin by gathering essential tools like a screwdriver, wire connectors, and mounting brackets. Ensure your dash cam’s power cable and adhesive pads are ready for installation. These items simplify the setup process and ensure a secure fit for your dash cam.
Gathering the necessary tools is crucial for a smooth dash cam installation. It ensures that the process is efficient, minimizing potential mishaps. Having the right tools on hand saves time and avoids frustration.Essential Installation Tools
To install a dash cam, you need a few key tools. A screwdriver is essential for loosening screws in the dashboard. A trim removal tool helps you lift panels without causing damage. You’ll also need a power cable to connect the dash cam to your car’s power source. A memory card is required for storing video footage. Finally, an adhesive mount or suction cup secures the dash cam in place.Optional Accessories
Some accessories can enhance your dash cam setup. A hardwiring kit connects the dash cam directly to the car’s battery. This ensures constant power without relying on the cigarette lighter socket. A GPS module adds location tracking to your recordings. An external battery pack provides backup power during long drives. A polarizing filter reduces glare in bright sunlight, improving video clarity. These accessories are not mandatory, but they can improve functionality and ease of use.Positioning The Dash Cam
Position the dash cam near the center of the windshield for optimal view. Ensure it doesn’t block the driver’s sight. Secure it firmly to avoid shaking while driving.
Positioning the dash cam correctly is crucial for capturing essential footage and ensuring your safety on the road. A well-positioned dash cam provides clear visibility without obstructing your view or violating any legal regulations. Let’s dive into how you can achieve the perfect placement for your dash cam.Optimal Placement For Visibility
Choosing the right spot for your dash cam can significantly affect the quality of the footage. The best location is usually behind the rearview mirror. This spot allows the camera to capture a wide angle of the road ahead while staying out of your direct line of sight. Make sure the camera lens is centered and not tilted. A centered lens ensures you capture both lanes and any potential hazards. Consider adjusting it slightly during different times of the day to avoid glare from the sun. Have you ever noticed how small adjustments can make a big difference? A slight tilt towards the driver’s side might reveal blind spots you didn’t think about before. Experiment with different angles to find what works best for your driving habits.Legal Considerations For Mounting
When mounting a dash cam, you must comply with legal regulations to avoid fines. Many regions have laws about obstructing your windshield. Make sure your dash cam is mounted where it doesn’t block your view of the road. It’s wise to check local laws regarding dash cams. Some places have specific rules about the size and position of devices on the windshield. Consulting your vehicle’s manual and local regulations can save you from unnecessary legal trouble. Think about this: a misplaced dash cam could lead to penalties, defeating its purpose entirely. So, take a moment to ensure your dash cam meets all legal requirements.Mounting The Dash Cam
Mounting a dash cam involves choosing the right spot on the windshield for clear visibility. Secure the camera with adhesive or suction, ensuring it’s stable. Plug it into the car’s power source to activate recording features.
Mounting the dash cam is a key step in setting up your car camera. A securely mounted dash cam provides clear footage and reliable performance. The process involves choosing the right mounting method for your needs. Two popular methods are suction cup mounts and adhesive mounts.Using Suction Cup Mounts
Suction cup mounts are easy to install and remove. Start by cleaning the windshield area where you plan to mount. A clean surface ensures a strong suction grip. Attach the suction cup to the dash cam. Press it firmly against the windshield. Twist or lock the mount to secure it in place. Ensure the camera angle covers the road ahead. Adjust the angle as needed. Suction mounts are portable. You can move them between vehicles easily.Installing With Adhesive Mounts
Adhesive mounts offer a more permanent solution. Clean the mounting area on the windshield. Use the provided alcohol pad for best results. Peel off the adhesive backing from the mount. Position the mount on the windshield. Press firmly to secure it. Hold it in place for a few seconds. Let the adhesive bond for 24 hours before use. Adhesive mounts provide a stable hold. Ideal for those who want a lasting setup.Connecting Power Supply
Ensure the car is off before connecting the dash cam power supply. Locate the vehicle’s fuse box and use a fuse tap to connect the power cable. Secure the wiring along the interior, ensuring it doesn’t obstruct driving view or function.
Connecting the power supply is crucial for dash cam installation. It ensures your device operates seamlessly while driving. There are two main ways to connect the power supply: using the car charger and hardwiring for a cleaner setup.Utilizing The Car Charger
Using the car charger is the simplest method. Most dash cams come with a cable that plugs into the cigarette lighter socket. This makes installation quick and easy. Just plug the cable into the dash cam, then insert the other end into the car’s power outlet. The dash cam will turn on and off with the car. This method requires no tools or technical skills. It’s perfect for those who want a straightforward setup.Hardwiring For A Cleaner Setup
Hardwiring offers a sleek, cable-free look. It connects the dash cam directly to the car’s fuse box. This method keeps the power outlet free for other devices. It also allows the dash cam to record even when the car is off. Start by purchasing a hardwire kit compatible with your dash cam. Locate the car’s fuse box, usually under the dashboard or in the engine bay. Use a multimeter to find a fuse that turns on and off with the ignition. Remove the fuse and insert the fuse tap from the hardwire kit. Connect the red wire to the fuse tap and the black wire to a metal ground point. Tuck the wires neatly out of sight for a clean finish. Hardwiring requires more effort but results in a tidy and efficient setup.Routing The Cables
Routing the Cables Tuck the dash cam cables neatly along the car’s edges for a tidy look. Use tools like trim removal kits to hide them under panels. Secure with clips or ties to prevent tangling and ensure clear visibility.
Routing the cables for your car dash cam can feel like a delicate art. The goal is to install the dash cam without leaving a trace of cables dangling around, which can be both distracting and unsightly. Achieving a tidy look requires a bit of planning and patience, but the result is definitely worth it.Hiding Cables For A Neat Look
To achieve a clean and professional installation, tuck the cables into the headliner. This is the fabric section that lines the roof of your car. Gently press the cable into the crevice using a plastic pry tool or even a credit card. Make sure to route the cable down the A-pillar, which is the column on either side of your windshield. This often has a removable panel that can temporarily hide the cable. If you’ve ever wondered why car interiors look neat, it’s all about keeping cables out of sight. You can also use adhesive clips or cable concealers along the edges of the dashboard for a polished finish. Who doesn’t love a clutter-free environment, especially in a car?Avoiding Airbag Zones
While hiding cables, it’s crucial to avoid airbag zones for your safety. Airbags deploy with significant force, and any obstruction can be dangerous. Typically, the A-pillars and areas around the steering wheel are equipped with airbags. Check your car manual to identify all airbag locations. It’s better to reroute cables than risk interfering with airbag deployment. If you’re unsure about a specific area, consult a professional. Peace of mind is priceless when it comes to safety. You wouldn’t want a simple dash cam installation to compromise your car’s safety features, would you?Testing The Dash Cam
Securely mount the dash cam behind the rearview mirror. Ensure the camera lens is unobstructed for clear views. Tuck the wires neatly to maintain a tidy dashboard.
Once you’ve successfully installed your dash cam, it’s crucial to ensure it’s functioning correctly. Testing the dash cam not only verifies the installation but also guarantees that it will capture clear footage when needed. Let’s dive into how you can test your dash cam effectively to avoid any surprises later.Ensuring Proper Functionality
Start by turning on your car to power the dash cam. Observe the device to see if it boots up smoothly without any error messages. Check the display screen, if available, for clear visuals. Ensure the camera lens captures a wide view of the road ahead. You might want to take a short drive around the block to verify that the camera records seamlessly without interruptions. It’s beneficial to review the recorded footage on a computer or smartphone. Make sure the video quality meets your expectations and the audio, if enabled, is clear. Are the recordings timestamped correctly? This is vital for referencing events accurately.Adjusting Settings For Optimal Recording
Once you confirm the dash cam is functioning, it’s time to tweak the settings for the best performance. Navigate through the camera’s menu to adjust the resolution to the highest setting available for crystal-clear footage. Consider enabling features like loop recording and motion detection. Loop recording ensures continuous recording by overwriting the oldest files when the memory card is full. Motion detection can be crucial for capturing movement around your vehicle when parked. Adjust the camera angle to ensure it’s not capturing too much of the sky or dashboard. An ideal position will focus primarily on the road. Check the sensitivity settings for the G-sensor. This feature detects impacts and locks the footage to prevent it from being overwritten. Setting it too high might fill your storage with unnecessary clips, while too low might miss critical events. Find the balance that suits your driving conditions. By thoroughly testing and adjusting your dash cam, you’re setting yourself up for reliable recordings. Have you ever faced a situation where dash cam footage could have been a game-changer? Being proactive now might save you a headache in the future.
Credit: www.youtube.com
Maintaining Your Dash Cam
Ensure proper placement to capture clear footage. Secure the dash cam on the windshield for optimal view. Adjust the camera angle for wide coverage.
Maintaining Your Dash Cam Once you’ve successfully installed your dash cam, ensuring it continues to function optimally requires regular maintenance. Neglecting simple upkeep tasks can lead to performance issues or even shorten the lifespan of your device. Here’s how you can keep your dash cam in top condition.Regular Cleaning Tips
Dust and grime can accumulate on your dash cam, affecting its performance and video quality. Use a microfiber cloth to gently wipe the lens and the camera body. Avoid using harsh chemicals, as these can damage the lens coating. Inspect the mounting bracket regularly to ensure it remains secure. A loose mount can result in shaky footage. If you notice any residue build-up, consider using a mild cleaner to maintain a strong adhesive bond.Updating Firmware
Firmware updates often include critical fixes and new features that enhance your dash cam’s functionality. Check the manufacturer’s website or app for the latest updates. Keeping your firmware up-to-date ensures your camera performs at its best. Updating is usually a straightforward process. Connect your dash cam to your computer or use a mobile app, depending on the model. Follow the manufacturer’s instructions carefully to avoid potential issues during the update. Have you ever faced challenges maintaining your dash cam? Share your experiences in the comments below and help fellow readers learn from your insights.Frequently Asked Questions
How Do I Install A Car Dash Cam?
To install a dash cam, first choose the right location on your windshield. Attach the adhesive mount or suction cup securely. Connect the power cable to your vehicle’s power source, typically the cigarette lighter socket. Finally, adjust the camera angle to ensure a clear view of the road ahead.
What Tools Are Needed To Fit A Dash Cam?
Fitting a dash cam usually requires minimal tools. You may need a screwdriver to secure mounts and a trim removal tool to hide cables. Some dash cams come with all necessary installation accessories. Ensure you have these tools handy for a seamless installation process.
Can A Dash Cam Drain My Car Battery?
Most dash cams are designed to use minimal power and won’t drain your car battery. However, if your dash cam has a parking mode, it might use more power when the car is off. Consider using a battery pack or hardwiring kit to prevent battery drainage.
Where Should I Position My Dash Cam?
Position your dash cam behind the rear-view mirror for optimal visibility and minimal obstruction. Ensure it doesn’t block your view of the road. This location provides a wide field of view and captures both lanes of traffic, enhancing safety and recording quality.
Conclusion
Installing a car dash cam is simple with the right steps. Follow the guide for a secure fit. Choose a spot with a clear view. Connect power cables carefully. Ensure the camera records properly. Test the setup before hitting the road.
Regular checks keep your dash cam reliable. Safe driving starts with good preparation. Enjoy peace of mind with your new dash cam. It’s a helpful tool for capturing road events. Keep your vehicle protected. Stay informed about your surroundings. Drive confidently with a dash cam in place.