
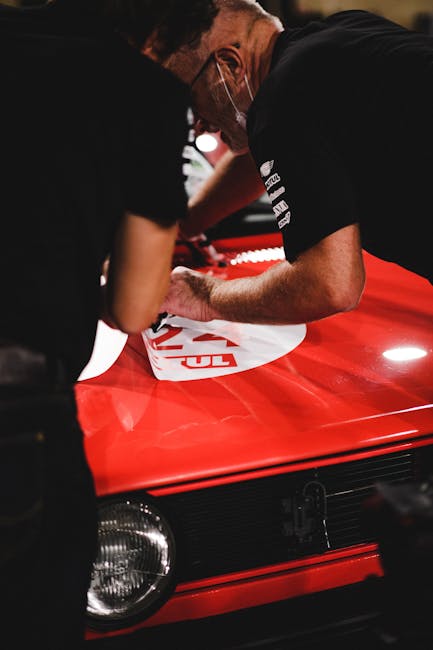
Have you ever thought about giving your car a fresh look without breaking the bank? Applying vinyl decals might be the perfect solution for you.
Whether you’re looking to express your personality or simply want to add a unique touch to your vehicle, vinyl decals can transform your car in a matter of hours. Imagine cruising down the road, turning heads with your customized design.
It’s easier than you think, and with the right guidance, you can achieve professional-looking results on your own. Intrigued? Keep reading to discover the simple steps to apply vinyl decals like a pro, ensuring they last and look stunning for years to come. Your car’s makeover awaits, and you won’t want to miss these insider tips!
Gathering Materials
Gather essential materials like a clean cloth, rubbing alcohol, and a squeegee. Ensure the vinyl decal is ready and free of dust. Have a spray bottle with soapy water for smooth application.
Gathering the right materials for applying vinyl decals to your car sets the foundation for a flawless finish. Without the right tools, you may find yourself struggling with bubbles, misalignment, or even damaging the decal. Ensuring you have everything you need beforehand can save you time and frustration.Checklist Of Essential Tools
Before you start, make sure you have a comprehensive list of tools ready. A few basic items can make the application process smooth and efficient. Here’s what you need:- Vinyl Decals:Choose quality decals that are designed for automotive use. This ensures durability and a professional look.
- Cleaning Supplies:Use a gentle car cleaner and microfiber cloth to prepare your car’s surface. This removes dirt and oils that can affect adhesion.
- Application Squeegee:A squeegee helps smooth out the decal and eliminate air bubbles.
- Masking Tape:Useful for positioning and aligning your decals.
- Measuring Tape:Ensures accurate placement of your decals.
- Heat Gun or Hair Dryer:Helps the decal conform to curves and adhere better.
Why Quality Matters
Investing in quality materials is crucial. Cheap decals might save money upfront but can fade quickly or peel off under harsh weather conditions. Opt for reputable brands that offer UV protection and durability.Prep Your Work Area
Find a clean, shaded area to work in. Direct sunlight can cause the adhesive to dry too quickly, leading to mistakes. A garage or carport is ideal for maintaining optimal conditions.Personal Experience: Learning The Hard Way
When I first applied decals to my car, I underestimated the importance of thorough preparation. I skipped the measuring tape, resulting in crooked decals that were a pain to realign. Learning from my mistakes, I now prioritize gathering all materials before starting any project. What unexpected issues have you encountered while working on your car? Having everything at hand not only speeds up the process but also ensures a professional result. So, gather your materials carefully, and you’re one step closer to having a car that stands out with stylish vinyl decals.Choosing The Right Decal
Applying vinyl decals to a car involves choosing the right design and size for smooth application. Clean the car surface thoroughly to ensure proper adhesion. Carefully position and apply the decal, smoothing out bubbles for a flawless finish.
Choosing the right decal for your car is an exciting step. The decal can express your personality or enhance your car’s look. Selecting the perfect design requires some thought and consideration. You want something that complements the vehicle without overwhelming it. Start by considering the size and color of the decal. A large decal might work well on the sides or back of the car. Smaller decals can add subtle flair to mirrors or windows. Choose a color that contrasts with your car’s paint. This ensures visibility and impact. Next, consider the decal’s design style. Do you prefer something sleek and modern or bold and artistic? Reflect on what matches your car’s aesthetic. Think about the decal’s purpose. Is it purely decorative or does it serve a functional role? Functional decals can include branding or sponsorship logos. Decorative decals might feature patterns, images, or text. Research the durability of materials. Quality vinyl decals withstand weather and washing. They maintain their appearance over time. Ensure the decal is easy to apply and remove. This avoids damage to the car’s surface.Color And Size Considerations
- Choose contrasting colors for visibility.
- Match the size with the application area.
Design Style
- Select a style that fits your personality.
- Consider modern versus artistic designs.
Purpose Of The Decal
- Decide between decorative and functional.
- Think about brand visibility if needed.
Material Quality
- Opt for weather-resistant materials.
- Check ease of application and removal.
Preparing The Surface
Clean the car surface with soap and water to remove dirt. Dry thoroughly to avoid moisture. Ensure a smooth application by using a lint-free cloth to wipe down the area with rubbing alcohol.
Before you start applying vinyl decals to your car, preparing the surface is crucial. A smooth, clean surface ensures your decals adhere properly and look flawless. It’s a bit like painting on a fresh canvas; the cleaner and smoother the canvas, the better the final masterpiece will appear. Let’s dive into the essential steps you need to take to prep your car’s surface for vinyl decal application.Cleaning The Car
Begin by washing your car thoroughly with soap and water. This removes dirt, dust, and grime that could interfere with the decal’s adhesive. Using a microfiber cloth can help avoid scratches while ensuring a spotless finish. Consider using a clay bar for extra cleanliness, as it removes embedded contaminants that a regular wash might miss.Checking For Imperfections
Inspect the car surface for any dents or scratches. Imperfections can cause bubbles or wrinkles in the decal, compromising its appearance. Use your fingertips to feel for bumps you might miss visually. A well-prepared surface is key to a professional-looking decal. What will you do if you find imperfections? Consider fixing them before applying your decals for the best results.Positioning The Decal
Positioning the Decal Choose a clean, flat surface on the car for the decal. Ensure alignment by using masking tape as a guide.
Positioning a vinyl decal on your car is crucial. Proper placement ensures your decal looks professional. It reflects your style and attention to detail. Careful positioning can make or break your car’s new look. Follow these steps for perfect placement.Measuring And Marking
Start by measuring the area where the decal will go. Use a measuring tape for accuracy. Note the dimensions of the decal and the space available. Mark the center of the area with a washable marker. This helps you align the decal evenly. Make small marks at the edges of the decal location. These marks guide your placement. Ensure they are visible, yet easy to remove.Using Tape For Alignment
Use masking tape to assist with alignment. Place a strip of tape along the top edge of the decal. Attach the tape to the car, creating a hinge. This allows you to lift and position the decal easily. Use additional tape on the sides to secure the decal. Check the alignment from different angles. Adjust the position as needed. The tape holds the decal in place while you make adjustments.Applying The Decal
Clean the car’s surface to remove dirt and dust. Position the vinyl decal carefully, ensuring it’s straight. Smooth out bubbles with a squeegee for a flawless finish.
Applying vinyl decals to your car transforms its look. The process involves several steps for a smooth finish. It’s important to approach each step with care. This ensures the decal adheres well and lasts long.Peeling The Backing
Begin by peeling the backing from the decal. Start at a corner and gently pull back. Keep the decal steady as you peel. Avoid ripping or stretching the vinyl. This step requires patience. If the decal sticks, use a sharp tool to aid peeling. Ensure the sticky side remains untouched. Clean hands prevent dirt transfer.Smoothing With A Squeegee
Use a squeegee to smooth the decal onto the surface. Start at the center of the decal. Move the squeegee outward to the edges. This prevents air bubbles and wrinkles. Apply gentle pressure for a firm stick. Work in small sections to ensure precision. Repeat the process until the decal lies flat.Removing Air Bubbles
Applying vinyl decals to a car can be exciting. Yet, air bubbles often spoil the look. These pesky bubbles can make the decal appear uneven. Fear not. Removing them is simple with the right steps.
Using A Pin
A small pin can help remove trapped air. Gently poke the bubble with the pin. Ensure you do not tear the decal. This creates a tiny escape route for air. Use your fingers to press the bubble. Push the air towards the pinhole. The bubble should disappear quickly.
Re-smoothing The Surface
After removing bubbles, re-smooth the decal. Use a squeegee or a soft cloth. Press firmly on the decal. Move from the center outwards. This helps in securing the decal. It also ensures no new bubbles form. Repeat the process as needed. Your decal should now look smooth and perfect.
Securing The Edges
Clean the car surface thoroughly before applying vinyl decals. Align the decal carefully, starting from one edge. Press firmly to secure the edges and ensure a smooth finish.
Securing the edges of vinyl decals on your car is crucial. It prevents peeling and ensures a long-lasting finish. Properly securing edges gives your car a neat appearance. This process involves careful heating and attention to detail. Follow these steps to achieve professional-looking results.Applying Heat
Using heat helps the decal adhere smoothly. A hairdryer or heat gun works best. Keep the tool moving to avoid damaging the vinyl. Warm the edges gently. This makes the material pliable. You can press it down firmly. Ensure even heat distribution for consistent adhesion.Ensuring Proper Adhesion
Firmly press the edges after heating. Use a squeegee or your fingers. This removes air bubbles. It also secures the vinyl to the surface. Check for any loose spots. Repeat the heating and pressing if needed. Proper adhesion prevents future peeling. Your decal will look seamless and professional.Final Inspection
You’ve taken the steps to apply your vinyl decals, and now it’s time for the crucial phase: the final inspection. This is your opportunity to make sure your hard work shines and your car looks as stunning as you envisioned. Think of it as the moment when all your efforts come together, and your vehicle transforms into a head-turning masterpiece.
Checking For Flaws
Begin by closely examining the decals for any air bubbles or wrinkles. These imperfections can be pesky but are often easily fixed. Use a squeegee or your thumb to gently smooth out any bubbles. If you spot any wrinkles, apply a bit of heat using a hairdryer to soften the vinyl, then smooth them out.
Look for alignment issues. Are the decals positioned as you planned? If anything seems off, make a note of it. This attention to detail will ensure your car looks professional and polished. Remember, the smallest flaw can catch the eye; so be thorough in your inspection.
Making Adjustments
Once you’ve identified any imperfections, it’s time to make adjustments. If you need to reposition a decal, gently peel it back and realign it. Vinyl is forgiving, but be cautious to avoid stretching it too much.
Consider the overall look. Does the decal blend well with the car’s color and design? If something feels out of place, don’t hesitate to tweak it. Perhaps adding a small accessory or repositioning can make a world of difference.
Stand back and admire your work from different angles. Sometimes, stepping back gives you a fresh perspective. Have you achieved the aesthetic you were aiming for? If not, what small adjustment could enhance the overall appearance?
After adjustments, do a final check under various lighting conditions. This can reveal hidden flaws that aren’t visible in just one setting. Are you confident in the decal’s placement? Your car is a reflection of your style, so ensure it’s one you’re proud to show off.
Maintenance Tips
Clean the car surface thoroughly before applying vinyl decals. Ensure it is dry and free of dust. Position the decal carefully, smoothing out any bubbles with a squeegee for a flawless finish.
Maintaining the vibrant look of your vinyl decals is just as crucial as applying them correctly. Without proper care, your decals might lose their charm or worse, start peeling off prematurely. So, how do you keep them looking fresh and new for as long as possible? Let’s dive into some essential maintenance tips to ensure your car decals remain in tip-top shape.Cleaning Around Decals
Regular cleaning around your decals is essential to prevent dirt build-up, which can affect adhesion over time. Use a soft microfiber cloth to gently wipe the area, ensuring not to lift the edges of the decal. If you encounter stubborn dirt, warm water mixed with a mild soap solution can do wonders. Just remember to rinse thoroughly and dry the area to avoid water spots. Isn’t it satisfying to see your car gleaming with clean decals? It not only boosts your car’s appearance but also extends the life of the decals.Avoiding Harsh Chemicals
Harsh chemicals can be the enemy of vinyl decals. Products like strong detergents, alcohol-based cleaners, or abrasive scrubbers can cause fading or peeling. Stick to gentle, car-friendly cleaning products. A mild soap solution is often the safest bet, ensuring your decals stay vibrant and intact. Have you ever noticed how some decals look dull and worn? Often, that’s the result of chemical exposure. By choosing the right cleaning products, you can avoid this pitfall and keep your decals looking as good as new. By incorporating these maintenance tips into your routine, you can enjoy long-lasting, eye-catching decals on your car. What will you do today to ensure your car decals stand out?Frequently Asked Questions
How To Apply A Vinyl Decal To A Car?
Clean and dry the car surface thoroughly. Peel the decal backing and position it carefully. Smooth the decal with a squeegee, removing air bubbles. Allow it to adhere for 24 hours before washing the car. Enjoy your new decal look!
Do You Apply Vinyl Decals Wet Or Dry?
Vinyl decals can be applied both wet and dry. The wet method helps with precise positioning, reducing bubbles. Dry application is quicker but requires careful alignment. Choose the method based on your comfort and the surface type. Always follow the manufacturer’s instructions for best results.
Can You Use Soapy Water To Apply Vinyl Decals?
Yes, soapy water helps apply vinyl decals smoothly. It allows for easy positioning and prevents air bubbles. Use a mild soap mix. Ensure the surface is clean before application. Adjust the decal’s position while wet. Once satisfied, squeegee out excess water.
Allow drying for a secure bond.
How To Apply Vinyl Decals Without Transfer Tape?
Clean the surface thoroughly. Peel the decal backing carefully. Position the decal on the surface. Smooth it out using a squeegee or credit card, removing air bubbles. Ensure edges are secure by pressing down firmly.
Conclusion
Applying vinyl decals is simple with the right steps. Clean the car surface thoroughly for best results. Use a squeegee to smooth out bubbles. Press firmly to ensure good adhesion. Trim excess decal for a neat finish. Check for any air pockets after application.
Enjoy your car’s new look! Vinyl decals offer a personal touch without the hassle. Anyone can do it with some patience. Follow these tips for a successful project. Now, your car stands out beautifully. Feel proud of your handiwork.