
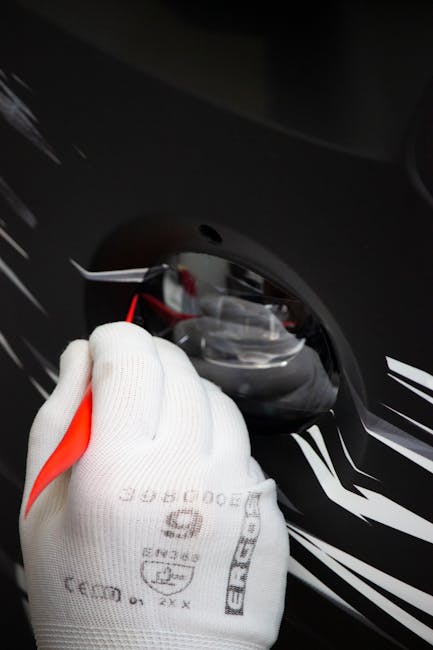
Are you ready to transform your car’s look with a touch of personality? Applying a vinyl decal is a simple yet striking way to customize your ride.
Whether it’s a sleek logo, a vibrant graphic, or a fun sticker, a vinyl decal can make your car stand out. But how do you ensure it looks perfect and lasts long? This guide is your key to mastering the art of applying vinyl decals on your car.
You’ll discover step-by-step instructions, insider tips, and common pitfalls to avoid. Get ready to create a head-turning look that reflects your style and makes your vehicle truly yours. Dive into the details below and unlock the secrets to a flawless application!
Preparation Steps
Clean the car surface thoroughly to remove dirt and grease. Measure and position the decal carefully. Smooth out any air bubbles using a squeegee, ensuring a firm adhesion.
Applying vinyl decals to your car can enhance its appearance. Proper preparation ensures a smooth and successful application. Follow these steps to achieve the best results.Choosing The Right Decal
Select a decal that suits your car’s style. Consider the size and color. Ensure it complements the vehicle’s paint. Check the quality of the vinyl. High-quality materials last longer and resist fading. Decide on the location for the decal. It should be visible but not overwhelming.Cleaning The Surface
A clean surface is essential for adhesion. Start by washing the car thoroughly. Use soap and water to remove dirt and grime. Dry the area with a lint-free cloth. Avoid leaving any moisture. Ensure the surface is smooth and free of imperfections. Use alcohol wipes for stubborn stains. This removes any remaining residue.Gathering Necessary Tools
Collect all tools before starting the application. You will need a squeegee. This helps in smoothing out air bubbles. A measuring tape ensures proper placement. Have a utility knife handy. It’s useful for trimming excess vinyl. Prepare masking tape for alignment. This helps in keeping the decal straight.Applying The Decal
Clean the car surface thoroughly and ensure it is dry. Peel the decal backing carefully and position it. Use a squeegee or credit card to smooth out any air bubbles.
Applying a vinyl decal to your car can be a rewarding DIY project that transforms its look. It involves a few careful steps to ensure the decal looks smooth and professional. Whether you’re displaying a brand logo or a personal design, getting it right is essential. Let’s dive into some practical tips to apply your vinyl decal flawlessly.Positioning The Decal
Begin by cleaning the car surface thoroughly where the decal will be placed. Any dirt or grime can prevent the decal from adhering properly. Use a mild detergent and water, then dry with a lint-free cloth. Once clean, align the decal in the desired position. Use masking tape to secure one side, creating a hinge. This allows you to flip the decal up and down to double-check its placement.Securing The Edges
After positioning, slowly peel the backing paper from the decal, starting from the taped side. Press the decal onto the surface with a squeegee or a credit card, working from the center outwards. This ensures the edges stick firmly without lifting. Take extra care at the edges, as these are prone to peeling. Firmly press down along the borders to ensure they are securely adhered to the car’s surface.Avoiding Air Bubbles
Air bubbles can ruin the look of your vinyl decal. To avoid them, press the decal onto the car slowly and evenly. Use the squeegee to smooth out any bubbles as you go. If bubbles persist, gently lift the decal and reapply. For smaller bubbles, use a pin to puncture and press them out. Remember, patience here is key to achieving a bubble-free finish. By following these steps, you can proudly display your vinyl decal, knowing it looks as good as it should. Have you tried applying a decal before? What tips would you add to this process?Finishing Touches
Applying a vinyl decal to your car is a rewarding task. After carefully placing the decal, the final steps make all the difference. These finishing touches ensure your decal looks professional and lasts longer.
Trimming Excess Material
Once the decal is applied, you might notice some extra edges. Trim these edges with a sharp blade. This gives the decal a clean and polished look. Hold the blade at a slight angle for precision. Be careful not to scratch the car’s surface. Small scissors can work for more detailed areas. This step enhances the overall appearance.
Smoothening The Surface
Check the decal for any air bubbles or wrinkles. Use a squeegee to smooth them out. Start from the center and work towards the edges. This technique helps remove trapped air. If bubbles persist, use a needle to gently pop them. Smooth the area again with the squeegee. This ensures the decal adheres properly and looks seamless.
Heat Application Techniques
Applying heat can help the decal stick better. Use a hairdryer or heat gun for this purpose. Hold the device a few inches away from the surface. Move it in a sweeping motion across the decal. Heat makes the material more flexible and adhesive. Avoid overheating to prevent damage. This step secures the decal and enhances its durability.
Maintenance Tips
Applying a vinyl decal to your car requires a clean surface. Ensure the car is washed and dried. Carefully position the decal, peel the backing, and smooth it out with a squeegee to avoid bubbles.
Maintaining your car’s vinyl decal ensures it stays vibrant and secure. Regular care prevents peeling and fading. Follow these maintenance tips for a long-lasting finish.Regular Cleaning
Clean your vinyl decal regularly to keep it looking fresh. Use a soft cloth and mild soap. Avoid harsh chemicals and abrasive materials. Rinse thoroughly with water. Dry it gently with a microfiber towel. Regular cleaning prevents dirt build-up and maintains shine.Protecting From Weather
Weather elements can harm your vinyl decal. Park your car in a shaded area. Use a car cover for added protection. Apply a UV protectant spray to shield from sun damage. This reduces fading and cracking. Weather protection preserves the decal’s appearance.Checking For Wear And Tear
Inspect your decal for signs of wear. Look for peeling edges or bubbles. Address issues immediately to prevent further damage. Use a heat gun to smooth bubbles. Reapply adhesive for peeling corners. Regular checks keep your decal in top condition.Frequently Asked Questions
How To Put A Vinyl Decal On A Car?
Clean the car surface thoroughly. Peel the decal backing carefully. Place the decal on the car, ensuring alignment. Use a squeegee to remove air bubbles. Slowly peel off the transfer tape.
Do You Apply Vinyl Decals Wet Or Dry?
Vinyl decals can be applied either wet or dry. The dry method is quicker, while the wet method allows repositioning. Choose the method based on your confidence and experience level. Both techniques ensure a smooth application when done correctly.
Can You Use Soapy Water To Apply Vinyl Decals?
Yes, using soapy water helps position vinyl decals. Wet the surface, apply the decal, and slide into place.
Will A Vinyl Decal Stick To A Car?
Yes, vinyl decals can stick to car surfaces. Ensure the area is clean and dry before application. Use a squeegee for smooth adhesion. High-quality vinyl offers durability against weather conditions. Proper installation ensures longevity and prevents peeling or fading. Always choose automotive-grade decals for best results.
Conclusion
Applying vinyl decals on your car is simple and fun. First, choose a clean and dry spot. Then, peel the decal slowly. Stick it carefully to avoid bubbles. Press firmly to secure it in place. Enjoy your car’s new look.
Show off your style with unique decals. Remember, practice makes perfect. With patience, you can enhance your car’s appearance. Get creative and experiment with different designs. Bring your vision to life. Your car can be an expression of your personality.
So, start today and transform your ride!