
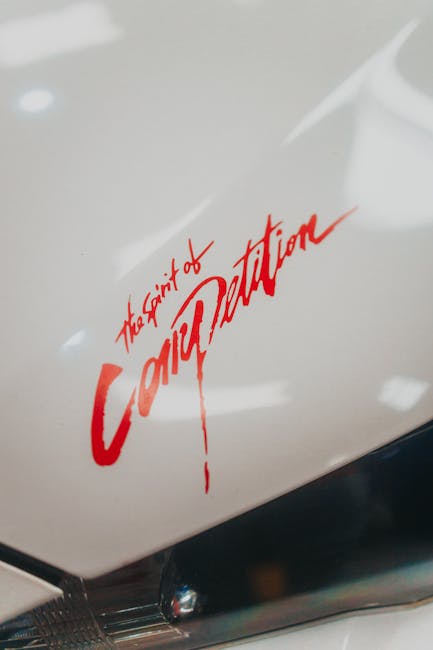
Imagine transforming your car into a reflection of your personality, turning heads and sparking conversations wherever you go. That’s the magic of car decals.
Whether you’re a sports fan, a proud parent, or just want to add some flair to your ride, applying a car decal can be an exciting way to express yourself. But how do you ensure it looks perfect? You don’t want bubbles, crooked placements, or a decal that peels off in a week.
You want your car to stand out, not for a botched job, but for a stunning decal that makes an impression. In this guide, you’ll discover simple, step-by-step instructions to apply a car decal like a pro. Imagine the satisfaction of seeing your car adorned with a decal that perfectly captures your style. As you read on, you’ll learn tips and tricks that not only save you time but also ensure your decal stays put for the long haul. So, roll up your sleeves and get ready to transform your vehicle into a moving masterpiece. Your car is about to become your canvas, and you’ll want to make sure every detail is just right.
Choosing The Right Decal
Choosing the right decal is essential for enhancing your car’s appearance. It reflects your personality and style. A well-chosen decal can make your vehicle stand out on the road. Consider the types and materials before making a decision.
Types Of Car Decals
There are various types of car decals available. Each serves different purposes and aesthetics. Popular options include:
- Bumper Stickers:Small and often humorous or political.
- Window Decals:Transparent and suitable for glass surfaces.
- Vinyl Wraps:Full or partial coverage of the car’s body.
- Magnetic Decals:Easily removable and reusable.
Choose based on your preference and the message you want to convey.
Material Considerations
Material plays a crucial role in the decal’s durability and appearance. Common materials include:
- Vinyl:Durable, weather-resistant, and versatile.
- Polyester:Thin and suitable for intricate designs.
- Magnetic:Best for temporary use and easy removal.
- Reflective:Ideal for visibility in low light.
Select a material that matches your needs and conditions. Durability and ease of application are key factors.
Preparing Your Car Surface
Clean the car surface with soap and water to remove dirt and oil. Ensure it is completely dry before applying the decal for optimal adhesion.
Applying a car decal can transform your vehicle’s appearance. The key to a successful application starts with preparing your car surface. This step ensures that your decal adheres properly and lasts longer. It involves cleaning and smoothing the area where you will place the decal. Here’s how you can prepare your car surface effectively.Cleaning The Area
Begin by washing the car where the decal will be applied. Use mild soap and water for cleaning. This removes dirt and grime that can hinder adhesion. Rinse thoroughly, ensuring no soap residues remain. Dry the area with a clean, lint-free cloth. Avoid using fabric softeners, as they can leave residues. For stubborn spots, use rubbing alcohol. Apply it with a soft cloth to remove oils and residues. This step ensures the surface is free of contaminants.Ensuring A Smooth Surface
Check for any imperfections on the car surface. Small bumps or dents can affect decal adhesion. Use sandpaper to smooth out minor imperfections. Be gentle to avoid damaging the car paint. After sanding, wipe the area clean with a damp cloth. Let the surface dry completely before applying the decal. If the surface is freshly painted, wait at least a month for the paint to cure. This prevents issues with adhesion and ensures a lasting application.Tools You Need
Gather a clean cloth, soapy water, and a squeegee. These tools help ensure smooth decal application.
To apply a car decal smoothly, you need the right tools. Having the correct equipment ensures a clean and professional finish. Let’s explore the essential tools and some optional accessories that can make the process easier.Essential Equipment
Start with a high-quality decal. It should be weather-resistant and durable. A squeegee helps remove air bubbles for a smooth finish. Use a cleaning solution to prepare the car surface. Ensure it’s free from dirt and grease. A microfiber cloth is perfect for drying the surface. Scissors come in handy for trimming excess material. Masking tape helps position the decal precisely before application.- High-quality decal
- Squeegee
- Cleaning solution
- Microfiber cloth
- Scissors
- Masking tape
Optional Accessories
Some accessories can simplify the application process. A heat gun can help the decal adhere better. Use it for complex curves and angles. Gloves protect your hands and keep fingerprints off the decal. A measuring tape ensures accurate placement. A utility knife allows precise cuts for a perfect fit. Consider using a level to align the decal correctly. These tools are not necessary but can make the task easier.- Heat gun
- Gloves
- Measuring tape
- Utility knife
- Level
Applying The Decal
Applying a car decal can give your vehicle a fresh look. With proper techniques, the decal will stick well and last long. Ensure your decal enhances your car’s aesthetic without damaging the surface.
Positioning The Decal
Start by cleaning the surface where you will place the decal. Dirt and grease can prevent the decal from sticking properly. Use a microfiber cloth for the best results. Once clean, hold the decal against the car to find the perfect spot. Make sure it is straight and aligned. You might want to step back to ensure it looks right from a distance. Use masking tape to mark the edges for guidance.
Using The Wet Or Dry Method
Decals can be applied using wet or dry methods. The dry method is simple and quick. Peel off the backing and press the decal onto the car. Smooth out any bubbles with a squeegee or credit card. For large decals, the wet method might be better. Mix water with a bit of soap in a spray bottle. Spray the area lightly before placing the decal. This allows adjustment before the decal sticks completely. Once positioned, smooth out the water and bubbles with a squeegee. Let it dry thoroughly before removing the tape.
Avoiding Common Mistakes
Applying car decals requires patience and precision. Clean the surface thoroughly to ensure proper adhesion. Avoid bubbles by slowly smoothing the decal from the center outward.
Applying a car decal might seem straightforward, but many people make mistakes that can lead to frustration and a less-than-perfect finish. By understanding some common pitfalls, you can avoid them and achieve a flawless look. Whether it’s air bubbles or wrinkles that have you worried, a little knowledge goes a long way in making the process smooth and satisfying.Preventing Air Bubbles
Air bubbles are a common annoyance when applying decals. Start by cleaning the surface of your car thoroughly to ensure no dust or grime gets trapped underneath. Use a squeegee or credit card to apply firm pressure as you smooth the decal from the center outward. Take your time and work gradually. If a bubble appears, gently lift the edge of the decal and smooth it out again. A pin can be useful for popping stubborn bubbles, but be careful not to damage the decal.Dealing With Wrinkles
Wrinkles can ruin the sleek look of your car decal. Begin by aligning the decal properly before adhering it, ensuring it’s straight and correctly positioned. Using a hairdryer on a low setting can help soften the decal, making it more pliable and easier to smooth out. If wrinkles appear, don’t panic. Carefully lift the decal and reapply it, smoothing it out as you go. Patience and precision are key; rushing can lead to more wrinkles and a less professional look. Avoiding these common mistakes not only enhances the visual appeal of your car but also boosts your confidence in DIY projects. Have you ever applied a decal and faced these challenges? Share your experiences and tips in the comments below!Finishing Touches
Applying car decals requires a clean surface and steady hands. Begin by cleaning the car area thoroughly to remove dirt. Carefully peel the decal backing, position it, and press firmly to ensure proper adhesion.
Adding the finishing touches to your car decal application can make the difference between a good and great result. These final steps ensure that your decal not only looks fantastic but also stays secure for the long haul. Let’s dive into the crucial aspects that will elevate your decal from satisfactory to show-stopping.Securing The Edges
Securing the edges is critical to prevent peeling. Use a squeegee to firmly press down the edges, ensuring they adhere well to the car’s surface. If you notice any air bubbles, gently push them out towards the edges to keep your decal smooth. Consider using a hairdryer on a low setting to slightly warm the edges. This softens the adhesive, allowing it to better conform to the car’s curves. Just be careful not to overheat, as too much heat can warp the decal.Polishing For Shine
Once the decal is securely in place, polishing it adds a professional touch. Use a soft microfiber cloth to gently buff the surface, enhancing its shine. This step not only makes your decal pop but also blends it seamlessly with the car’s paintwork. A little spray of water or a mild cleaning solution can help in removing any residue or fingerprints. Just ensure the cloth is damp, not soaking wet, to avoid any moisture seeping under the edges of the decal. Have you ever noticed how a shiny car catches your eye? That’s the magic of a well-polished finish. Take the time to polish your decal, and watch how it transforms into a head-turner on the road. By focusing on these finishing touches, your car decal will look as though it was applied by a professional, and you’ll be proud to show it off.Maintaining Your Decal
Maintaining your car decal is crucial to ensure it remains vibrant and intact over time. A well-maintained decal not only enhances your car’s appearance but also reflects your attention to detail. Let’s dive into how you can keep your decal looking fresh and new.
Cleaning Tips
Regular cleaning is key to maintaining your car decal. Use a soft cloth or sponge with mild soapy water to gently clean the decal. Avoid abrasive materials or harsh chemicals that can damage the surface.
Rinse with clean water to remove any soap residue, which can dull the decal’s finish. After washing, pat the decal dry with a microfiber cloth to prevent water spots.
Have you ever noticed how a simple wipe down can make a world of difference? Keeping your decal clean not only maintains its appearance but also extends its life.
Longevity Strategies
Protecting your car decal from the elements is essential for longevity. Park in the shade whenever possible to shield it from the sun’s harmful UV rays.
Consider applying a UV protectant spray to the decal, which acts like sunscreen for your car. This simple step can prevent fading and cracking.
Think about your driving habits. Avoid using high-pressure washes near the decal, as the force can lift edges and cause peeling. Instead, hand wash that area for a gentler clean.
By taking these precautions, you can ensure your car decal stays vibrant and securely attached for years to come. What strategies will you adopt to maintain your decal’s allure?
Frequently Asked Questions
What’s The Best Way To Put Decals On A Car?
Clean the car surface with soap and water. Dry thoroughly. Peel backing off the decal slowly. Align the decal carefully on the desired spot. Press firmly, smoothing out bubbles with a squeegee or credit card. Avoid washing the area for 24 hours to ensure proper adhesion.
Is It Better To Apply Decals Wet Or Dry?
Applying decals wet allows for easier positioning and fewer bubbles. Dry application is quicker but requires precision. Wet application is recommended for larger decals.
Can You Use Soapy Water To Apply Decals?
Yes, you can use soapy water to apply decals. It helps position and prevents bubbles. Ensure the surface is clean and dry before application. Use a squeegee to smooth the decal and remove excess water. Let it dry completely for the best results.
How Are Vinyl Decals Applied?
Clean the surface thoroughly. Peel the decal backing. Position the decal. Press firmly with a squeegee. Remove the transfer tape carefully.
Conclusion
Applying a car decal can be simple with the right steps. Start by cleaning the surface thoroughly. Ensure there are no dust or dirt particles. Slowly peel off the decal backing. Align it carefully on your car’s surface. Press down firmly to avoid bubbles.
Use a squeegee for smooth application. Finally, check all edges for secure adhesion. With patience, you can achieve a professional look. Your car will have a fresh new appearance. Enjoy your personalized ride. Celebrate your creativity every time you drive.
Remember, practice makes perfect. Keep experimenting with styles and designs.