
Imagine driving down a dark road and suddenly realizing your headlights aren’t as bright as they once were. You squint, trying to see what lies ahead, but the road remains dim.
It’s frustrating, isn’t it? You’re not alone. Many drivers face this problem, often caused by cloudy headlight covers. Over time, dirt, grime, and UV exposure can make them foggy, reducing visibility and compromising your safety. But don’t worry—there’s a simple solution.
By learning how to clean headlight covers on your car, you can restore their clarity and brightness. This guide will show you easy steps to bring back that shine, ensuring safer drives and a fresher look for your vehicle. Stick around, because your headlights deserve to sparkle!
Tools And Materials Needed
Microfiber cloths, mild soap, water, and a soft-bristled brush are essential for cleaning headlight covers. Include a polishing compound and UV sealant to enhance clarity and protection.
Cleaning your car’s headlight covers can drastically improve your visibility on the road and enhance the overall look of your vehicle. Before diving into the cleaning process, it’s essential to gather the right tools and materials. Having everything prepared not only saves time but ensures the job is done efficiently and effectively. Let’s explore what you’ll need to transform those dull, foggy headlights into clear, shining beacons.Basic Cleaning Supplies
Start with a few essential items you might already have at home. A bucket filled with warm water and a mild soap is a good foundation. You’ll also need a few soft microfiber cloths to wipe down the headlight covers without scratching them.Specialized Cleaners
For headlights that are particularly cloudy or oxidized, a specialized headlight cleaner or polish can work wonders. These products are designed to break down the grime and restore clarity. Choose a cleaner that is specifically formulated for plastic headlight covers to avoid damage.Sandpaper Or Sanding Kit
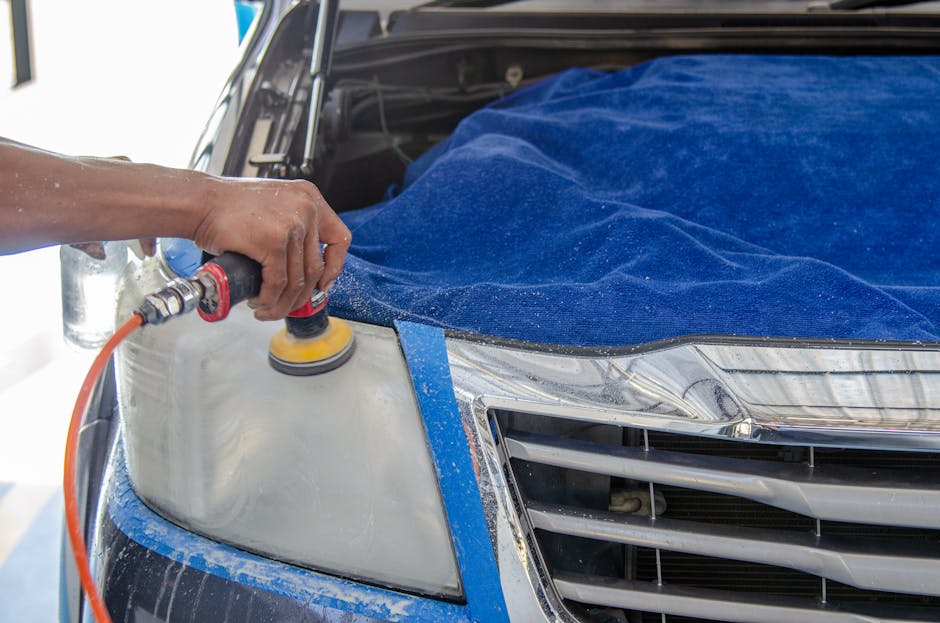
If your headlights are heavily oxidized, consider using sandpaper or a sanding kit designed for headlight restoration. Starting with a coarse grit and gradually moving to a finer grit helps smooth out the surface and remove deep-seated grime.Tape And Protective Gear
To protect your car’s paint and surrounding areas, use masking tape to outline the headlight covers. This keeps any cleaner or sanding residue from damaging the car’s finish. Additionally, safety goggles and gloves are advisable to protect yourself during the process.Optional: Uv Sealant
After cleaning, you can apply a UV sealant to keep the headlights looking clear longer. This extra step adds a protective layer that guards against future oxidation and yellowing. It’s a small investment that can make a big difference in maintaining clarity. By gathering these tools and materials, you’re setting yourself up for a successful headlight cleaning project. Do you have any tips or tools you swear by when cleaning your car’s headlights? Share your thoughts in the comments!Preparing Your Workspace
Creating a tidy workspace is essential for cleaning headlight covers effectively. Gather necessary tools like microfiber cloths, cleaning solution, and a bucket. Ensure the area is well-lit and spacious to prevent accidental damage while working on your car’s headlights.
Preparing your workspace is a crucial step in ensuring a smooth and efficient headlight cleaning process. A well-organized workspace not only speeds up the task but also minimizes the risk of accidents. Before you dive into cleaning, take a few minutes to set up your area properly.Safety Precautions
Begin by prioritizing safety. Make sure your car is parked on a flat, stable surface. Engage the parking brake to prevent any unexpected movement. Wear gloves to protect your hands from chemicals and any sharp edges. If you’re using cleaning solutions, it’s wise to wear safety goggles to shield your eyes from splashes. Good ventilation is important, especially if you’re working in a garage. Open windows or doors to allow fumes to dissipate, keeping the air fresh and breathable.Setting Up Equipment
Gather all the tools and materials you’ll need before you start. This includes a microfiber cloth, headlight cleaning solution, sandpaper, and water. Having everything within arm’s reach prevents unnecessary interruptions. Lay out a clean, dry towel on the ground next to your workspace. This provides a clean area to place your tools, preventing them from rolling away or getting dirty. Consider using a small portable light if your workspace lacks adequate lighting. Proper illumination helps you see the fine details and ensures a thorough cleaning job. Is your workspace ready for action? Taking these preparatory steps can make the difference between a quick fix and a prolonged ordeal.Cleaning Methods
Your car’s headlights are like the eyes of your vehicle, guiding you safely through the night. Yet, over time, dirt, grime, and oxidation can cloud these vital components. Keeping them clean not only enhances your car’s appearance but also ensures optimal visibility. Let’s explore some effective methods to restore clarity to your headlight covers.
Using Soap And Water
Sometimes, simplicity is key. A mixture of soap and water can work wonders on mildly dirty headlights. Grab a bucket, fill it with warm water, and add a few drops of mild dish soap.
- Dip a soft sponge or cloth into the soapy solution.
- Gently scrub the headlight covers in circular motions, ensuring you cover the entire surface.
- Rinse with clean water and dry with a microfiber cloth to prevent streaks.
Did you know that regular soap and water can remove most surface-level dirt and debris? It’s a quick fix, but what about those stubborn spots?
Commercial Headlight Cleaner
If your headlights are showing signs of severe oxidation, a commercial headlight cleaner might be your best bet. These products are specially formulated to tackle tough stains and restore clarity.
- Apply the cleaner according to the manufacturer’s instructions.
- Use a soft cloth or applicator pad to rub the cleaner onto the headlights.
- Buff the headlights with a clean cloth to reveal a shiny finish.
Have you ever wondered why commercial products often work better for deep cleaning? They’re designed to break down stubborn residues and provide long-lasting protection.
So, what cleaning method will you try first? Consider the condition of your headlights and choose the approach that suits your needs best.
Diy Solutions
Cleaning headlight covers can be simple with DIY methods. Start with a mixture of baking soda and vinegar. Apply it gently with a soft cloth, rubbing in circular motions. Rinse with warm water and dry with a microfiber towel. This will restore clarity and brightness to your headlights efficiently.
Cleaning your car’s headlight covers doesn’t have to be a costly or complicated task. With a few DIY solutions, you can tackle those cloudy, foggy covers and restore them to their former clarity. These methods use common household items, making it easy and budget-friendly to get your headlights shining brightly again. Let’s dive into some effective DIY solutions that you can try today.Baking Soda And Vinegar
Baking soda and vinegar are a classic cleaning duo that can work wonders on hazy headlights. First, gather a small bowl, some baking soda, vinegar, a clean cloth, and a spray bottle. – Mix the Cleaning Solution: Combine a few tablespoons of baking soda with just enough vinegar to form a paste. This mixture will fizz, but don’t worry—that’s the cleaning power in action! – Apply and Rub: Use the cloth to spread the paste over the headlight covers. Rub in a circular motion, applying slight pressure to remove grime and oxidation. – Rinse and Dry: Once you’ve scrubbed the surface thoroughly, spray the headlights with water to rinse off the paste. Dry with a clean cloth to reveal your freshly cleaned headlights. This method is not only effective but also a testament to the power of natural cleaning solutions. Have you ever thought such a simple kitchen staple could be so versatile?Toothpaste Method
You might be surprised to learn that toothpaste isn’t just for your teeth—it can also be a quick fix for cloudy headlights. – Choose the Right Toothpaste: Opt for a non-gel toothpaste with mild abrasives, such as baking soda varieties. These ingredients can help scrub away the dull layer on your headlights. – Apply the Toothpaste: Squeeze a generous amount onto a clean cloth and rub it onto the headlight covers. Use a circular motion and cover the entire surface. – Rinse and Buff: After about five minutes of scrubbing, rinse the headlights with water. Buff them with a dry cloth to enhance clarity. The toothpaste method is a go-to for many car enthusiasts and a handy trick to know. Did you ever imagine that a bathroom essential could double as a car care product? These DIY solutions are not only simple but also satisfying. With just a few household items, you can achieve professional-looking results. Next time your headlights need a refresh, remember these easy tricks that put you in control of your car’s maintenance.Polishing And Finishing
Maintaining headlight clarity involves careful polishing and finishing techniques. Start with a gentle cleaning solution to remove dirt. Use a soft cloth to apply polish, then buff for a smooth finish.
Polishing and finishing are crucial for clear headlight covers. This process not only improves visibility but also enhances the car’s appearance. By following simple steps, you can achieve a polished, finished look.Applying Polish
Choose a quality polish designed for headlights. Apply a small amount onto a clean cloth. Spread it evenly over the headlight cover. Ensure full coverage for the best results. Let the polish sit for a few minutes. This allows it to bond with the surface.Buffing Techniques
Use a microfiber cloth for buffing. Move the cloth in circular motions. Apply light pressure to avoid scratches. Make sure to cover all areas evenly. Buff until the headlight shines bright. Repeat the process if needed for clarity.Maintaining Clear Headlights
Clear headlights are crucial for safe driving, especially during those late-night adventures or when the weather takes a turn for the worse. Over time, headlight covers can become cloudy or yellowed, significantly reducing visibility. You might not even realize how much your driving experience is compromised until you clean them. Maintaining clear headlights isn’t just about aesthetics; it’s about ensuring your safety and the safety of others on the road. Let’s dive into some practical ways to keep those headlight covers shining brightly.
Regular Cleaning Schedule
Having a regular cleaning schedule for your headlights can make a world of difference. How often do you notice grime building up on your headlights? A simple wipe-down every few weeks can prevent buildup and keep your lights clear.
- Use a mild soap and water solution for regular cleaning.
- Consider investing in a microfiber cloth to avoid scratches.
- Don’t forget to clean after long road trips where dust and bugs are inevitable.
By sticking to a routine, you won’t have to worry about sudden cloudiness affecting your drive. Could you imagine driving through a foggy night with dim headlights?
Protective Coatings
After cleaning, applying a protective coating can help maintain clarity. These coatings act as a shield against UV rays and dirt, prolonging the lifespan of your headlights.
- Choose a high-quality UV protection spray to prevent yellowing.
- Consider wax-based products for added shine and protection.
- Ensure the coating is applied evenly for maximum effectiveness.
Ever thought about how much time you’d save by preventing buildup rather than constantly cleaning? Protective coatings might be the answer. Not only do they keep your headlights gleaming, but they also reduce the need for frequent cleanings.
Frequently Asked Questions
How To Clean Cloudy Car Headlight Covers?
Use toothpaste on a damp cloth to scrub headlights. Rinse, then dry with a microfiber towel for clarity.
Does Wd-40 Clean Headlights?
Yes, WD-40 can clean headlights. It helps remove oxidation and dirt, making them clearer temporarily. For long-term results, consider a dedicated headlight restoration kit.
Will Magic Eraser Clean Foggy Headlights?
Yes, a magic eraser can clean foggy headlights. Gently scrub the surface to remove oxidation and grime. Ensure to rinse thoroughly and dry for best results. Regular maintenance helps keep headlights clear and bright.
How To Clean Plastic Headlight Protectors?
Clean plastic headlight protectors using mild soap and water. Gently scrub with a microfiber cloth. Rinse thoroughly and dry with a soft towel. For stubborn grime, use a plastic-safe cleaner. Regular maintenance prevents discoloration and scratches. Avoid harsh chemicals to preserve clarity and longevity.
Conclusion
Bright headlights make driving safer. Clean headlight covers improve visibility. Regular maintenance keeps them clear. Remove dirt and grime often. Use the right products. Follow simple steps. Sanding and polishing work wonders. Protect headlights from future damage. Clear covers enhance your car’s look.
Enjoy safer night drives. Clean headlights also boost confidence. Say goodbye to foggy lights. Your car deserves the best care. Clear headlights mean a brighter road ahead. Keep them shining, keep driving safe. Now, you know how to clean headlight covers.
Start today and see the difference!