
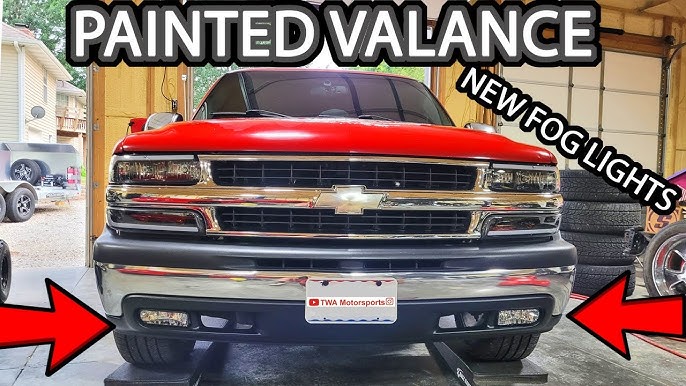
Are you tired of driving with limited visibility during foggy conditions or in the dead of night? Installing aftermarket fog lights on your car can be a game changer.
Not only do these lights enhance your safety, but they also add a touch of style to your vehicle. You might think it’s a complicated task meant only for seasoned mechanics, but with the right guidance, you can easily tackle this project yourself.
Imagine the satisfaction of upgrading your car and driving with confidence, knowing you’ve made it safer for you and your loved ones. Dive into this article to discover a step-by-step guide that will make the installation process straightforward and stress-free. It’s time to take control and illuminate your path!
Credit: www.toyotanation.com
Choosing The Right Fog Lights
Installing aftermarket fog lights enhances visibility in adverse weather. Begin by selecting the correct lights for your car model. Follow manufacturer instructions for wiring and mounting to ensure proper installation.
Choosing the right fog lights can make a big difference in visibility. Not all fog lights suit every car, so choose wisely. Assess your needs before making a purchase. Consider factors like the type of fog lights and their compatibility with your vehicle. This section will guide you through making an informed decision.Types Of Fog Lights
Fog lights come in various types, each with unique features. Halogen fog lights are common and affordable. They provide adequate visibility in foggy conditions. LED fog lights offer brighter light and longer lifespan. They consume less power and are more efficient. HID fog lights produce a strong, white light. They are ideal for extreme weather conditions but may be more expensive. Choose the type that best fits your driving needs and budget.Compatibility With Your Vehicle
Ensure the fog lights are compatible with your car. Check the size and shape of the fog light housing. Some vehicles may require specific fittings or brackets. Review your car’s manual to understand the electrical system. Some fog lights need additional wiring or adapters. Consult with a professional if unsure about compatibility. Proper fitment ensures optimal performance and safety on the road.Gathering Necessary Tools
Installing aftermarket fog lights on your car can significantly enhance visibility during harsh weather conditions. However, diving into this DIY project without the right tools can lead to frustration and incomplete work. Gathering the necessary tools ensures a smooth installation process and saves you from multiple trips to the hardware store.
Essential Tools List
To get started, you’ll need a few basic tools that are common in most households, as well as some specialized equipment:
- Screwdrivers:Both Phillips and flat-head types for removing panels and fixing screws.
- Socket Set:Essential for loosening and tightening bolts.
- Wire Strippers:Crucial for safely handling electrical wiring.
- Drill:Handy for mounting brackets if required.
- Multimeter:Useful for checking electrical connections.
- Zip Ties:For securing wires and preventing them from dangling.
Missing any of these? You might want to consider borrowing from a friend or heading to the nearest hardware store. The right tools can make or break your installation process.
Safety Equipment
Your safety is paramount when working on a vehicle. Here’s what you should have on hand:
- Gloves:Protect your hands from sharp edges and electrical shocks.
- Safety Glasses:Keep your eyes safe from debris and accidental splashes.
- Work Light:A bright, portable light ensures you can see clearly, especially when working in tight spaces.
Investing in proper safety gear not only protects you but also boosts your confidence as you work. Have you ever tried fixing something only to realize you forgot to wear gloves? It’s those little things that can make a huge difference.
By preparing with the right tools and safety equipment, you’re setting yourself up for success. What do you think is the most overlooked tool or piece of equipment for car modifications? Share your thoughts below!
Preparing Your Vehicle
Ensure your vehicle is parked safely and turned off. Gather tools like screwdrivers, wiring kits, and fog lights. Follow the installation manual closely for step-by-step guidance to attach and connect the fog lights securely.
Preparing your vehicle is crucial before installing aftermarket fog lights. Proper preparation ensures a smooth installation process and helps avoid damage. This stage involves setting up your car in the right way and taking safety precautions. Let’s dive into the key steps for preparing your vehicle.Parking And Positioning
Begin by parking your vehicle on a level surface. This ensures stability while working. Use wheel chocks to prevent the car from moving. Make sure the car is in “Park” or in gear, with the parking brake engaged. Adequate space around the car is essential. It provides room to move and work comfortably.Disconnecting The Battery
Safety first. Disconnect the car battery to prevent electrical shocks. Locate the battery, usually found in the engine bay. Remove the negative terminal first. This minimizes the risk of a short circuit. Use a wrench to loosen the nut, then gently lift off the cable. Ensure the cable is safely away from the battery. Repeat the process for the positive terminal if necessary. This step protects both you and the vehicle’s electrical system.Mounting The Fog Lights
Mounting aftermarket fog lights enhances visibility during foggy conditions. Begin by gathering necessary tools and reading the fog light manual. Securely attach the lights to the bumper and connect the wiring harness. Ensure proper alignment for optimal performance.
Mounting the fog lights on your car is a crucial step in ensuring they’re both functional and aesthetically pleasing. It’s not just about screwing them into place; it’s about finding the right balance between practicality and style. You’ll want to choose locations that not only enhance visibility but also complement your car’s design.Identifying Mounting Locations
Before you start drilling holes, take a moment to study your car’s front end. Look for spots that provide a clear path for the beam without obstruction. Consider areas near the grille or beneath the bumper as potential locations. Are there existing brackets or holes that can be repurposed? Using these can save time and preserve your car’s aesthetics. Remember, the goal is to enhance visibility, so ensure the fog lights are positioned to effectively illuminate the road during foggy conditions.Securing The Fog Lights
Once you’ve identified the perfect spots, it’s time to secure the fog lights. Grab your tools and ensure you have the right screws and brackets. Use sturdy brackets to avoid vibrations and potential damage. Double-check the alignment. Are the lights pointing in the right direction? Adjust them if needed to ensure they illuminate the road efficiently. Finally, tighten the screws firmly. You don’t want them coming loose while driving. A snug fit ensures longevity and stability. Have you considered how the new lights impact your car’s look? Sometimes, small adjustments make a big difference.Wiring The Fog Lights
Wiring the fog lights requires careful connection to the car’s electrical system. Begin by disconnecting the battery to ensure safety. Then, route the wiring harness to the fog light location, securing it with zip ties. Finally, connect the wiring harness to the fog lights and battery, ensuring all connections are tight and secure.
Wiring the fog lights is a crucial step when installing aftermarket fog lights on your car. It can seem daunting, but with a little patience and attention to detail, you can successfully connect your new lights. Taking the time to do it right ensures that your fog lights will work efficiently and safely, enhancing your nighttime and poor weather driving experience. A few years back, I decided to install fog lights on my older sedan. I was amazed at how much better I could see on foggy mornings once I got them working. Let’s dive into the process to get your fog lights connected and ready to go.Connecting To The Electrical System
Begin by identifying a suitable power source. Most often, the car’s battery is the best choice for a reliable power connection. Ensure the car is off and the keys are out of the ignition before you start. Use a fuse tap to connect the fog lights to an existing circuit. This ensures that the lights are protected by a fuse, preventing potential electrical overload. Make sure the circuit you choose is not overloaded by other accessories. Next, connect the ground wire. Attach it to a metal part of the car’s body using a ring terminal and a bolt. A clean and secure connection is essential for the fog lights to function properly.Using Relays And Switches
Relays are critical for ensuring your fog lights receive the correct voltage without overwhelming your electrical system. Connect a relay between the power source and the fog lights. This component acts as a switch to control the power flow. Install a switch inside the vehicle to control the fog lights. Consider placing it somewhere accessible, like near the dashboard. This way, you can easily turn the lights on and off as needed. When running wires through the firewall, take precautions to avoid damaging them. Use a grommet to protect the wires and prevent any potential short circuits. Have you ever considered how a simple switch can enhance your car’s functionality? By properly wiring relays and switches, you ensure safe operation while adding a touch of convenience. Following these steps, your aftermarket fog lights will be wired correctly, enhancing both safety and aesthetics on the road.
Credit: www.facebook.com
Testing The Installation
Verify the aftermarket fog lights by turning them on. Check brightness and alignment to ensure proper installation. Adjust as needed for optimal visibility and safety.
Testing the installation of your newly added aftermarket fog lights is crucial to ensure they function correctly and safely. After spending time on the installation, the last thing you want is to find out they’re not working when you need them most. This is the moment of truth—where you see the results of your hard work illuminate the night.Checking Light Functionality
Once you’ve installed the fog lights, it’s time to make sure they’re working properly. Start your car and switch on the fog lights. Check each light to ensure it turns on without flickering. If one or both lights don’t work, recheck the wiring connections and fuses, as these are common culprits. Ask yourself: Are the lights as bright as expected? Sometimes, a dim light indicates poor power supply or a faulty bulb. Adjust the connections and, if necessary, replace the bulb to achieve optimal brightness.Adjusting The Beam Angle
It’s not just about having working lights; they need to be adjusted correctly for maximum effectiveness. Park your car on a level surface facing a wall or garage door about 25 feet away. Turn on the fog lights and observe the beam pattern on the wall. The beams should be low and wide, illuminating the road directly in front of your car without blinding oncoming traffic. Use a screwdriver to adjust the mounting brackets if needed. This ensures the light spreads evenly and covers the necessary area. Have you ever driven in foggy conditions with poorly adjusted lights? Properly angled beams can make a significant difference in visibility, enhancing safety during challenging driving conditions. Spend a few extra minutes on this step to ensure your safety and the safety of others on the road.Final Adjustments
You’ve successfully installed your aftermarket fog lights, but the journey doesn’t end there. Final adjustments are crucial to ensure your lights function optimally and safely. Let’s dive into the last steps to wrap up your installation process.
Ensuring Stability
Stability is key for your fog lights to withstand the test of time and road conditions. Double-check all mounting brackets and screws. Are they tightened firmly? A loose bracket can lead to vibrations, impacting light performance.
Consider how secure the wiring is. Use zip ties to keep wires from dangling and potentially snagging on other components. This simple step can save you from future headaches.
Imagine driving through a bumpy road. You’d want your fog lights to stay put, wouldn’t you? Ensuring stability now prevents those unsettling rattles and potential damages.
Reconnecting The Battery
With the physical installation complete, it’s time to give your fog lights power. Reconnect the battery, ensuring the terminals are clean and securely fastened. A poor connection could mean flickering lights or, worse, no lights at all.
After reconnecting, test the lights to confirm they illuminate properly. Is the beam pattern as expected? Adjust if necessary to avoid blinding other drivers while maximizing visibility.
Are your fog lights ready for their maiden voyage? With everything reconnected, you’re set to tackle even the foggiest of drives with confidence and clarity.

Credit: www.youtube.com
Maintenance Tips
Installing aftermarket fog lights can enhance your car’s visibility and style. Once installed, proper maintenance ensures they function well and last long. Here are some essential tips to keep your fog lights in top condition.
Cleaning The Fog Lights
Regular cleaning keeps your fog lights clear and bright. Use a soft cloth and gentle soap to wipe them. Avoid harsh chemicals that can damage the lens. Rinse with water and dry with a microfiber cloth. This prevents streaks and ensures maximum clarity.
Regular Inspections
Inspect your fog lights frequently. Check for cracks, moisture, or loose connections. These issues can affect performance and lead to bigger problems. Address any damage immediately to avoid further complications. Ensure all screws and mounts are secure.
Frequently Asked Questions
Can I Install Fog Lights On A Car That Didn’t Come With Them?
Yes, you can install fog lights on a car without them. Choose compatible lights and follow installation instructions. Ensure wiring and mounting are secure. Check local regulations for legal compliance. Consider professional installation for optimal safety and performance.
How To Install Aftermarket Led Fog Lights?
Start by disconnecting the battery for safety. Remove the old fog lights and mount the new LED ones. Connect the wiring harness to the lights and the vehicle. Secure everything and test the lights to ensure proper functioning. Reconnect the battery and ensure all connections are tight.
Where Do You Connect The Power Wire For Fog Lights?
Connect the fog lights’ power wire to the vehicle’s battery or fuse box using a relay. Ensure proper grounding and use an inline fuse for safety. Check the car’s manual for specific wiring diagrams. Secure all connections to prevent any damage or short circuits.
Can I Install My Own Fog Lights?
Yes, you can install fog lights yourself. Ensure you have the right tools and follow the vehicle’s manual. Proper installation improves visibility and safety. Consider consulting a professional if unsure about wiring or compatibility. Always check local regulations regarding fog light usage and installation.
Conclusion
Installing aftermarket fog lights is a rewarding project. It enhances safety and style. With basic tools, anyone can do it. Follow the steps carefully. Check connections and test the lights. Ensure everything works properly. Remember to aim the lights correctly.
This prevents blinding other drivers. Fog lights improve visibility in bad weather. They add a unique look to your car. Enjoy the improved driving experience. Feel confident on foggy nights. Safety and style, all in one upgrade.