
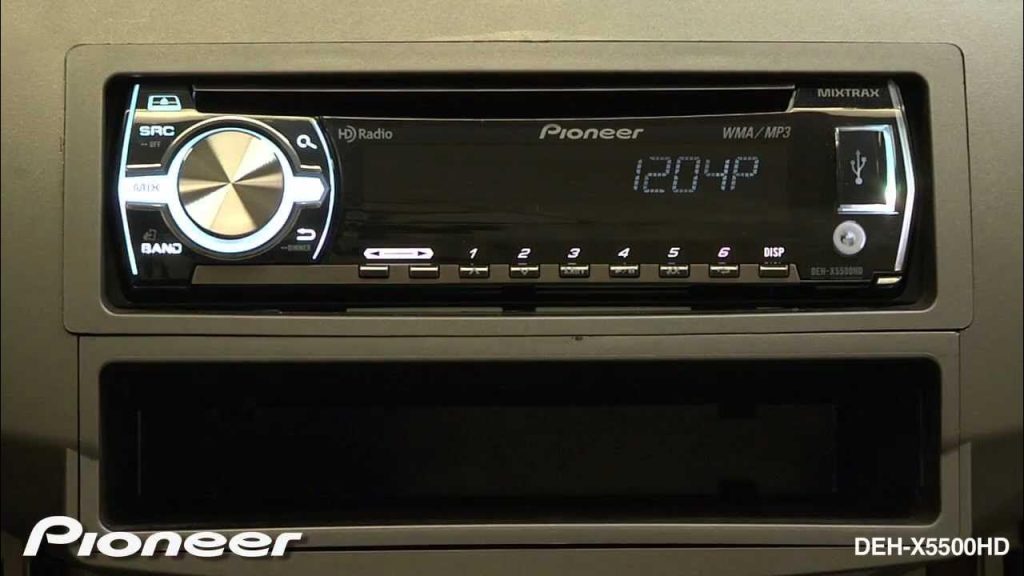
Imagine cruising down the highway with your favorite tunes, but something feels off. You glance at your Pioneer car stereo, and the time is wrong.
Frustrating, right? You deserve a perfect drive, where everything, including the time, is in sync. Setting the time on your Pioneer car stereo might seem daunting, but it’s easier than you think. In this guide, you’ll discover simple steps to ensure your stereo displays the correct time, enhancing your driving experience and ensuring you never miss a beat.
Dive into this article, and you’ll have your Pioneer stereo perfectly set up in no time, making your rides smoother and more enjoyable.

Credit: www.youtube.com
Understanding Your Pioneer Car Stereo
Setting the time on a Pioneer car stereo is simple. Begin by turning on the stereo and accessing the menu. Use the arrow buttons to find the clock setting option, adjust the hours and minutes, then confirm the changes.
Understanding your Pioneer car stereo can open up a world of audio enjoyment while driving. Whether you’re cruising down the highway or stuck in traffic, having the right settings can enhance your experience. Knowing how to set the time is just the beginning of mastering your stereo.Models And Features
Pioneer offers a variety of car stereo models, each packed with unique features. From the basic single-DIN units to advanced touchscreen systems, there’s something for every audio enthusiast. Familiarize yourself with your specific model by checking the manual or the model number, usually found on the front panel or the side of the unit. Some models come with features like Bluetooth connectivity, USB ports, and even support for Apple CarPlay or Android Auto. These features can greatly impact how you interact with your stereo, so it’s worth exploring what your model offers.Basic Controls
Understanding the basic controls is essential for setting the time and accessing other features. Most Pioneer stereos have a power button, volume knob, and a menu or setup button. The menu button is your gateway to all the settings, including time adjustment. Typically, you’ll need to press and hold it to enter the settings menu. Look for options like “Clock” or “Time” once you’re in the settings menu. Use the volume knob or directional buttons to adjust the hours and minutes. It’s a simple process, but finding the right buttons can be tricky if you’re not familiar with the layout. Have you ever struggled to find the right button while driving? Taking a few minutes to understand your stereo’s layout can save you from distractions on the road.Preparing To Set The Time
Setting the time on your Pioneer car stereo might seem like a small task, but it can be surprisingly tricky without the right guidance. Before diving into the process, preparation is key. Just like any device, knowing the specific model and having your stereo powered on ensures a smooth setup. Let’s walk through these essential steps to get your stereo ready for time adjustment.
Gathering Necessary Information
First, identify the model of your Pioneer stereo. You might wonder why this is crucial. Well, different models have unique interfaces and button layouts. Knowing your model helps you find the right manual or online guide tailored to your device.
Keep your stereo manual handy. It often contains valuable instructions specific to your device. If the manual is lost, a quick online search with your model number can lead you to digital versions.
Powering On The Stereo
Ensure your car is in accessory mode. This allows the stereo to turn on without draining the car battery. If you’ve ever had a dead battery from leaving the car on, you know how frustrating it can be.
Turn the stereo on by pressing the power button. It might seem obvious, but sometimes the simplest steps are overlooked in haste. Once powered, your stereo is ready for the next steps in setting the time.
Do you ever find yourself staring at a blinking screen, unsure of the next move? With these preparations, you can approach the task with confidence and ease. Ready to proceed?
Accessing The Time Settings
Adjusting the time on a Pioneer car stereo is simple. Access the menu by pressing the ‘Menu’ button. Navigate to ‘System Settings’ and select ‘Clock Set’. Use the arrow keys to change the hour and minutes. Confirm the settings by pressing ‘Enter’ to save the changes.
Accessing the time settings on your Pioneer car stereo might seem like a daunting task, but with a bit of guidance, you’ll find it’s quite straightforward. Imagine you’re on a road trip, and every minute counts; having the correct time displayed can make all the difference in planning your stops. Whether you’re adjusting for daylight saving or just setting the clock after a battery change, knowing how to access and navigate the time settings efficiently is essential.Navigating The Menu
The first step to accessing the time settings on your Pioneer car stereo involves navigating the menu. You’ll want to locate the ‘Menu’ button, typically found on the front panel of the stereo. Pressing it should bring up a list of options on the display screen. Once you see the menu options, the key is to use either the arrow keys or the rotary knob to scroll through the choices. This might remind you of scrolling through radio stations back in the day, but instead, you’re hunting for a specific setting. Keep an eye out for the ‘System’ or ‘Settings’ option, as this is usually where time settings are nestled. Have you ever wondered why manufacturers tuck these settings away? It’s all about keeping the interface clean and focused on entertainment.Locating The Clock Option
After navigating the menu, your next challenge is locating the clock option. It’s typically labeled as ‘Clock Set’ or simply ‘Clock,’ depending on your stereo model. This is where the magic happens. Select the clock option by pressing the corresponding button or pushing the rotary knob. You might feel like a safecracker as you adjust the hour and minute settings—turning the knob to set the correct time. Remember, the key is patience. If you’ve ever set a microwave clock, you know the precision needed. Adjusting your stereo’s clock is similar, but with the added bonus of your favorite tunes accompanying your efforts. Once set, confirm your changes by pressing the button again. It’s a simple action that locks in the time, ensuring you’re always on schedule. Have you ever thought about how a simple setting can impact your day? Next time you glance at your car stereo’s clock, consider it your co-pilot in time management.
Credit: www.youtube.com
Adjusting The Time
Setting the time on a Pioneer car stereo is simple. Begin by turning on the stereo, then press and hold the “SRC” button. Use the arrow keys to select “Clock,” adjust the hours and minutes, and confirm with the “OK” button.
Adjusting the time on your Pioneer car stereo might seem like a mundane task, but it’s essential for ensuring that you’re not running late for appointments or missing out on your favorite radio shows. Whether you’ve just installed a new stereo or have been using it for years, keeping the correct time is crucial. Imagine cruising down the highway, listening to your favorite tunes, and knowing you’re perfectly on schedule. It’s a small detail that can make a big difference in your daily routine. Let’s dive into how to set the hours and minutes on your Pioneer stereo, ensuring you always know the right time.Setting Hours
Setting the hours on your Pioneer car stereo is straightforward. Start by locating the ‘Clock’ button on the stereo interface. Press and hold it until the time display blinks, indicating it’s ready for adjustment. Use the volume knob to adjust the hours. Rotate it clockwise to increase the hour and counterclockwise to decrease it. Make sure you’re setting it to the correct AM or PM setting. A common mistake is setting the hour to PM instead of AM, especially if you’re doing this early in the morning. Double-check to ensure the time reflects the right part of the day.Setting Minutes
Now that the hours are set, let’s move on to the minutes. After adjusting the hours, press the ‘Clock’ button once more to switch to minute adjustment mode. Rotate the volume knob again, just like you did with the hours, to set the minutes. Precision is key here, especially if you rely on your stereo for keeping track of time during commutes or tasks. Once you’ve set the correct minutes, press the ‘Clock’ button one last time to lock in your settings. You’ve successfully adjusted the time, and now your Pioneer stereo is perfectly synchronized with your schedule!Saving And Exiting
Access the settings menu on your Pioneer car stereo. Adjust the time using the hour and minute buttons. Save changes and exit to finalize the new time setting.
Setting the time on a Pioneer car stereo involves a few simple steps. Once you’ve adjusted the settings, it’s crucial to save and exit properly. This ensures your changes are stored and your stereo functions correctly. Follow these easy steps to confirm your changes and exit the menu seamlessly.Confirming Changes
Double-check the time you set. Make sure it matches your current time. Press the confirmation button on your stereo. This saves your settings. It’s usually labeled as “Enter” or “Select.” Confirming helps avoid errors. So, ensure everything is correct before exiting.Exiting The Menu
Find the exit option on your stereo display. It might say “Exit” or “Return.” Press this button to leave the menu. Your stereo should return to regular mode. This step finalizes the process. You’ll know it’s successful when the display shows the correct time.Troubleshooting Common Issues
Setting the time on a Pioneer car stereo is straightforward. Press and hold the “SRC” button to power on. Use the “MULTI-CONTROL” knob to select and adjust the clock settings easily.
Troubleshooting issues with your Pioneer car stereo can be a bit challenging. Sometimes, even after setting the time, you might face problems. These common issues can disrupt your driving experience. Let’s explore some frequent troubles and their solutions.Time Not Saving
The time not saving might be due to a power interruption. Ensure the stereo has a constant power supply. Check if all connections are secure and tight. Verify the battery condition; it might need replacement. Sometimes, resetting the stereo can solve this issue. Hold the reset button for a few seconds and set the time again.Incorrect Time Display
An incorrect time display can be caused by wrong settings. Confirm the time zone is correctly set in the stereo settings. Double-check the AM/PM setting to ensure accuracy. A software glitch may also cause display issues. Updating the stereo’s firmware often resolves such glitches. Make sure the stereo’s software is up to date. If problems persist, consult the user manual for further guidance.Tips For Maintaining Accurate Time
Ensure your Pioneer car stereo displays the correct time by accessing the clock settings menu. Adjust the hours and minutes using the designated buttons or dial to set the accurate time. Confirm the changes to keep your car’s stereo clock precise and reliable.
Setting the time on your Pioneer car stereo is a simple task, but maintaining accurate time requires a bit more attention. Whether it’s for ensuring you’re always on schedule or just to keep your car’s dashboard looking tidy, accurate timekeeping is essential. Here are some practical tips that can help you keep the time on your Pioneer stereo precise.Regular Adjustments
Regularly checking and adjusting the time on your stereo is crucial. Over time, even digital clocks can drift slightly. Make it a habit to verify the time displayed on your car stereo with your phone or another reliable clock. A quick check during your morning routine or while waiting at a traffic light can keep your stereo’s time accurate. Don’t wait for the clock to be noticeably off before making adjustments.Utilizing Daylight Saving Settings
Daylight saving time can easily throw off your schedule if your stereo doesn’t adjust automatically. Pioneer stereos often come with a feature to handle this transition smoothly. Check your stereo’s manual for instructions on activating the daylight saving settings. This small step can save you from the hassle of manual adjustments twice a year. Have you ever missed an important appointment because your clock was off by an hour? Ensuring your stereo is set to account for daylight saving time can prevent such mishaps.
Credit: usa.pioneer
Frequently Asked Questions
How Do I Set The Clock On My Pioneer Stereo?
To set the clock on your Pioneer stereo, turn on the unit and press the “Clock” button. Use the “Up” or “Down” arrow keys to adjust the hours and minutes. Press “Enter” or “Clock” again to save the changes. This ensures your stereo displays the correct time.
Why Is My Pioneer Car Stereo Time Wrong?
Your Pioneer stereo may display the wrong time due to power interruptions or incorrect settings. Reset the clock using the manual method. Regularly updating your stereo’s firmware can also help prevent timekeeping issues. Follow the manual instructions for accurate time settings.
Can I Set Pioneer Stereo Time Automatically?
Most Pioneer stereos require manual time setting. However, some advanced models may sync time automatically via GPS or RDS. Check your stereo’s manual to see if your model supports automatic time updates. If it does, ensure the feature is activated in the settings menu.
Is There A Reset Button For Pioneer Stereo Clock?
Most Pioneer stereos do not have a dedicated reset button for the clock. However, you can reset the clock by accessing the time settings menu. Follow the instructions in your stereo’s manual to adjust the time. This will ensure the clock displays the correct time.
Conclusion
Setting the time on your Pioneer car stereo is simple. Follow the steps patiently. Adjusting the clock enhances your driving experience. A precise clock helps plan your day better. Remember, each stereo model might vary slightly. Always refer to your manual for specifics.
With a little practice, you’ll feel confident in making adjustments. Enjoy your music and stay punctual. A well-set stereo clock keeps you on track. Share this guide with friends needing stereo help. Happy driving and enjoy your tunes!