
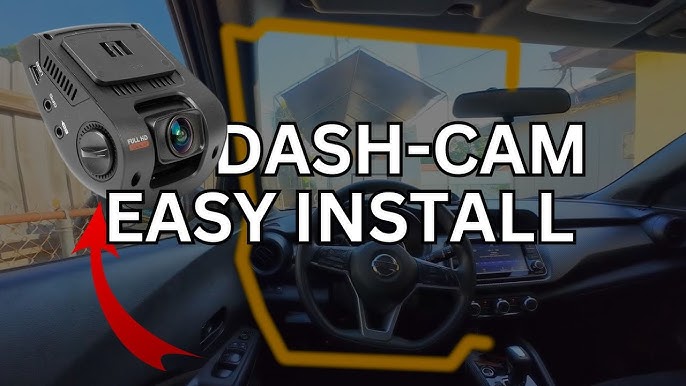
Imagine driving with an extra layer of security, knowing that every moment on the road is being recorded. Dash cams are your silent witnesses, capturing unexpected events and safeguarding your journey.
But fitting a dash cam in your car might seem like a daunting task. How do you ensure it’s placed correctly? What if you miss a crucial step and it doesn’t work properly? You’re not alone in these concerns. Many drivers share your hesitation, but here’s the good news: installing a dash cam is easier than you think.
In this guide, you’ll discover simple steps to fit your dash cam perfectly, enhancing your driving experience without the stress. Ready to unlock this safety feature and enjoy peace of mind on every drive? Let’s dive in and make your car smarter and safer.
Credit: medium.com
Benefits Of Installing A Dash Cam
Secure your vehicle with a dash cam to capture real-time footage. It serves as a reliable witness in accidents, provides evidence, and can lower insurance costs.
Installing a dash cam in your car can seem like just another tech upgrade, but its advantages go far beyond capturing scenic drives. A dash cam offers peace of mind, security, and even potential savings. Whether you’re a frequent traveler or simply want to enhance your vehicle’s safety, understanding these benefits can help you make an informed decision.Enhanced Security
Having a dash cam installed can significantly enhance your car’s security. It acts as a vigilant eye, continuously recording the surroundings. If your vehicle is vandalized or involved in a hit-and-run, you have a reliable witness to back your claims.Accident Evidence
In the unfortunate event of an accident, a dash cam can be your best ally. It provides clear, unbiased footage that can clarify fault in ambiguous situations. Imagine the relief of having video evidence to support your story when dealing with insurance companies.Fraud Prevention
Dash cams can deter fraudulent claims, such as staged accidents or false pedestrian accidents. Knowing that their actions are being recorded may discourage fraudsters. This not only protects you from unnecessary legal hassles but also safeguards your insurance premiums.Driver Behavior Monitoring
For parents and fleet managers, dash cams offer an excellent way to monitor driver behavior. You can ensure your teen or employees are driving safely and responsibly. This promotes accountability and can encourage better driving habits.Travel Log And Memories
Beyond safety, dash cams can document your road trips and adventures. Capture memorable moments and breathtaking landscapes without distraction. It’s like having a personal storyteller for your journeys.Insurance Discounts
Some insurance companies offer discounts to drivers with dash cams. This is because they reduce the risk of fraudulent claims and provide clear evidence in disputes. Check with your insurer to see if you qualify for any savings.Peace Of Mind
Ultimately, having a dash cam offers peace of mind. Knowing that every drive is recorded can alleviate stress and anxiety. Wouldn’t you feel more at ease knowing you’re prepared for the unexpected? Installing a dash cam is a straightforward process that brings numerous benefits. From security to savings, these small devices pack a powerful punch. So, are you ready to enhance your driving experience with a dash cam?Choosing The Right Dash Cam
Ensure dash cam placement for a clear view. Secure it on the windshield using a suction cup or adhesive mount. Connect it to the car’s power source through the cigarette lighter or fuse box.
Choosing the right dash cam is crucial for capturing clear footage. You want a dash cam that fits your needs and budget. Let’s explore the types and features to consider.Types Of Dash Cams
Dash cams come in various types, each offering unique benefits. The most common types include:- Front Dash Cam:Records the road ahead, ideal for traffic incidents.
- Rear Dash Cam:Captures the view behind, useful for rear-end accidents.
- Dual Dash Cam:Provides front and rear coverage, offering complete protection.
- Cabin Dash Cam:Monitors inside the car, perfect for rideshare drivers.
Key Features To Consider
When selecting a dash cam, focus on key features. These ensure quality and usability:- Resolution:Higher resolution means clearer footage. Aim for at least 1080p.
- Field of View:Wider angles capture more details. Look for at least 120 degrees.
- Night Vision:Essential for recording in low light. Infrared sensors enhance visibility.
- GPS:Tracks location and speed, useful for insurance claims.
- Loop Recording:Automatically overwrites old footage, preventing storage issues.
- G-Sensor:Detects impacts and locks footage, safeguarding crucial moments.
Tools Needed For Installation
Tools Needed for Installation Gather essential tools like a screwdriver, adhesive mounts, and a cable clip. These will help secure and connect the dash cam properly in your car.
Installing a dash cam in your car can be a straightforward process when you have the right tools at your disposal. Just like any other DIY project, the success of your dash cam installation heavily relies on using the appropriate tools. Imagine setting up a tent without poles; it might be possible, but definitely not practical or efficient. Having the right tools ensures a seamless installation and reduces the risk of damage to your vehicle or the device. So, what exactly do you need to get started?Basic Tools You’ll Need
To install your dash cam, a few basic tools are indispensable. Start with a screwdriver set, as most dash cams come with components that need fastening. Make sure the screwdriver matches the screws provided with your dash cam package. Additionally, a trim removal tool is crucial for safely removing panels without scratching or damaging your car’s interior. This tool helps you hide wires neatly, maintaining the aesthetics of your vehicle.Measuring Tools For Precision
For precise installation, you’ll need some measuring tools. A measuring tape can help determine the best placement for your dash cam, ensuring it covers the intended field of view without obstruction. You might also consider a spirit level to ensure the camera is mounted perfectly horizontally, providing an accurate recording angle.Electrical Tools For Wiring
Since dash cams require power, electrical tools are essential. Wire cutters and strippers are vital for preparing wires for connection. These tools help you achieve clean cuts and strip away insulation without damaging the wire itself. Moreover, a multimeter can be your best friend when checking voltage levels to ensure that your dash cam receives the appropriate power supply.Additional Accessories
Don’t forget additional accessories like zip ties or adhesive clips to manage wires effectively. These accessories are perfect for securing loose wires and keeping them out of sight. Have you ever tried setting up tech without enough cable ties? It often leads to a tangled mess. Zip ties offer a simple solution to organize and secure wires efficiently.Safety Gear
Safety should always be a priority. Wear gloves to protect your hands from sharp edges or electrical hazards. Also, safety goggles shield your eyes from dust or debris that may arise during installation. Equipped with these tools, you’re ready to embark on your dash cam installation journey. Do you think having the right tools can make all the difference in your installation experience?
Credit: www.youtube.com
Preparing Your Car For Installation
Ensure the car’s interior is clean and free of dust. Check power outlets and cables for easy dash cam connection. Position the dash cam for optimal visibility without obstructing your driving view.
Preparing your car for a dash cam installation might seem daunting, but it’s a breeze with the right steps. Think of it as setting the stage for a new, helpful gadget. By getting everything ready, you ensure a smooth installation process that keeps your dash cam secure and functional. Plus, taking these steps can help your dash cam capture the best footage possible, safeguarding you on the road.Cleaning The Windshield
Before you install anything, make sure your windshield is squeaky clean. Dust, dirt, or smudges can interfere with the camera’s view and adhesive grip. Use a quality glass cleaner and a microfiber cloth to remove any grime. You might be surprised at how much clearer your dash cam footage will be. A clean windshield not only helps with visibility but also enhances the overall reliability of your dash cam. Remember, the camera’s eyes are only as clear as the glass it’s looking through.Selecting The Mounting Location
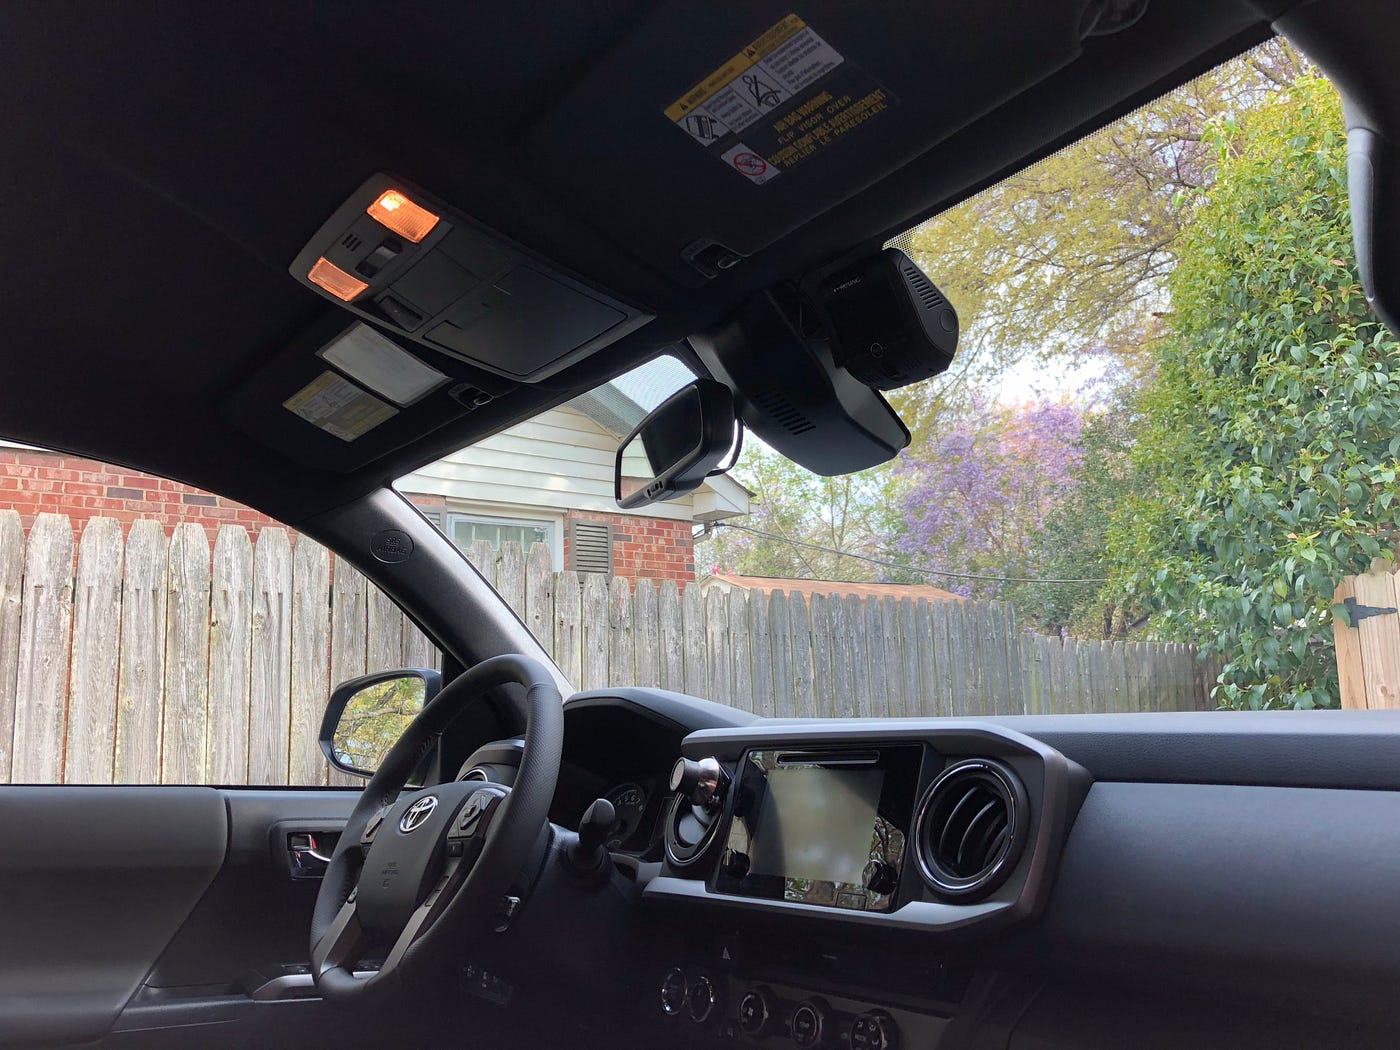
Choosing the right spot for your dash cam is crucial. You want a position that captures the road clearly without obstructing your view. Often, the best spot is behind the rearview mirror. This location allows the dash cam to blend seamlessly into your line of sight. Consider any obstructions like sun visors or tinted areas of the windshield. Ask yourself, “Will this spot give me the best coverage?” Ensure it’s within easy reach for adjustments but not too tempting for potential thieves. Finding the sweet spot can make all the difference in both performance and security. By thoroughly preparing your car, you set the foundation for an efficient and effective dash cam setup. What’s your go-to tip for a flawless installation?Mounting The Dash Cam
Ensure the dash cam is powered off before installation. Clean the windshield for optimal adhesion. Position the dash cam behind the rearview mirror, ensuring it doesn’t obstruct your view. Connect the power cable to the car’s power source, and adjust the camera angle for clear road visibility.
Mounting the dash cam in your car is an essential step to ensure it captures clear footage. Proper installation not only guarantees optimal recording but also keeps the device securely in place during your drive. By following a few straightforward guidelines, you can mount your dash cam efficiently and start capturing those important road moments without hassle.Attaching The Mount
To begin, ensure you have a clean windshield for a strong adhesive grip. Use a damp cloth to wipe away any dust or residue. Choose a position just behind the rearview mirror. This spot provides a discreet view and minimizes distractions. Peel off the adhesive backing from the dash cam mount and press firmly against the glass. Hold it in place for a few seconds to ensure a secure bond.Adjusting The Camera Angle
Once the mount is secure, it’s time to adjust the camera angle. Position the camera so that it captures both the road ahead and the edge of your vehicle’s hood. This view offers a clear perspective and provides context in case of incidents. Check the live view on your dash cam’s display or mobile app. Make slight adjustments until you’re satisfied with the coverage. Ensure there are no obstructions like the rearview mirror or windshield wipers in the frame. Ask yourself: Is the camera covering the entire road width? Making these small tweaks can make all the difference when reviewing footage later.Connecting Power To The Dash Cam
Connecting power to your dash cam is a crucial step to ensure it operates smoothly, capturing every important moment on the road. Whether you’re using it for security or capturing scenic drives, providing a reliable power source is essential. Let’s explore two common methods to power your dash cam effectively.
Using The Cigarette Lighter Socket
The simplest way to power your dash cam is through the cigarette lighter socket. This method is quick and doesn’t require any technical skills. You just need to plug the dash cam’s power adapter into the socket, and you’re good to go.
- Most dash cams come with a long power cable that can be easily routed around your dashboard and windshield.
- Ensure the cable doesn’t obstruct your view or interfere with the vehicle’s controls.
- Using the cigarette lighter socket makes it easy to remove the dash cam when not needed.
Have you ever wondered why this method is so popular? It’s because it offers convenience without permanent alterations to your vehicle. However, this option might not be ideal if you frequently use the socket for other devices.
Hardwiring To The Fuse Box
For a more seamless and professional installation, hardwiring your dash cam directly to the fuse box is an excellent choice. This method ensures your dash cam receives continuous power, even when the car is off.
- You’ll need a hardwiring kit, which typically includes cables and connectors designed for this setup.
- Identify a suitable fuse in the fuse box that corresponds to an accessory that turns off with the ignition.
- Carefully connect the hardwiring kit to the fuse, ensuring all connections are secure and tidy.
This method might seem daunting, but it’s surprisingly straightforward with the right tools. You can enjoy uninterrupted power without cluttering your vehicle’s interior. Remember, it’s always wise to consult your car’s manual or a professional if you’re unsure.
What method will you choose to power your dash cam? Consider how often you use your cigarette lighter socket or if you’re ready for a more permanent installation. Each method has its merits, and it’s all about finding what suits your needs best. Happy driving!
Setting Up The Dash Cam
Mount the dash cam on the windshield using the suction cup. Connect the power cable to the car’s cigarette lighter. Adjust the camera angle for a clear road view.
Setting up the dash cam can enhance your driving experience. It records crucial events and offers peace of mind. Proper installation ensures optimal performance and safety.Configuring The Settings
Begin by powering up your dash cam. Use the car’s cigarette lighter or USB port. Access the main menu through the cam’s display. Adjust the date and time settings for accurate recordings. Select the preferred video resolution. Higher resolutions offer better clarity. Enable features like motion detection and loop recording. Motion detection starts recording if movement is sensed. Loop recording overwrites old files, freeing up space. Adjust sensitivity settings to avoid unnecessary recordings. Set the device to auto-start with ignition for convenience.Testing The Video Quality
Ensure the dash cam is securely mounted. Position it to capture a wide view. Start the car and check the camera’s angle. Adjust for optimal road visibility. Test the video quality in different lighting conditions. Review footage for clarity during day and night. Check for any blurriness or distortion. Ensure the audio recording is clear, if enabled. Fine-tune settings based on your test footage. Save changes and finalize the setup.Troubleshooting Common Issues
Fitting a dash cam in your car can be straightforward. Begin by choosing a suitable location on the windshield. Ensure the camera has a clear view of the road. Secure the dash cam using the adhesive mount, then connect it to the power source, usually via the car’s cigarette lighter.
Installing a dash cam can enhance your driving experience. Yet, you might face some common issues. Don’t worry; most problems have easy fixes. Let’s explore solutions to ensure your dash cam works perfectly.Addressing Poor Video Quality
Poor video quality can frustrate. First, check the camera lens. Ensure it is clean and free from dust. Use a soft cloth to wipe the lens gently. Next, inspect the resolution settings. Set the camera to the highest resolution available. This ensures clear and crisp video. Also, verify the microSD card. Use a high-speed card for better recording. Low-quality cards can affect video output.Fixing Power Connection Problems
Power issues can hinder dash cam performance. Check the power cable first. Make sure it is securely connected. Look for any visible damage to the cable. Replace it if needed. Next, examine the car’s power source. Ensure the cigarette lighter socket functions correctly. Test with another device to confirm power flow. If the socket is faulty, seek professional help. Consider using a hardwire kit for a stable power supply. This connects the dash cam directly to the car’s fuse box.Maintaining Your Dash Cam
Proper dash cam installation enhances safety on the road. Choose a suitable position on the windshield for optimal view. Secure the device using adhesive pads or mounts, connecting it to the power source efficiently. Regular checks ensure functionality and a clear recording.
Maintaining Your Dash Cam To ensure your dash cam serves you well over the years, it requires regular maintenance. A well-maintained dash cam not only captures clear footage but also ensures the safety of your recordings. As with any electronic device, a little care can go a long way.Cleaning And Care
Keeping your dash cam clean is essential for optimal performance. Dirt and dust can obscure the lens, affecting the quality of your recordings. Use a microfiber cloth to gently wipe the lens and screen, preventing scratches. Avoid using harsh chemicals or abrasive materials, as these can damage the device. If you notice any smudges or fingerprints, a simple lens cleaner can work wonders. Regular cleaning ensures that your dash cam captures every detail, no matter the conditions.Updating Firmware
Firmware updates are crucial for your dash cam’s functionality and security. Manufacturers often release updates to fix bugs and enhance features. Check the manufacturer’s website or app regularly for any new updates. Updating your dash cam’s firmware is usually a straightforward process. Follow the instructions provided by the manufacturer to ensure a smooth update. Keeping the firmware up to date can prevent unexpected issues and improve your dash cam’s performance. Have you ever experienced a glitch or lag with your dash cam? It might be time to check for a firmware update. Regular updates ensure your device stays ahead of any potential problems.
Credit: www.tiktok.com
Frequently Asked Questions
How Do I Choose The Right Dash Cam?
Choosing the right dash cam involves considering resolution, storage capacity, and additional features. Look for at least 1080p resolution for clear video. Ensure it has ample storage, like a 32GB microSD card. Features such as GPS, Wi-Fi connectivity, and parking mode can enhance functionality and user experience.
Where Should I Mount My Dash Cam?
Mount your dash cam behind the rearview mirror for optimal visibility. This location provides a wide field of view without obstructing your view. Ensure the camera lens is centered and not blocked by the mirror. A well-placed dash cam captures crucial details without distracting the driver.
Can I Install A Dash Cam Myself?
Yes, you can install a dash cam yourself with basic tools. Most dash cams come with a mounting kit and detailed instructions. Typically, it involves mounting the camera, routing the power cable, and connecting it to your car’s power source.
DIY installation is straightforward and saves money.
How Do I Hide Dash Cam Wires?
To hide dash cam wires, tuck them into the car’s headliner and door seals. Use adhesive clips or cable channels to secure loose wires. This method keeps your installation neat and avoids any interference with airbags. A clean installation enhances the car’s appearance and safety.
Conclusion
Installing a dash cam doesn’t need to be complicated. Follow these simple steps. Choose a suitable spot on the windshield. Attach the mount securely. Connect the power cable to the car’s outlet. Adjust the camera angle for optimal view. Ensure the lens is clean and clear.
Test the camera to confirm it’s working well. A dash cam offers peace of mind. It records vital footage for safety. Enjoy safer journeys with your new dash cam. It’s a smart addition to any vehicle. Stay safe and drive confidently.