
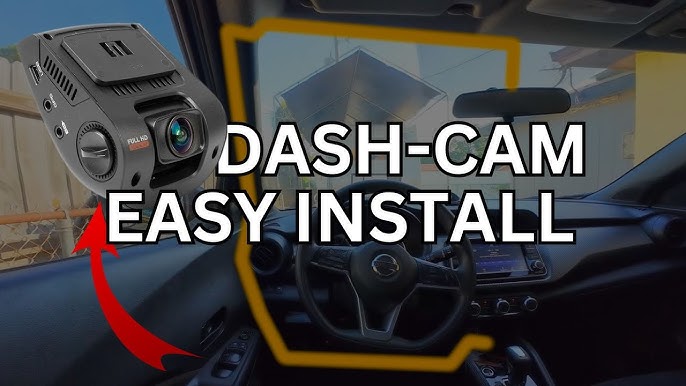
Imagine you’re driving down the highway when suddenly an unexpected event occurs. In such moments, having a dash cam installed in your car can be a lifesaver, providing crucial evidence and peace of mind.
You might be wondering how you can equip your vehicle with this handy device. The good news is, installing a dash cam is simpler than you might think, and you don’t need to be a tech genius to do it.
You’ll discover step-by-step instructions that make the process straightforward and stress-free. You’ll learn tips and tricks to ensure your dash cam is positioned perfectly to capture every detail, giving you confidence on the road. By the end, you’ll not only know how to install a dash cam but also understand how it can enhance your driving experience. Are you ready to boost your safety and security while driving? Let’s dive into the details!

Credit: www.tiktok.com
Choosing The Right Dash Cam
Choosing the right dash cam for your car is a crucial step before installation. The market is flooded with various models, each boasting unique features and capabilities. Picking the right one can make all the difference in capturing clear footage and ensuring safety on the road. Whether you’re a daily commuter or embarking on a cross-country road trip, understanding your needs will guide you to the perfect dash cam.
Types Of Dash Cams
Dash cams come in various configurations, each suited for different purposes. Single-channel dash cams record only the front view, ideal for those primarily concerned with what happens ahead. Dual-channel dash cams offer both front and rear recording, providing more comprehensive coverage. There’s also the option of wireless dash cams, which eliminate messy wiring and offer easy installation.
- Single-channel:Best for front-view recording.
- Dual-channel:Offers front and rear coverage.
- Wireless:Easy installation without complex wiring.
Key Features To Consider
When selecting a dash cam, focus on features that enhance its functionality. Video quality is paramount; opt for at least 1080p resolution for clear footage. Night vision is equally important, especially if you drive frequently after dark. Consider storage options—many dash cams use microSD cards, but cloud storage can be a viable option for long-term storage needs.
- Video Quality:Look for 1080p or higher for crisp images.
- Night Vision:Essential for nighttime driving.
- Storage:Choose between microSD cards and cloud storage.
Have you ever found yourself wishing you had evidence of that reckless driver cutting you off? A dash cam could be your solution. Choosing wisely means prioritizing features that match your lifestyle and driving habits. Are you ready to enhance your road safety with the perfect dash cam?
Gathering Necessary Tools
Start by gathering essential tools like a screwdriver, adhesive mount, and a power cable. These items ensure smooth installation of your dash cam, making it ready to capture every detail on the road.
Gathering the necessary tools is crucial for installing a dash cam in your car. Proper preparation ensures a smooth installation process. Having the right tools on hand can save time and prevent frustration.Basic Installation Tools
For a basic dash cam setup, you need a few essential tools. A screwdriver is often required to remove panels or screws. A trim removal tool can help avoid damaging your car’s interior. Electrical tape is useful for securing wires and connections. A fuse tap or adapter may be needed to connect the dash cam to the car’s power supply. Having a multimeter can be handy for checking voltage levels.Optional Accessories
Optional accessories can enhance your dash cam installation. A hardwire kit provides a cleaner installation by connecting the dash cam directly to the car’s power source. This helps avoid using the cigarette lighter socket. A GPS module can be added to track speed and location data. Polarizing filters reduce glare and improve video quality. Some users opt for a rear camera for additional coverage. Consider a Wi-Fi dongle for wireless video transfer and live streaming capabilities.Preparing Your Vehicle
Before you start installing a dash cam, it’s crucial to prepare your vehicle properly. This step ensures your dash cam functions optimally and remains securely in place. A well-prepared vehicle can prevent installation mishaps and make the process smoother. Let’s dive into the essentials of getting your car ready for a dash cam installation.
Selecting The Installation Location
Choosing the right spot for your dash cam is key to capturing the best footage. Consider the areas that provide a wide view of the road ahead, such as the center of your windshield. This position ensures you record all details without blind spots.
Think about your car’s features. Does your rearview mirror have built-in technology that might interfere? Make sure the dash cam doesn’t obstruct your view or any sensors. A friend of mine once installed his dash cam too close to the mirror, blocking his line of sight. Learn from his mistake and evaluate your setup carefully.
Cleaning The Installation Area
A clean installation area is essential for a dash cam to stay securely mounted. Dirt and debris can weaken adhesive strength, causing your camera to fall off. Use a microfiber cloth and a gentle cleaner to wipe down the chosen spot.
Even if your windshield looks clean, don’t skip this step. Invisible grime can create problems. I once thought my windshield was spotless until I noticed my dash cam slipping after a few days. A thorough clean makes a big difference!
What could be lurking on your windshield right now? Take a moment to clean it well, ensuring your dash cam stays put for the long haul.
Mounting The Dash Cam
Mounting a dash cam requires choosing a suitable spot on the windshield. Ensure the camera lens has an unobstructed view of the road. Use adhesive mounts or suction cups for secure installation.
Mounting the dash cam in your car is a crucial step. A well-mounted dash cam records clear footage and stays secure. This section covers attaching the mount and positioning the camera. Follow these guidelines for optimal performance.Attaching The Mount
Start by selecting a suitable mount for your dash cam. Most mounts use suction cups or adhesive pads. Clean the windshield thoroughly to ensure a strong grip. Secure the mount by pressing firmly against the glass. Allow any adhesive mounts to set for a few minutes. This step ensures the mount stays in place during bumpy rides.Positioning The Camera
Position the camera behind the rearview mirror. This spot provides an unobstructed view of the road. Adjust the angle to capture the entire front view. Ensure the horizon is straight in the camera’s preview. Avoid blocking the view with the mirror or sun visors. Finally, check the footage quality by recording a short video. Make any necessary adjustments for a clear and centered view. Proper positioning ensures the dash cam records important events accurately.Routing The Power Cable
Ensure the power cable is routed neatly along the car’s interior edges. Use clips to secure the cable and prevent tangling. Keep the cable away from airbags and moving parts for safety.
Routing the power cable for your dash cam might seem like a daunting task, but it’s simpler than you think. A clean installation not only keeps your car’s interior tidy but also ensures your dash cam functions optimally. Let’s dive into the details to make this process as seamless as possible.Choosing The Power Source
The first step is deciding where to draw power from. Many prefer the 12V cigarette lighter socket due to its convenience. However, this might not offer a neat finish. For a more streamlined look, consider using your car’s fuse box. Using a hardwire kit, you can connect the dash cam directly to your car’s electrical system. This option provides a cleaner installation and often enables parking mode features.Hiding The Cable
Once you’ve chosen your power source, it’s time to hide the cable. Start by tucking it into the headliner above your windshield. Use a plastic trim tool to gently push the cable into place without damaging the interior. Next, run the cable down the A-pillar. Most cars have a rubber seal that you can easily pull back to hide the cable underneath. Continue routing the cable under the glove compartment and towards the power source. Keep it out of sight to maintain your car’s aesthetic. Remember, a tidy installation not only looks good but also avoids any interference with airbags and other safety features. Are you ready to tackle this project with confidence?
Credit: www.youtube.com
Configuring Dash Cam Settings
Setting up dash cam settings ensures optimal performance and clear recordings. Adjust resolution, frame rate, and exposure to suit driving conditions. Test and fine-tune settings for quality footage and safety.
Configuring the settings of your dash cam is crucial for optimal performance. Proper configuration ensures the device records clear and useful footage. This section will guide you through key settings adjustments.Adjusting The Camera Angle
Position the camera to capture the road ahead. Ensure it’s not obstructed by the rearview mirror. The lens should cover both sides of the road. Adjust until the horizon is centered in the frame. This provides a balanced view of the road.Setting Up Recording Preferences
Choose the right video resolution. Higher resolutions provide clearer images but use more storage. Set the recording length to loop every 3-5 minutes. This ensures older, unimportant footage is overwritten. Turn on audio recording if desired. It can capture important sounds like honks or conversations.Testing The Dash Cam
Testing the dash cam ensures it captures clear footage. Check the camera angle and recording quality. Adjust settings for optimal performance.
Testing the dash cam ensures it works perfectly for your needs. After installation, it’s crucial to verify its performance. This step includes checking video quality and power connections. The goal is to ensure reliable recording every time you drive.Checking Video Quality
A clear video is essential for capturing details. Start by reviewing footage during various times of the day. This includes bright daylight and low-light conditions. Look for sharpness and clarity in the recordings. Ensure the camera lens is clean for optimal quality. Adjust settings if the video appears grainy or unclear. Test the dash cam with different angles for the best view.Ensuring Stable Power Connection
A stable power connection is vital for continuous recording. Check the power cable for any loose connections. Make sure it is securely plugged into the car’s power outlet. Observe if the dash cam powers on smoothly when the car starts. Monitor if the camera stays on without interruptions. Consider using an extra battery pack for long-lasting power.Troubleshooting Common Issues
Installing a dash cam in your car can sometimes be tricky. Ensure proper power connection and secure mounting for the best results. Check the camera angle frequently to capture a clear view of the road.
When installing a dash cam, you might encounter some hurdles along the way. These common issues can be frustrating, but most are easily fixable with the right approach. Let’s dive into a couple of frequent problems you might face and how you can troubleshoot them.Addressing Power Problems
One of the first hurdles you might face is powering your dash cam. Does your dash cam not turn on, or does it shut off randomly? First, ensure the power cable is firmly connected. A loose connection is often the culprit. Next, check if your vehicle’s power outlet is functioning by plugging in another device. If it works, your dash cam might have a faulty cable or adapter. Consider if your dash cam is compatible with your car’s battery voltage. Some dash cams require specific voltage levels to operate properly. Using a multimeter can help verify this. If voltage compatibility is the issue, you may need a step-down converter.Fixing Recording Errors
Recording errors can be another source of frustration. Is your dash cam failing to record footage, or are the files corrupted? Begin by inspecting your memory card. Ensure it’s formatted correctly and is compatible with your dash cam’s specifications. Using a high-quality, Class 10 or UHS-1 card is recommended for reliable recording. Check the storage capacity. If the card is full, your dash cam might not overwrite old files as expected. Adjust the settings to enable loop recording, ensuring continuous footage capture. Lastly, update your dash cam’s firmware. Manufacturers often release updates to fix bugs and improve performance. Check their website for the latest version and follow the instructions for installation. Have you ever faced any of these issues? With these tips, you can tackle them head-on and ensure your dash cam operates smoothly.
Credit: www.youtube.com
Frequently Asked Questions
How Do I Choose The Right Dash Cam?
Choosing the right dash cam involves considering features like video quality, night vision, and storage capacity. Ensure it has loop recording and a wide-angle lens. Additionally, check for GPS functionality and ease of installation. Reading user reviews can also help in making an informed decision.
Can I Install A Dash Cam Myself?
Yes, installing a dash cam yourself is possible and straightforward. Start by selecting a suitable location, usually behind the rearview mirror. Then, attach the adhesive mount and connect the power cable to your car’s cigarette lighter or fuse box. Follow the dash cam’s manual for specific instructions.
What Tools Are Needed For Dash Cam Installation?
For dash cam installation, you typically need a pry tool, cable clips, and a suitable power cable. A USB car charger is often necessary for power. Additionally, a microfiber cloth can help in cleaning the windshield before attaching the dash cam mount.
Where Should A Dash Cam Be Placed?
The best place for a dash cam is behind the rearview mirror. This location provides an unobstructed view of the road. Ensure it’s within the wiper’s coverage area for a clear view in bad weather. Avoid blocking the driver’s view and ensure it’s securely mounted.
Conclusion
Installing a dash cam is straightforward with this guide. Now your driving is safer. You can capture important moments on the road. Follow each step carefully for the best results. Check your dash cam regularly for proper functioning. Adjust settings for clear video quality.
Remember, a dash cam records valuable evidence. It can help in case of accidents. Stay confident knowing your drive is monitored. Share your experiences with friends or family. Encourage them to install a dash cam too. Enjoy peace of mind while driving.
Keep your dash cam clean and secure. Drive safely and smartly!