
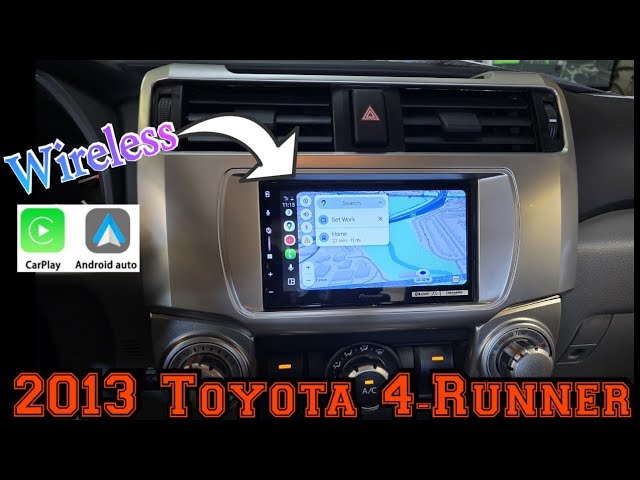
Imagine cruising down the road with your favorite tunes playing through a brand-new stereo system in your Toyota Sienna. Or picture the peace of mind you’ll feel knowing you can see everything behind you with a state-of-the-art backup camera.
Sounds great, right? You might think that installing these upgrades is a job best left to professionals, but with the right guidance, you can easily do it yourself. You’ll learn simple steps to install a car stereo and backup camera in your Toyota Sienna.
We’ll make sure you feel confident and excited about transforming your driving experience. Get ready to unlock the potential of your vehicle and enjoy a safer, more entertaining ride!

Credit: www.youtube.com
Tools And Materials Needed
Installing a Toyota Sienna car stereo and backup camera requires basic tools and materials. Essential items include screwdrivers, wire cutters, electrical tape, and a wiring harness. A trim removal tool and mounting kit ensure smooth installation.
Installing a car stereo and backup camera in your Toyota Sienna can transform your driving experience, bringing modern conveniences right to your fingertips. But before you get started, having the right tools and materials is crucial for a smooth installation process. Whether you’re a seasoned DIYer or tackling this task for the first time, gathering everything you’ll need upfront can save you time and frustration. Let’s dive into the essentials for this exciting project.Tools Required
To ensure a seamless installation, you’ll want a set of basic tools handy. Here’s a breakdown:- Screwdriver Set:A Phillips and flathead screwdriver will help you remove panels and screws.
- Wire Strippers:Essential for preparing wires for connection.
- Socket Wrench Set:Useful for loosening bolts in the dashboard area.
- Panel Removal Tool:Helps you gently pry off panels without damaging them.
- Multimeter:Handy for checking voltage and ensuring proper electrical connections.
Materials Needed
Having the right materials can make all the difference in achieving a professional-looking installation. Here’s what you’ll need:- Stereo Kit:Ensure compatibility with your Sienna’s dashboard layout.
- Backup Camera Kit:Choose a camera that suits your preferred mounting position, whether on the license plate or inside the rear window.
- Wiring Harness:A vehicle-specific harness simplifies the connection process.
- Electrical Tape:For securing wire connections and preventing short circuits.
- Zip Ties:Keep wires organized and out of sight.
Additional Considerations
Before you start, think about where you’ll work. A well-lit garage or driveway is ideal. Do you have a friend who can lend a hand? Sometimes an extra pair of eyes can spot things you might miss. Also, consider your comfort level with electrical work. If you’re unsure, consulting a professional might be worth the peace of mind. Preparing thoroughly can make the installation process not only successful but enjoyable. Have you ever tackled a project like this before? Share your experience in the comments!Preparing Your Vehicle
Installing a Toyota Sienna car stereo and backup camera requires patience and the right tools. Begin by disconnecting the battery and removing the old stereo. Carefully connect the new stereo and camera, following the instructions. Secure everything in place, and test to ensure proper functionality.
Preparing your vehicle before installing a new car stereo and backup camera is crucial. This step ensures the process runs smoothly and safely. It also protects your car’s electrical system from any unexpected issues. Gather necessary tools like screwdrivers, pliers, and wire cutters. Have the new stereo and camera ready. This preparation saves time and prevents frustration.Disconnecting The Battery
Start by disconnecting the battery. This prevents electrical shocks and protects the car’s system. Locate the battery, usually under the hood. Use a wrench to loosen the negative cable first. Remove it carefully and ensure it is tucked away. This step keeps you safe while working on electrical components.Removing Existing Stereo
Next, remove the existing stereo. Use screwdrivers to take out screws holding the stereo unit. Pull the stereo gently to avoid damaging wires. Disconnect all cables attached to the back of the stereo. Label them if necessary to remember their connections. This process prepares the space for the new stereo installation.Installing The New Car Stereo
Installing a car stereo and backup camera in a Toyota Sienna is a straightforward process. Begin by disconnecting the battery to ensure safety. Follow the manufacturer’s instructions to remove the existing stereo. Connect the new stereo and backup camera wires carefully, ensuring all connections are secure.
Installing a new car stereo in your Toyota Sienna can transform your driving experience, bringing enhanced audio quality and modern features to your fingertips. Whether you’re a seasoned DIY enthusiast or just someone looking to upgrade their ride, this process can be both rewarding and straightforward. Let’s delve into the essential steps to ensure a smooth installation of your new car stereo.Connecting Wiring Harness
To start, ensure you have the right wiring harness for your Toyota Sienna model. This is crucial for a seamless connection between the car’s existing wires and the new stereo. Begin by matching the colors of the wires from the harness with those on the stereo. Typically, similar colors indicate corresponding functions, such as power and speaker connections. Use crimping tools or soldering for secure connections, and wrap each connection with electrical tape to avoid any short circuits. This step is key to preventing future electrical issues and ensuring optimal stereo performance. Doesn’t it feel satisfying to see everything coming together neatly?Mounting The Stereo
Once the wiring is sorted, it’s time to mount the stereo. Start by gently sliding the stereo into the dash opening, aligning it with the mounting brackets. If your stereo came with a metal sleeve, insert it first, bending the tabs to secure it in place. Ensure the stereo is snug and flush with the dashboard. This not only looks aesthetically pleasing but also minimizes vibrations while driving. Secure it with screws if necessary, but be careful not to overtighten to avoid damaging the unit. Have you noticed how a well-mounted stereo can change the feel of your car’s interior?Testing The Stereo
Before fully reassembling the dashboard, it’s essential to test the stereo. Reconnect the battery and turn on the ignition to power up the stereo. Check all functions, including radio reception, CD playback (if applicable), and Bluetooth connectivity. Adjust the volume and test each speaker to ensure they all work correctly. If something isn’t functioning as expected, revisit the wiring connections. This is your chance to fine-tune everything before completing the installation. Isn’t it exciting to hear that crystal-clear sound for the first time? By taking your time and paying attention to detail, you can enjoy the fruits of your labor—a perfectly installed stereo that enhances every drive.Credit: www.siennachat.com
Camera Installation Process
Installing a backup camera in your Toyota Sienna enhances safety and convenience. Follow these steps to seamlessly integrate the camera with your car stereo. The process requires careful planning and attention to detail.
Selecting Camera Placement
Choose a location that provides a wide view of the rear. The most common spot is above the license plate. Ensure the camera is centered for balanced visibility. This placement offers the best angle for parking and reversing.
Running Camera Wiring
Begin by routing the wires through the trunk or rear hatch. Keep the wires hidden for a clean look. Use existing pathways to avoid damaging the vehicle. Secure the wires with clips or ties to prevent movement.
Feed the wires towards the front of the vehicle. Follow the car’s wiring harness for an easier path. Avoid placing wires near hot or moving parts.
Connecting Camera To Display
Locate the video input on your car stereo. This is usually labeled as “Camera” or “Video.” Connect the camera’s video cable to this input. Ensure a firm connection for clear video transmission.
Next, connect the power wire of the camera. This often ties into the reverse light circuit. This ensures the camera activates when you shift into reverse.
Test the camera to ensure everything functions correctly. Adjust the camera angle if needed for optimal view.
Final Adjustments
Ensure all connections are secure and wires are neatly organized. Test the stereo and camera for proper function. Adjust settings to enhance audio and visual quality.
After installing your Toyota Sienna car stereo and backup camera, make final adjustments. These ensure optimal audio and camera performance. Pay attention to fine-tuning settings for the best experience.Adjusting Audio Settings
Start by turning on the stereo system. Listen to the sound quality and adjust the volume. Check the bass, treble, and balance. Ensure they suit your preferences. Many systems have preset options. Explore these to find the best sound for your music. Use the equalizer settings for more precise control. Try different settings and listen closely.Calibrating Camera View
Switch on the backup camera. Inspect the view on the screen. You might need to adjust the angle. Ensure the camera covers the desired area. Look for any blind spots. Use the guidelines on the screen. They help in reversing safely. Adjust the brightness and contrast if needed. Clear visibility is key during day and night. Test the camera under different lighting conditions. Make sure the image remains clear and sharp.Troubleshooting Common Issues
Installing a Toyota Sienna car stereo and backup camera can be tricky. Check wiring connections carefully and ensure the camera is securely mounted. Adjust settings on the stereo for optimal sound and video clarity.
Installing a car stereo and backup camera in your Toyota Sienna can be a rewarding DIY project. Yet, even with a successful installation, you might encounter some common issues. Let’s explore how to troubleshoot them effectively.Audio Problems
If your car stereo is not producing sound, first check the connections. Ensure all wires are firmly connected and that the speaker wires are not crossed or shorted. Verify the stereo settings; sometimes a simple mute or incorrect audio setting can be the culprit. If you hear distortion, it could be due to the speaker impedance mismatch or a defective speaker. Double-check the specifications of your speakers to ensure compatibility.Camera Display Errors
A blank screen can be frustrating after all your hard work. Begin by inspecting the camera connection to the head unit. Loose or incorrectly connected cables are often the main issue. If the camera shows a distorted image, check for dirt or damage on the camera lens. A quick clean might resolve the issue. Inconsistent or flickering displays may indicate a power supply problem. Make sure the camera is receiving a steady power source, and consider checking the ground connection. Are you facing any of these issues? Don’t worry, addressing them step-by-step can help you get your system up and running smoothly.Maintenance Tips
Installing a Toyota Sienna car stereo and backup camera enhances driving convenience. Ensure all necessary tools and components are ready. Follow the manufacturer’s instructions carefully for a smooth setup.
Installing a new stereo and backup camera in your Toyota Sienna can significantly enhance your driving experience. However, to keep these gadgets running smoothly, regular maintenance is crucial. Proper upkeep not only prolongs their lifespan but also ensures optimal performance every time you hit the road.Regular Checks
Ensure you’re routinely checking the stereo and camera system for any signs of wear or damage. Look for loose wires or connectors, as these can lead to connectivity issues. It’s a good idea to inspect the camera lens for dirt or debris, which can impair visibility. Consider setting a monthly reminder to perform these checks. Consistency is key, and regular attention can help you catch small issues before they become big problems. Have you ever noticed a glitch in your system just when you needed it the most? Regular checks can help prevent those frustrating moments.Updating System Software
Keeping your system’s software up-to-date is essential for smooth operation. Manufacturers often release updates to improve functionality or fix bugs. Check the manufacturer’s website or your system’s manual for update instructions. Updating software can seem daunting, but it’s often as simple as downloading a file to a USB and plugging it into your stereo. Imagine the relief of a seamless update process that enhances your system’s features without a hitch. Are you someone who ignores those software update notifications? Embrace them! Regular updates can drastically improve your user experience and keep your technology running like new.
Credit: www.facebook.com
Frequently Asked Questions
How Do I Start Installing A Car Stereo?
To start, disconnect the car battery for safety. Remove the old stereo using a trim removal tool. Ensure you have the correct wiring harness and connectors. Follow the installation manual for specific instructions. Double-check connections before securing the new stereo in place.
What Tools Are Needed For Stereo Installation?
You’ll need a trim removal tool, screwdriver set, wire strippers, and electrical tape. A multimeter can help verify connections. Having a wiring harness adapter makes the process easier. Ensure you have all necessary tools before starting to avoid interruptions.
How Can I Install A Backup Camera In A Sienna?
First, choose a suitable camera for your Sienna model. Mount the camera near the license plate. Run the wiring through the vehicle to the display unit. Connect power to the reverse light for activation. Test the camera before finalizing installation.
Is Professional Installation Necessary For Beginners?
While DIY installation is possible, beginners might prefer professional help. Experts ensure correct installation and functionality. They can troubleshoot issues more efficiently. Professionals also provide warranties on their work, offering peace of mind for new users.
Conclusion
Installing a Toyota Sienna stereo and backup camera is manageable. Follow the steps carefully for a smooth experience. Double-check connections before powering on the system. This ensures everything functions properly. Enjoy better audio and safer reversing with your new setup.
Remember, take your time and stay patient. The rewards of a successful installation are worth the effort. Your driving experience will improve significantly. Feel more confident and entertained on the road. Happy driving with your upgraded Sienna!