
Imagine cruising down the road with your favorite tunes enveloping you in a sound cocoon. The perfect car stereo can transform your driving experience, but getting it installed can feel like a daunting task.
You might be thinking, “How do I even start wiring a car stereo? ” Don’t worry, you’re not alone. Many people shy away from this project because it seems too complex. However, with a straightforward guide and a little patience, you can have your car stereo set up in no time.
This article will walk you through each step, ensuring you feel confident and empowered. By the end, not only will you know how to wire a car stereo, but you’ll also discover how gratifying it is to bring your audio dreams to life. Dive in, and let’s get your car rocking with the rhythm you love.
Tools And Materials Needed
Wiring a car stereo can be an exciting DIY project that lets you enjoy your favorite tunes on the road. However, to ensure a successful installation, you’ll need a specific set of tools and materials. Gathering the right equipment not only simplifies the process but also helps prevent costly mistakes. Let’s dive into the essentials you’ll need for this audio adventure.
Essential Tools
- Screwdriver Set:A set of Phillips and flathead screwdrivers will be your best friend for loosening and tightening screws.
- Wire Strippers:These are crucial for removing insulation from wires without damaging them.
- Crimp Tool:This tool ensures secure connections between wires and connectors.
- Multimeter:Use this to test electrical connections and ensure the stereo is powered properly.
- Panel Removal Tools:Plastic tools are ideal to avoid scratching your car’s interior when removing panels.
Materials Required
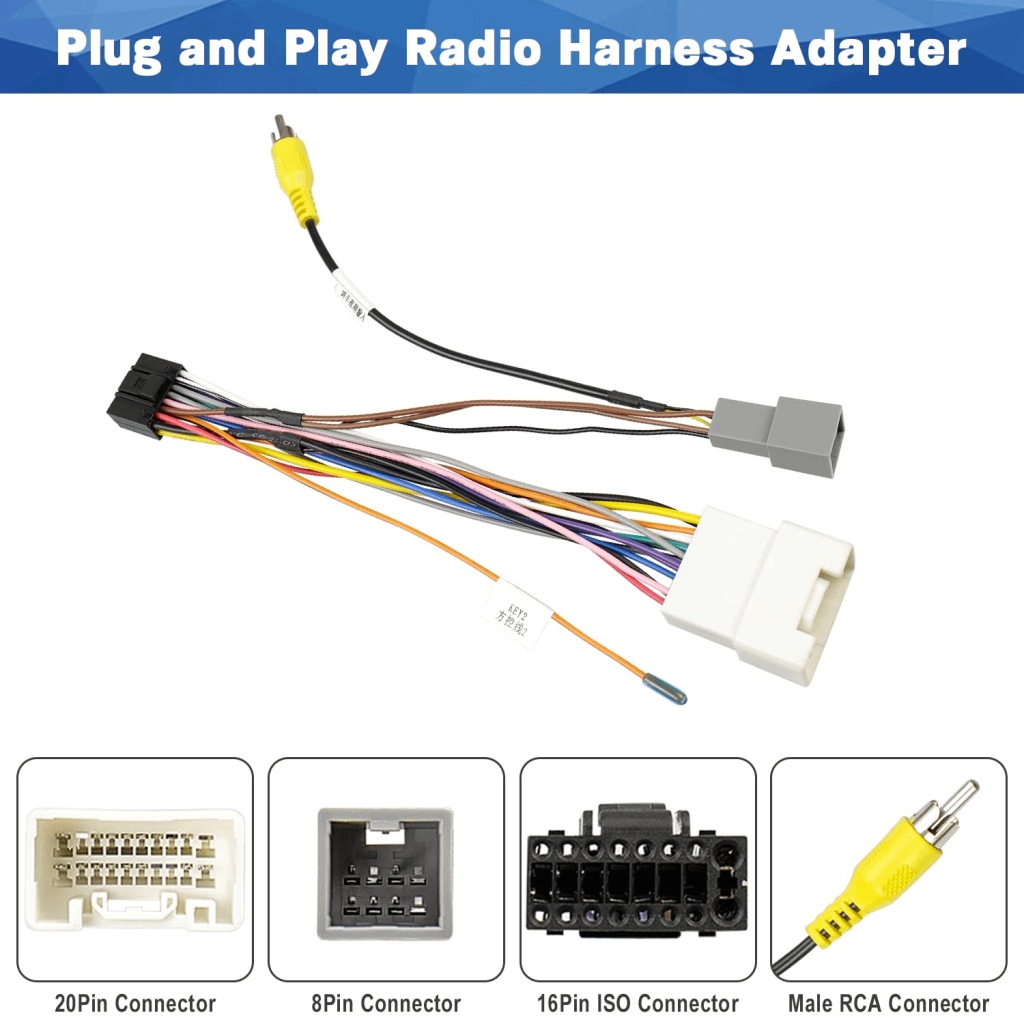
- Wiring Harness:This connects your stereo to the car’s electrical system and is usually specific to your vehicle make and model.
- Electrical Tape:Essential for insulating and securing wire connections.
- Connectors:These help in joining wires securely; consider using butt connectors or quick-disconnect connectors.
- Fuse Tap:Provides a safe power source for the stereo from the fuse box.
- Stereo Mounting Kit:Required for fitting the stereo unit into the dashboard seamlessly.
Have you ever tried to install something only to realize you’re missing a crucial tool or material? It can be frustrating. By preparing your toolkit and materials ahead of time, you can avoid these setbacks and focus on the fun of bringing your audio system to life. What’s the one tool you can’t imagine living without for this task?
Safety Precautions
Ensure the car is off and the battery is disconnected before starting. Use insulated tools to prevent electric shocks. Follow the stereo’s wiring diagram closely to avoid incorrect connections.
When you’re ready to wire a car stereo, excitement might overshadow caution. But remember, safety is your top priority. Before you dive into the wiring process, understanding safety precautions is crucial. Neglecting them can lead to costly mistakes or even endanger your life. So, let’s explore how to keep your car stereo installation safe and sound.Disconnect The Battery
Always start by disconnecting the car battery. This simple step prevents electrical shocks and short circuits. Use a wrench to remove the negative terminal from the battery to cut the power supply. You might feel this is unnecessary, but it’s a critical first line of defense against any electrical mishaps.
Use Proper Tools
Invest in quality tools designed for car stereo installations. Avoid makeshift tools that might damage your car or the stereo components. A dedicated set of screwdrivers, wire cutters, and crimping tools makes the process smoother and safer. You wouldn’t want a tool slipping and causing an injury, right?
Inspect Wiring Harness
Inspect the wiring harness for wear and tear. Frayed wires can lead to shorts and potential fire hazards. Ensure all connections are secure and insulated. It’s tempting to rush through, but a careful inspection can save you from headaches down the road.
Secure Loose Wires
Loose wires can cause shorts and interfere with other electronic components. Use zip ties or electrical tape to secure them in place. A well-organized setup prevents accidental disconnections and keeps everything running smoothly. Ever had a wire pop loose while driving? It’s a distraction you definitely want to avoid.
Mind The Airbags
Be cautious not to tamper with airbag wiring while installing your stereo. Airbags are critical safety features, and any interference can be dangerous. Ensure you know the location of airbag sensors to avoid accidental triggering. Do you know where these sensors are in your vehicle?
Double-check Connections
Before powering up, double-check all connections. Ensure wires are correctly matched and secured to prevent malfunction. A quick review might reveal potential issues you missed earlier. Wouldn’t it be frustrating to redo everything due to a simple oversight?
Keep A Fire Extinguisher Nearby
It’s wise to have a fire extinguisher on hand as a precaution. Although rare, electrical fires can occur during installation. Being prepared allows for quick action and minimizes potential damage. How often do you think people overlook this safety tip?
Remember, taking these safety precautions seriously not only protects you but also ensures your car stereo functions flawlessly. Prioritize safety, and you’ll enjoy your new sound system without any worries.Removing The Old Stereo
Begin by removing the old stereo carefully to avoid damage. Unscrew the stereo and disconnect wiring connectors gently. Ensure all wires are free before lifting the stereo out.
Removing the old stereo from your car can feel like a daunting task, but with some patience and a few tools, it’s definitely manageable. Before diving into the new installation, you need to carefully remove the old stereo unit. This process involves several key steps, each essential to ensure you don’t damage any components or wiring. Are you ready to get started? Let’s dive in!Disconnecting The Battery
The first and most crucial step is disconnecting the battery. It’s a simple but vital precaution that ensures your safety. Remove the negative cable from the battery terminal, which helps prevent any electrical shorts. Use a wrench to loosen the nut and slide the cable off. By doing this, you protect yourself and the car’s electrical system from accidental shocks or damage.Uninstalling The Dashboard Panel
Next, you need to uninstall the dashboard panel to access the stereo unit. This might require a screwdriver or specialized panel remover tool. Carefully remove any screws or clips securing the panel. Be gentle to avoid cracking or damaging the plastic. Once the panel is loose, set it aside safely. Seeing your dashboard without its panel might be strange, but it’s all part of the process.Detaching Wiring Connections
Now comes the intricate task of detaching the wiring connections from the stereo. This is where your patience pays off. Identify the wiring harness connected to the stereo. You may need to unclip or unscrew these connections, so inspect them carefully. Keep track of each wire, possibly labeling them if needed. This will make connecting the new stereo much easier and prevent confusion. Removing the old stereo is a bit like solving a puzzle. You need to be methodical and attentive. Have you ever found yourself in a situation where slow and steady truly won the race?Preparing The New Stereo
Connecting a car stereo involves matching the wires to their corresponding colors. Ensure the power wire is connected securely. Speakers require precise wire connections for optimal sound quality.
Preparing the New Stereo Setting up a new car stereo can feel like embarking on a thrilling adventure. You’re not just upgrading your car’s audio; you’re enhancing every drive. But before you dive into the sounds of your favorite playlist, it’s essential to ensure everything is wired correctly. Understanding the preparation steps for installing your new stereo will save you time and headaches down the road. It’s like laying a solid foundation before building a house. So, where do you begin? Let’s break it down.Reading The Wiring Diagram
Begin with the wiring diagram that comes with your stereo. This diagram is your road map to success. It shows you how each wire should connect, ensuring you don’t mistakenly attach speaker wires to power cables. Take a moment to study it. Notice where each color-coded wire leads. Is the diagram overwhelming? Try focusing on one section at a time. Sometimes, manufacturers offer additional tips in the manual. These can be invaluable.Identifying The Wiring Harness
The wiring harness is your stereo’s lifeline. It connects all the electrical components to the stereo, making sure they work harmoniously. Look for the bundle of wires with connectors at the end. Match the wiring harness with the wires you’ve studied in the diagram. This step is crucial; a mismatched connection can lead to poor sound quality or even damage your stereo. Have you ever tried to solve a puzzle without knowing where the pieces fit? That’s what it feels like without identifying the harness correctly. Don’t hesitate to use labels or markers on wires if it helps clarify connections. This small step can prevent big mistakes later.Connecting The Wires
Connecting the Wires Learn how to wire a car stereo with simple steps. Secure connections ensure clear sound and reliable operation. Proper installation can enhance your driving experience.
Connecting the wires in your car stereo setup can be exciting. It brings your audio system to life. With the right tools and techniques, you can do it yourself. Let’s dive into the essential steps to connect your car stereo wires.Matching Wire Colors
First, identify the wires by color. Each wire color has a specific function. Connect the power wire, usually red, to the car’s power source. The black wire connects to the ground. Speaker wires often come in pairs with matching colors. Check your stereo manual for guidance. This helps ensure correct connections.Using Connectors Or Soldering
Choose between connectors or soldering for joining wires. Connectors offer a quick, secure way. Crimp connectors tightly for a good connection. For a more permanent bond, solder the wires. Heat the solder and apply it to the twisted wires. This method prevents wires from coming loose. Both methods ensure a stable connection.Securing Wire Connections
Secure the wires to avoid loose connections. Use electrical tape to wrap around joined wires. This insulates and holds them together. Cable ties can organize wires neatly. Ensure wires are not under tension or exposed. This prevents damage from movement or vibration. Properly secured wires last longer and work better.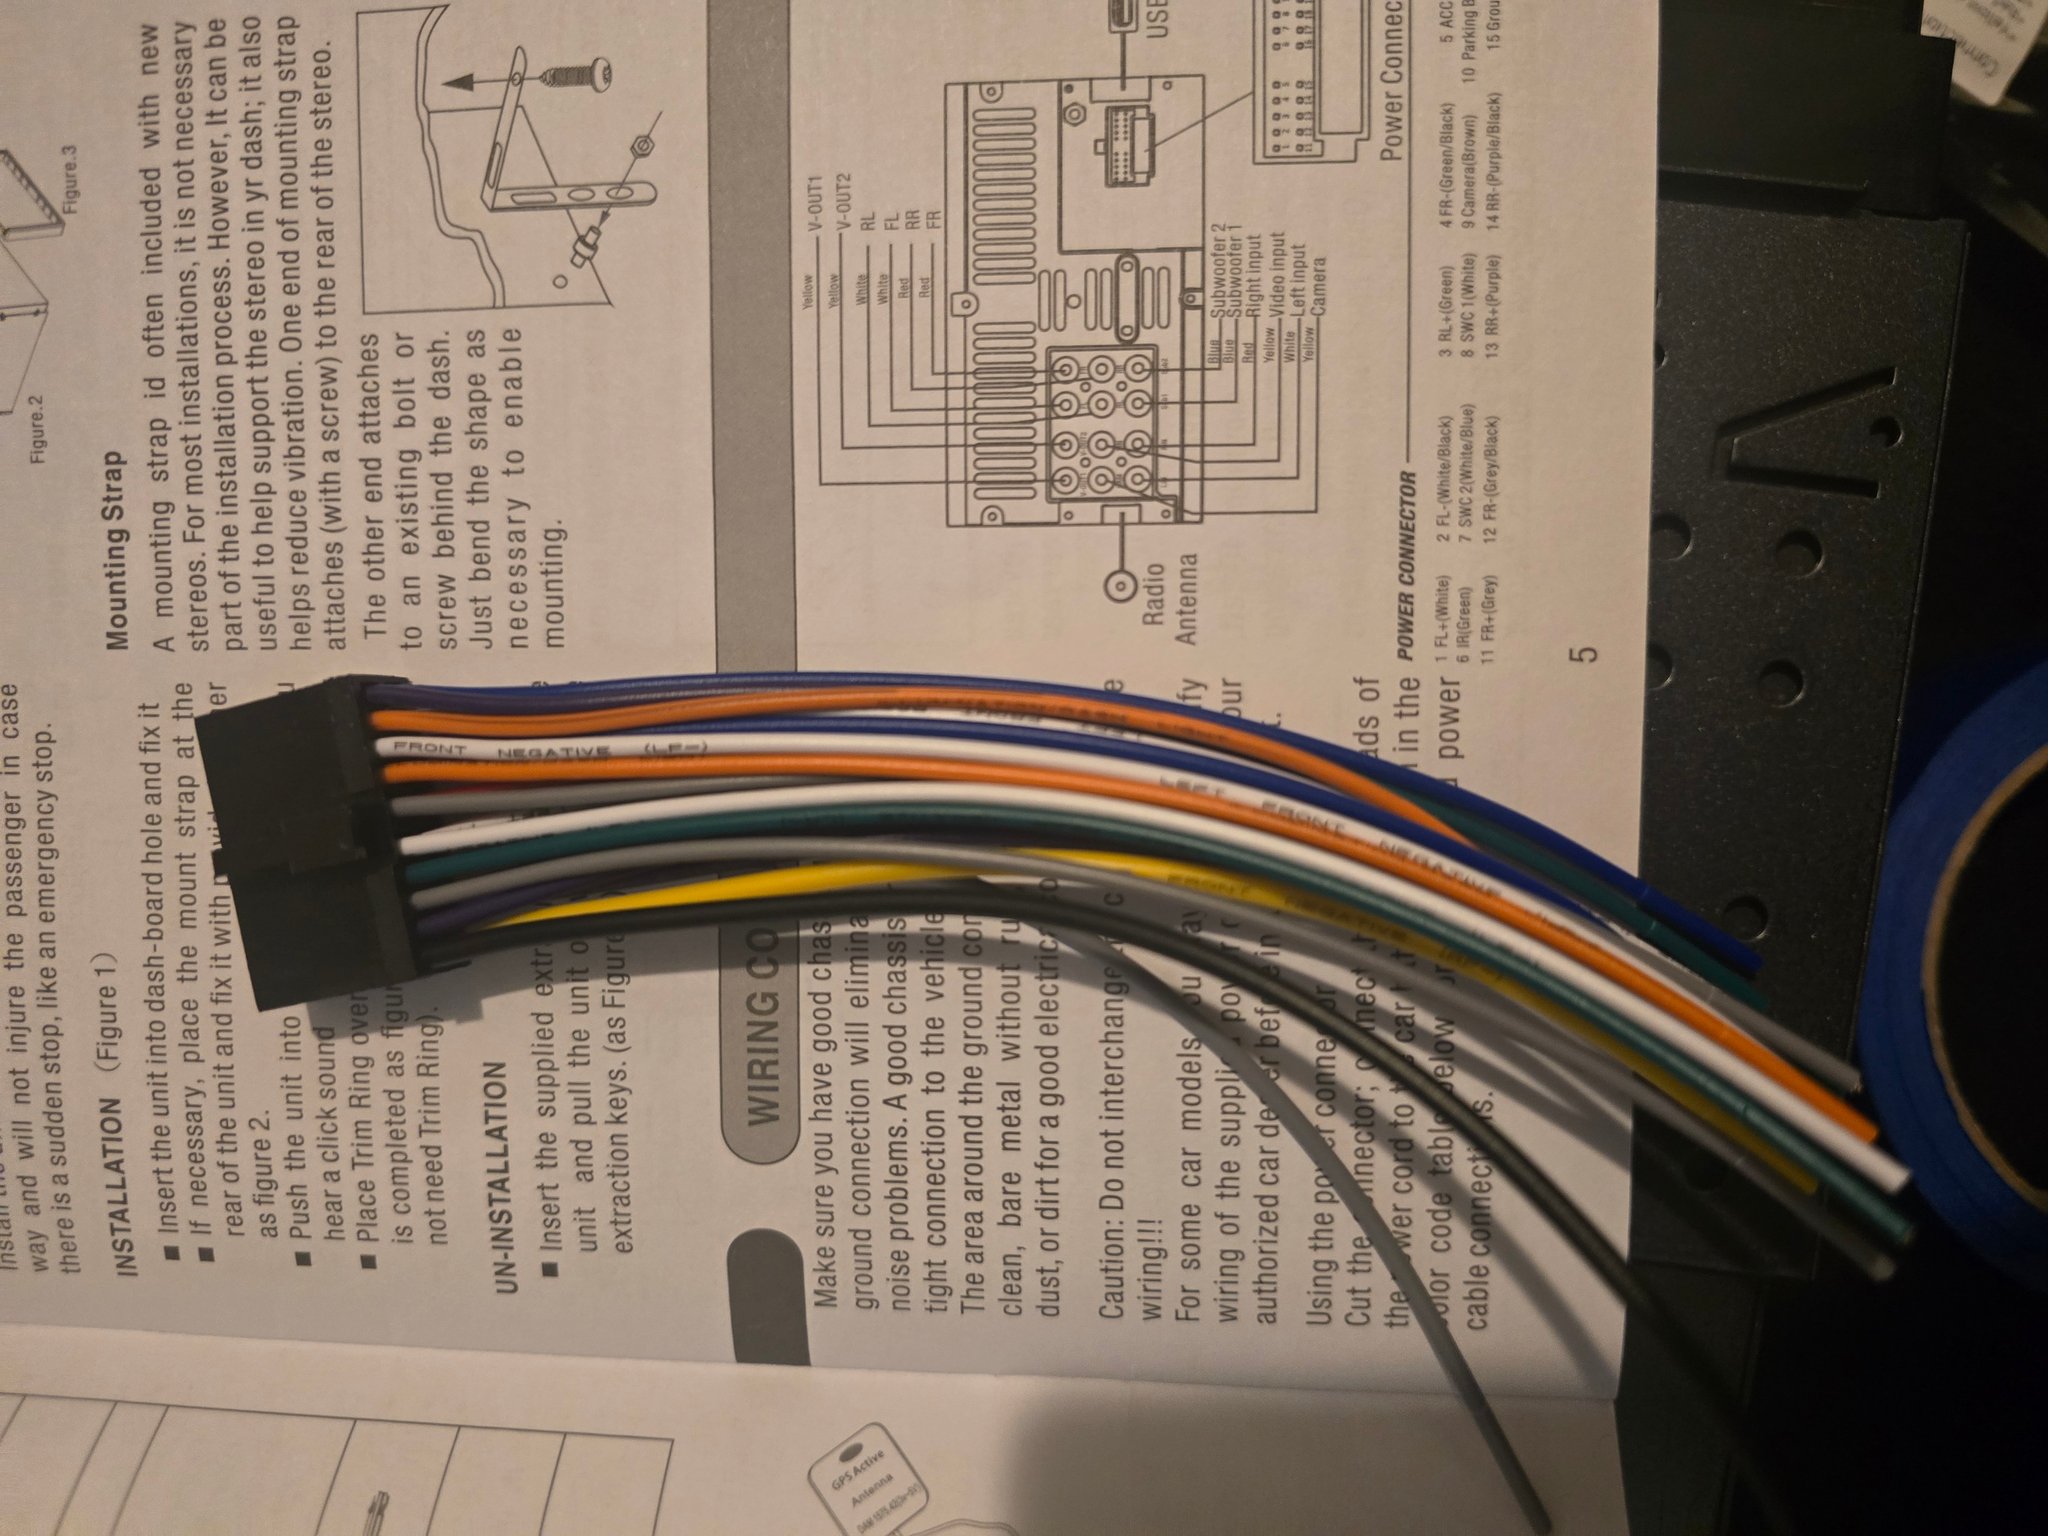
Credit: www.facebook.com
Installing The New Stereo
Installing a new stereo involves connecting wires correctly to ensure good sound. Identify the car’s wiring harness and match it with the stereo’s wires. Secure connections with crimp connectors or soldering for reliable performance.
Installing a new car stereo can enhance your driving experience. It brings better sound quality and more features to your car’s audio system. This process might seem daunting at first. But with the right guidance, it becomes manageable. Let’s dive into the steps for installing your new stereo successfully.Placing The Stereo In The Dash
Start by connecting the stereo wiring harness to the car’s harness. Ensure all connections are secure and matched correctly. Slide the stereo into the dash opening gently. Align it with the mounting brackets. Use the screws provided to secure the stereo in place. Check that the stereo sits firmly and does not move. This ensures a snug fit and prevents any rattling noises.Reattaching The Dashboard Panel
Position the dashboard panel back into its original place. Align it with the clips and holes on the dashboard. Gently press the panel until you hear it click into place. Ensure all edges are flush with the surrounding dashboard. Reattach any screws or fasteners that were removed earlier. Double-check that all parts are secure and nothing is loose. Your new stereo is now installed and ready to use!Testing The Stereo
Learn how to wire a car stereo for a seamless audio experience. Connect the power wires correctly for optimal performance. Ensure speaker wires are secured for clear sound.
Testing the stereo is crucial after wiring your car stereo. It ensures everything works as expected. This step helps you catch any errors in the installation. Proper testing can save you from future headaches. Let’s dive into how to test your newly wired car stereo.Reconnecting The Battery
First, reconnect the car battery. This is vital to power the stereo system. Ensure the battery terminals are secure. A loose connection can cause issues. Double-check the battery is firmly in place. Your car stereo needs stable power to function.Checking Sound Quality
Play a variety of music tracks to assess sound quality. Listen for clarity and volume. Adjust settings if needed. Check each speaker’s output. Make sure there’s no distortion. Good sound quality enhances your driving experience.Verifying All Functions
Test all stereo functions thoroughly. Check the radio reception. Ensure the Bluetooth connects smoothly. Test the USB ports and auxiliary inputs. Verify the touchscreen and controls are responsive. Make sure all features work perfectly. A fully functioning stereo is a joy to use.
Credit: www.youtube.com
Troubleshooting Common Issues
Encountering wiring issues when installing a car stereo? Check loose connections and verify wire colors match correctly. Ensure the power supply is adequate and inspect fuses for any damage or faults.
Troubleshooting common issues with car stereo wiring can save time and frustration. Many face challenges like no sound, static, or power issues. Let’s explore solutions to these problems.No Sound Output
No sound from the speakers can be frustrating. First, check the speaker connections. Loose wires often cause this issue. Ensure all connections are secure. Next, inspect the speaker balance settings. They might be set incorrectly. Adjust them to distribute sound evenly. Also, verify the stereo’s mute function isn’t activated. Sometimes, it’s accidentally turned on. Lastly, test the speakers with another device. This confirms if they are working properly.Static Or Interference
Static can ruin your listening experience. Start by checking the antenna connection. A loose antenna often causes interference. Reattach it firmly to improve reception. Also, inspect nearby electronic devices. They might cause electromagnetic interference. Move them away from the stereo if possible. Additionally, check the grounding wire. A poor ground connection can lead to noise. Secure it tightly for clear sound.Stereo Not Powering On
A stereo that won’t turn on can be puzzling. First, examine the fuse. A blown fuse will prevent power. Replace it with a new one of the same rating. Next, check the wiring harness connections. They must be secure and properly aligned. Also, test the car battery voltage. A low battery might not provide enough power. If the battery is fine, inspect the ignition switch. Sometimes, the switch doesn’t send power to the stereo. Make sure it functions correctly.Maintenance Tips
Once you’ve successfully wired your car stereo, maintaining it is crucial to ensure long-lasting performance and sound quality. Proper maintenance can prevent common issues and ensure your music experience remains uninterrupted. Let’s dive into some practical tips to keep your car stereo in top shape.
Regular Cleaning
Dust and dirt can accumulate on your stereo, affecting its functionality and appearance. Make it a habit to clean the controls and display using a soft, damp cloth. Avoid using harsh chemicals that might damage the surface. If you drive frequently, consider cleaning your stereo at least once a month. A clean stereo not only looks good but also performs better.
Updating Software
Many modern car stereos come with software that may need periodic updates to fix bugs and enhance features. Check the manufacturer’s website or your stereo’s manual for any available updates. Keeping the software up-to-date ensures compatibility with new devices and improves overall functionality. Ask yourself, when was the last time you updated your stereo’s software?
Checking Connections Periodically
Loose connections can lead to poor sound quality or even complete loss of audio. Every few months, take the time to check the wiring behind the stereo. Ensure that all connections are secure and intact. If you notice any frayed wires, it’s time for a replacement. Regular checks can save you from unexpected audio failures during your drive.

Credit: www.amazon.ca
Frequently Asked Questions
What Tools Are Needed To Wire A Car Stereo?
To wire a car stereo, you’ll need a few essential tools. Gather a wire stripper, crimping tool, electrical tape, and screwdrivers. These tools help ensure a secure and efficient installation. Having the right tools makes the process smoother and reduces the risk of damaging components.
How Do You Identify Car Stereo Wires?
Identifying car stereo wires involves checking the color-coding system. Typically, colors represent specific functions like power, ground, and speakers. Refer to your car’s manual for exact details. You can also use a multimeter to verify wire functions, ensuring accurate connections.
Can You Install A Car Stereo Yourself?
Yes, you can install a car stereo yourself with some basic knowledge. Follow the instructions provided by the stereo manufacturer. Make sure to disconnect the car battery before starting. Take your time and double-check connections. This approach ensures a safe and successful installation.
What Precautions Should You Take When Wiring?
When wiring a car stereo, safety is crucial. Always disconnect the car battery before starting. Avoid using damaged wires and connectors. Use electrical tape to insulate exposed wires. Double-check all connections to prevent short circuits. These precautions help protect both you and your vehicle.
Conclusion
Wiring a car stereo can be simple with careful steps. Follow each instruction closely to avoid mistakes. Begin with gathering the right tools. Make sure wires connect properly. Use a manual for your specific car model. Double-check connections to ensure safety.
Always test the stereo before finalizing installation. Clear sound means success. If needed, seek help from a professional. Enjoy your new car audio experience. Happy listening and safe driving!