
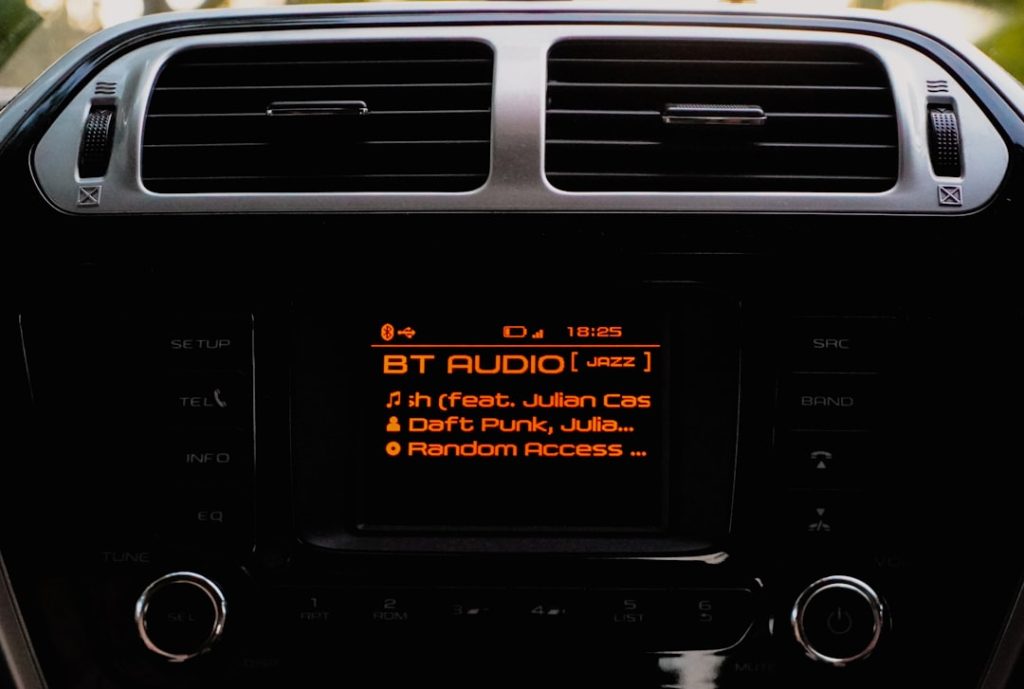
Are you tired of your old car stereo that seems to have a mind of its own? Imagine cruising down the road with your favorite tunes playing flawlessly, enhancing every drive.
Changing out a double-din car stereo might seem daunting, but it’s easier than you think. You don’t need to be a tech wizard to transform your car’s audio experience. With the right guidance, you can upgrade your stereo and enjoy clearer sound, better functionality, and a modern look.
Dive into this guide where you’ll find simple steps to make this change without breaking a sweat. Whether you’re a seasoned DIYer or just getting started, this article is crafted to empower you with the confidence and knowledge you need. Ready to elevate your driving experience? Let’s get started!
Tools And Materials Needed
Changing out a double-din car stereo requires specific tools and materials. Having the right items ensures a smooth installation process. Preparing these tools in advance saves time and prevents frustration. Here’s a comprehensive list of what you’ll need.
Tools Required
- Screwdriver set: Phillips and flathead types are essential.
- Pry tool: Helps to remove dashboard panels without damage.
- Wire stripper: Necessary for connecting wires safely.
- Soldering iron: For secure and reliable wire connections.
- Multimeter: Checks electrical connections and prevents errors.
- Socket wrench: Removes bolts holding the stereo in place.
Materials Needed
- Wiring harness: Matches your vehicle’s wiring to the new stereo.
- Dash kit: Ensures the stereo fits snugly in the dashboard.
- Electrical tape: Secures wire connections and prevents short circuits.
- Connectors: Joins wires without soldering for a simpler installation.
- Antenna adapter: Connects the car’s antenna to the new stereo.
Having these tools and materials ready makes the installation easier. You’ll achieve a professional finish without unnecessary hassles.
Safety Precautions
Ensure the car is off and the keys are removed before starting. Disconnect the car battery to prevent electric shock. Use the right tools to avoid damage to the dashboard.
Changing out a double-DIN car stereo can be an exciting project, offering you the chance to upgrade your car’s audio system. However, before diving in, it’s crucial to prioritize safety. Ensuring a safe environment will not only protect you but also prevent damage to your car’s electrical system. Let’s explore some key safety precautions to keep in mind.Disconnect The Battery
Always disconnect the negative terminal of your car battery before starting. This prevents accidental electrical shorts and protects both you and your car’s electronics. Remember, safety comes first, and this simple step can save you from potential hazards.Use The Right Tools
Having the right tools is essential for a smooth installation. Use a trim removal tool to avoid scratching the dashboard. A screwdriver set with various heads can help you tackle different screws with ease. Investing in quality tools can make your task easier and safer.Check The Wiring
Double-check the wiring diagrams for your car and new stereo. Mismatched wires can lead to electrical issues or even damage your new stereo. Use wire connectors and electrical tape to ensure secure connections. If you’re unsure, consult a professional or a detailed guide specific to your car model.Work In A Well-lit Area
Ensure you have adequate lighting to see what you’re doing. A well-lit workspace reduces the risk of mistakes. If you’re working in a garage, consider using a portable work light or headlamp for better visibility.Be Mindful Of Airbags
Avoid tampering with any components related to airbags. Accidental deployment can be dangerous and costly. If the stereo is near an airbag, proceed with extra caution and make sure to consult your car’s manual. Taking these precautions can make your stereo upgrade a safe and rewarding experience. What’s the most important safety tip you’ve learned while working on your car? Share your insights in the comments below!Preparing Your Vehicle
Before you dive into the exciting world of upgrading your car’s stereo system, it’s crucial to prepare your vehicle properly. This step sets the foundation for a smooth and successful installation, ensuring your new stereo fits perfectly and functions flawlessly. Let’s look at the essential steps that will get your car ready for this transformation.
Disconnecting The Battery
Safety first! Disconnecting the battery is a crucial step that prevents electrical shorts and protects your car’s electronic components. Begin by locating your car’s battery, usually found under the hood. Use a wrench to loosen the nut on the negative terminal, then carefully remove the cable.
Why is this important? It safeguards you from potential electric shocks and ensures that no power is flowing through your vehicle while you work. Imagine the peace of mind knowing you’re working in a safe environment. Remember, you only need to disconnect the negative cable. This simple act can save you from unexpected surprises.
Removing Trim Panels
With the battery disconnected, it’s time to tackle the trim panels. These panels often hide screws and bolts that secure your stereo. Use a trim panel removal tool or a flathead screwdriver to gently pry off the panels. Take your time and be careful, as the plastic can be fragile.
Pay attention to how these panels are attached. Some may have clips that need to be carefully detached. Keep a mental note or take pictures for reference when reassembling later. Don’t rush this step, as damaging the trim could lead to unnecessary expenses or the need for replacements.
Have you ever wondered why patience is emphasized in DIY projects? It’s because the slightest oversight can lead to bigger challenges down the line. By handling your vehicle’s trim panels with care, you’re setting yourself up for a hassle-free installation.
Removing The Old Stereo
Changing out a double-din car stereo involves careful removal of the old unit. Begin by disconnecting the car’s battery. Then, carefully unscrew and detach the old stereo, ensuring no wires are damaged in the process.
Removing your old double-din car stereo can seem daunting. With a few simple steps, it becomes manageable. This section will guide you through the process smoothly. First, gather your tools and ensure the car is off for safety. Then, follow the steps below to safely remove the stereo unit.Unscrewing The Stereo Unit
Begin by removing any trim or panels around the stereo. These might be held by clips or screws. Use a panel removal tool to gently pry them off. Locate the screws holding the stereo in place. Use a screwdriver to unscrew them carefully. Keep these screws safe for later use.Disconnecting Wiring And Antenna
Once unscrewed, gently pull the stereo forward. You will see the wiring harness and antenna cable behind it. Carefully disconnect these by pressing the release clips. Do not yank the wires as they are delicate. Ensure all connections are free before removing the stereo completely.Installing The New Stereo
Changing out a double-din car stereo requires disconnecting the battery for safety. Carefully remove the old stereo, ensuring all wires are detached. Install the new stereo, connecting wires as per the manual instructions for a seamless upgrade.
Installing the New Stereo Once you’ve removed the old stereo, it’s time to bring your car’s audio system into the modern age. Installing a new double-DIN stereo can transform your driving experience, offering better sound quality and advanced features like Bluetooth connectivity and navigation. But how do you get started with the installation?Connecting Wiring Harness
Begin by connecting the wiring harness to your car’s existing wiring. This step is crucial for ensuring all components function properly. Use a wiring harness adapter for a seamless connection, avoiding the need to cut factory wires. Match each wire from the stereo to the corresponding wire on the adapter. Colors are typically standardized, but always double-check with the manual. Secure each connection with a crimp or solder for durability.Mounting The New Unit
With wiring out of the way, focus on mounting the stereo unit. Slide the new stereo into the dash, aligning it with the mounting brackets. A proper fit is essential to avoid any rattling noises while driving. Use the screws provided with your stereo to secure it in place. Ensure the unit is stable and flush with the dash for a sleek, professional look. Isn’t it satisfying to see your new stereo perfectly installed? Not only does it enhance your car’s aesthetics, but it also elevates your driving pleasure.Testing The New Stereo
Changing out a double-DIN car stereo involves removing the old unit and installing the new one. Carefully disconnect wires, ensuring all connections are secure before finalizing the setup. Enjoy enhanced sound quality with your new stereo.
Testing the New Stereo Now that you’ve installed your new double-DIN car stereo, it’s time to test its functionality. This is the moment where all your hard work pays off. Ensure everything is set up correctly and enjoy the enhanced sound quality and features.Reconnecting The Battery
Before you start testing, you need to reconnect the car battery. This is a crucial step that powers up your new stereo. Ensure the connections are tight and secure to avoid any power interruptions. Once the battery is connected, turn on your ignition. Check if the stereo powers up. If it doesn’t, double-check the wiring connections.Checking Sound And Features
With the stereo powered on, test the sound quality. Play a variety of music genres to ensure the speakers handle different sounds well. Adjust the equalizer settings to your preference and check for any distortion. Next, explore the features of your new stereo. Test the Bluetooth connectivity by pairing it with your smartphone. Try making a call or streaming music to confirm the connection is stable. Finally, navigate through the stereo’s interface. Check if all buttons and touch screen functions are responsive. Are there any new features that surprised you? Enjoy discovering them!Reassembling The Dashboard
Reassembling the dashboard is the final step in changing a double-din car stereo. Carefully align and secure the panels, ensuring all screws are tightened properly.
Reassembling the dashboard after installing a double-DIN car stereo is crucial. This step ensures everything looks neat and functions well. Careful attention during this phase can prevent rattles or misalignments.Securing Trim Panels
Begin by aligning the trim panels with their respective slots. Press them gently into place. Ensure each clip snaps securely. Avoid forcing any panel into place. It might damage the clips or the panel itself. Take your time to check for any gaps or misalignments. Use a gentle hand to make adjustments. This ensures a seamless fit.Ensuring All Components Fit
Verify that all components are seated correctly. This includes buttons, dials, and vents. Check that none are obstructed or pressed against the trim. Test each component for functionality. Make sure buttons press smoothly and dials turn without resistance. Adjust as necessary to ensure everything operates as intended. By following these steps, your dashboard will look and function perfectly.Troubleshooting Common Issues
Changing a double-din car stereo can be tricky. First, disconnect the car battery to avoid electrical issues. Carefully remove the old stereo, noting wire connections, and fit the new one securely. Ensure all connections are tight before testing.
Changing out a double-DIN car stereo can be a rewarding task. But, sometimes, issues arise even after a successful installation. Understanding these problems can help you fix them quickly. Here, we explore common issues and how to troubleshoot them.No Sound Output
After installation, the stereo may not produce sound. Start by checking the wiring connections. Loose wires often cause sound issues. Ensure all speaker wires are connected correctly. Also, check if the mute function is turned on. This simple mistake can lead to silence. If the problem persists, inspect the speaker settings. Some stereos have a separate setting for internal and external amplifiers. Choose the correct setting for your system. Lastly, test the balance and fader controls. They might be set to one side, causing sound to be inaudible.Display Malfunctions
A malfunctioning display can be frustrating. First, check the power supply. A weak connection can lead to display issues. Ensure the stereo is firmly connected to the power source. Next, consider adjusting the brightness settings. Sometimes, the display is dimmed too low, making it hard to see. If the screen remains unresponsive, a reset might help. Refer to the manual for reset instructions specific to your model. If problems continue, inspect the display cable connections. A loose or damaged cable can affect the screen’s performance.Maintenance Tips
Changing a double-dinn car stereo involves disconnecting the battery and removing the old unit. Next, install the new stereo by connecting wires properly. Ensure all connections are secure before testing the new stereo functionality.
Changing a double-din car stereo can be rewarding. Ensuring it lasts requires regular maintenance. Proper care enhances sound quality and extends the stereo’s life. Simple steps can keep it in top shape. Below, you’ll find essential tips for maintaining your car stereo.Keeping Your Stereo Clean
Dust and dirt can affect your stereo’s performance. Regular cleaning prevents this. Use a soft, dry cloth for the screen and buttons. Avoid harsh chemicals that might damage surfaces. A gentle cleaner can help with stubborn grime. Be sure to clean the vents to prevent overheating. A clean stereo ensures better audio quality.Regular Software Updates
Software updates can improve your stereo’s functionality. Manufacturers release updates to fix bugs and add features. Check for updates through the stereo’s menu. Connect to Wi-Fi to download updates easily. Keeping software current helps avoid glitches. An updated stereo provides a better user experience.Frequently Asked Questions
Are All Double Dins Interchangeable?
Not all double dins are interchangeable. Compatibility depends on your vehicle’s dashboard size and wiring connections. Check dimensions and connections before purchasing. Always verify with your car’s manual or consult a professional for installation guidance.
Can I Replace My Car Stereo Myself?
Yes, you can replace your car stereo yourself. Ensure you have the necessary tools and follow instructions carefully. Check compatibility with your vehicle to avoid issues. Consider watching tutorial videos for guidance and safety. If unsure, consult a professional to prevent damage and ensure proper installation.
Can I Put Any Double Din Radio In My Car?
Installing a double DIN radio depends on your car’s dashboard space and compatibility. Check dimensions and compatibility with your vehicle’s model. Adapter kits might be needed for proper fit. Ensure wiring matches your car’s setup for smooth installation and functionality.
Always consult a professional if unsure about compatibility and installation.
How To Remove Kenwood Double Din Stereo?
To remove a Kenwood double DIN stereo, disconnect the battery, remove the trim panel, unscrew mounting brackets, and gently pull out the stereo. Disconnect all wiring harnesses and antenna cables.
Conclusion
Changing your double-din car stereo can be simple and rewarding. Follow each step carefully. Gather your tools and remove the old unit. Install the new stereo with precision. Double-check connections for safety. Test your new stereo for sound quality. Enjoy your favorite music with improved audio.
Remember to keep your workspace clean. Ensure all wires are secure. This DIY task saves money and boosts your car’s entertainment. With patience, you can enhance your driving experience. Your car can sound better than ever. Happy driving and enjoy your tunes!